
Making it FUN and EASY to use
SPEECH with your COMPUTER!
CoolSoft, LLC
CoolInfo™
Voice Recognition
Version 1.10 User Manual
INTRODUCTION
CoolInfo™ Voice Recognition Version 1.10 is a sponsored program that can retrieve and read information from the Internet using speech commands. CoolInfo™ can also use speech recognition to perform tasks like use the calculator, create your own speech commands to browse webpages, play music, start programs, open files, make your computer talk back to you and much more.
How Does CoolInfo Work?
Just speak the command for the desired information and, depending on the type of information you are requesting and sponsor requirements, the information is either displayed in CoolInfo™ or in your computer’s default web browser.
CoolInfo™ displays banners and advertisements, and speaks messages for our sponsors, who make it possible for us to provide CoolInfo™ and speech recognition free of charge. Please keep this in mind and visit our sponsors regularly.
CoolInfo Respects Your Privacy
CoolInfo™ is not adware or spyware. CoolInfo™ runs only when you choose to start it, and does not gather or send any personal information from your computer. All sponsor information, including banners and messages, are distributed exclusively within CoolInfo™. When you close CoolInfo™, it stays closed until you start it again.
Getting CoolInfo
One of our goals at CoolSoft, LLC is to make speech recognition available to a wide community of users. You can download CoolInfo™ for free and use it for thirty days. After thirty days, you must register CoolInfo™ and registration is FREE! Just visit our CoolInfo registration page at http://www.CoolSoftLLC.com/CoolInfo/Register. CoolInfo™ is packaged with the Microsoft SAPI 5.1 speech recognition engine.
CoolInfo Commands and Sponsored Information Categories
The initial release of CoolInfo™ includes links to news, weather, joke of the day, daily horoscopes and other websites of interest. Also included are search commands for Google, Yahoo, MSN and eBay searches by speech. A few CoolInfo speak commands make your computer talk back to you and demonstrate some of what you can do by creating your own speech commands with the User Commands feature. To see the most recent list of CoolInfo speech commands, visit http://www.CoolSoftLLC.com/CoolInfo/CoolInfoCommands.htm
Updates
CoolInfo™ updates the command list each time it runs so you can stay current as we add new commands and information categories.
Like other CoolSoft products, CoolInfo™ has an update feature in the “About” dialog which allows you to easily install updates for CoolInfo™ as they become available.
Internet Connection
CoolInfo needs a high-speed Internet connection (DSL/ADSL, Cable or Wireless Broadband). In order to retrieve the latest commands and sponsored information with CoolInfo™, your computer must be connected to the Internet. However, you can still use the calculator and User Commands by speech even if you are not connected to the Internet.
© Copyright 2006-2007 CoolSoft, LLC. All rights reserved.
CoolInfo, SpeakToText, Speak-to-Mail and CoolSoft are trademarks of CoolSoft, LLC
TABLE OF CONTENTS
Configuring the Microphone and Training the Speech Engine
Did You Already Have SAPI Speech Recognition Installed?
Setting Up and Training the Microsoft SAPI 5.1 Speech Recognition Engine
Setup your Recognition Profile
Setting Up and Configuring Your Microphone.
Training the Microsoft SAPI Speech Recognition Engine
Other Settings under the Speech Recognition Tab
Training and Speech Recognition Engine Accuracy
Tips for Achieving the Best Possible Speech Recognition
Technical Support on the Microsoft SAPI Speech Recognition Engine
Internet Connection and Internet Security Software
CoolInfo and Internet Security Software
Using CoolInfo to Get and Read Information
Other CoolInfo Features and Commands
Scroll Up and Scroll Down Speech Commands
CoolInfo Prompt Dialogs and Speech
How to Setup and Train Speech Recognition Video
Solutions for Poor Recognition Accuracy
Today My Voice is not as Clear
CoolSoft, LLC Technical Support Policy for CoolInfo
Examples for Creating User Commands in CoolInfo
Release Notes for CoolInfo™ Voice Recognition, Version 1.10
Known Issues for CoolInfo™ Voice Recognition, Version 1.10
GETTING STARTED
System Requirements
System requirements for CoolInfo are:
|
Operating System: |
Windows 2000 or Windows XP (Home or Professional) with all the latest updates. This version of CoolInfo is not compatible with or supported in Windows Vista. |
|
Memory: |
At least 265 MB RAM, 500 MB or better preferred. |
|
System Processor: |
A PC with a 500mhz or greater Pentium III, Pentium IV or Pentium compatible processor. |
|
Disk Space: |
100 MB free disk space. |
|
Software: |
Microsoft SAPI 5.1 Speech Recognition Engine* |
|
Hardware: |
A good quality, noise-cancelling microphone. A good quality, SoundBlaster compatible sound card. |
|
Internet: |
A high-speed Internet connection (DSL/ADSL, Cable or Wireless Broadband). CoolInfo may function, but is not supported with dialup connections. To retrieve information, you must be connected to the Internet. You can use the Custom Commands feature without an Internet connection. |
|
User: |
About 15 to 30 minutes of your time to install CoolInfo, the Microsoft SAPI 5.1 speech recognition engine* and to train your recognition profile to recognize your voice. |
*Now comes with CoolInfo™ or the trial version of SpeakToText™, and the full versions of SpeakToText™ and Speak-to-Mail™.
Installing CoolInfo
After downloading your copy of CoolInfo™, double click on the installation file and follow the instructions. The installation is completed in two stages. First, CoolInfo™ is installed and second, the Microsoft SAPI 5.1 speech recognition engine is installed. The installation of the speech recognition engine my take a while, so please be patient
Configuring the Microphone and Training the Speech Engine
After installing CoolInfo™, there are a few things you need to do.
If this is your first time using SAPI speech recognition, it’s important that you create a personal speech recognition profile, configure your microphone and train the speech recognition engine to recognize your voice. We cannot over emphasize the importance of these steps – they are essential for achieving the best possible speech recognition accuracy.
To configure your microphone and train the speech engine, start CoolInfo™ and say “Speech Properties” or click on the speech properties button (shown below).
![]()
Speech Properties Button
Note: The “speech properties” speech command may not work until you have trained your speech recognition profile.
Important: After you have trained your speech recognition profile, CoolInfo must be closed and restarted again in order for the changes to take effect.
For best results, you should configure your microphone each time you start CoolInfo.
For complete instructions on how to do this, watch the “How to Setup and Train Speech Recognition” video available in the Help menu of CoolInfo, or read the section below on “Setting-Up and Training the Microsoft SAPI 5.1 Speech Recognition Engine.”
Did You Already Have SAPI Speech Recognition Installed?
If, before installing CoolInfo™, you installed Office XP or Office 2003 and selected the alternative user input at the time of installation, speech recognition will already have been installed on your computer. CoolInfo™ installs the “Microsoft English Recognizer v5.1” while Office XP installs v5.0 and Office 2003 installs V6.1.
Although CoolInfo will work with any version of the “Microsoft English Recognizer” you should use the latest version that is on your computer. If you previously installed Office XP and have the Microsoft English Recognizer v5.0, then use v5.1, which installs with CoolInfo™. If you previously installed Office 2003 and have the Microsoft English Recognizer V6.1, then use this version. If speech recognition was not previously installed on your computer, then use the Microsoft English Recognizer v5.1 which comes with CoolInfo™.
Note: You can choose which Speech Recognition version to use when you train your speech recognition profile
–Selecting the version of the Microsoft speech recognition engine:
Setting Up and Training the Microsoft SAPI 5.1 Speech Recognition Engine
Before You Start
Before you setup and train the speech engine, we recommend watching the “How to Setup and Train Speech Recognition” video, which can be accessed from the CoolInfo™ Help menu, or from the CoolInfo™ start program group in the start menu of Windows.
CoolInfo Help Menu
![]()
CoolInfo Start Programs Group
Setting-up and training the speech engine is done from the Speech Properties dialog. There are two ways to access this dialog:
From CoolInfo
Start CoolInfo™. Say “speech properties” or click on the Speech Properties button (shown below).
![]()
CoolInfo Speech Properties Button
From the Control Panel
Start “Speech Properties”
Go to the Windows Control Panel
(StartàSettingsàControl Panel). Find and double click
the “Speech” icon. To edit these settings after CoolInfo is installed, within
CoolInfo, click on the Speech Properties button, or say “train speech profile”
or “configure microphone.” You can also say “click speech properties.”
The “Speech Properties” dialog appears:
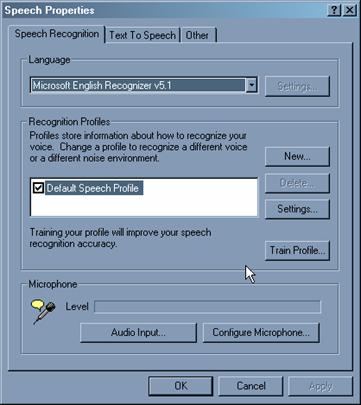
Setup your Recognition Profile
We recommend not using the “Default Speech Profile,” but rather creating a new speech recognition profile with a unique name – especially if there will be others using speech with your computer. To create a new profile, click on “New…” and follow the prompts.
After creating your new profile, click “Next” to configure your microphone and train your profile (do not click “Finish”). The next two sections are extremely important in achieving good speech recognition and the highest possible level of accuracy.
Setting Up and Configuring Your Microphone
Microphone Quality
In selecting the correct microphone headset, consider: 1) Sound in the environment (a noise canceling microphone is required) and 2) Fit and style (Will you be comfortable?). Cost is usually not a factor. A less expensive microphone may fit your needs better than a more costly one. There are many suppliers of high quality speech recognition microphones. Please check our website, where you can purchase a variety of recommended headset microphones.

Configure the Microphone
To achieve the best speech recognition accuracy, we recommend configuring your microphone each time you start a speech recognition session. This can be done easily from CoolInfo™ by saying “Configure Microphone,” which opens the Speech Properties dialog.
Select Audio Input
The “Audio Input” should be set to your system’s default audio device. If your system has more than one sound card, you can use this button to select a new audio input device. If you are not sure which is the correct device, please see the user manual for your computer or contact technical support for the manufacturer of your computer.
Training the Microsoft SAPI Speech Recognition Engine
Access the Speech Properties dialog from CoolInfo™ by clicking on
the Speech Properties button ![]() or saying “train speech profile.”
or saying “train speech profile.”
The installation of CoolInfo now includes a short and informative video on setting up and training a speech recognition profile for the Microsoft SAPI speech recognition engine. This video can be accessed from the CoolInfo Help Menu or from the Windows Program menu by clicking Start buttonàProgramsàCoolInfoàPlay video “How to Setup and Train SAPI Speech Recognition” as shown below.
![]()
Training Overview
Although the Microsoft Speech Recognition Engine is much better than previous speech engines, it still needs a sample of each user’s speech to correctly convert sound into written words. Each speaker and each computer audio system has unique characteristics, which must be sampled and used to adjust the engine. This process is called “training.”
Each user must setup and train their individual speech recognition profile. The initial setup and training of your speech recognition profile typically takes less than 15 minutes. During this process, speak in a normal and even tone of voice and insure that the microphone is properly configured and positioned about one inch from your mouth.
Start Training
To start training, click on the “Train Profile” button from the Speech Recognition tab and follow the instructions. When you first establish your profile, the training session reading excerpt is chosen for you. If this is not the first time you have trained this profile, you will be given a choice of literature to read aloud to your computer for training.
Select a title and click on “Next>.” Read the selection and follow the instructions to complete your training session.
Note: If it has been some time since the initial training of your profile, we recommend using the “Introduction to Microsoft Speech Recognition” session to re-familiarize yourself with how training works.
If you want to take a break, click on the “Pause” button. Training will be paused and the “Pause” button will change to “Resume.” When you are ready to start reading again, click the “Resume” button.
As you complete each reading excerpt, you will have the option to select “Finish” or “More Training.”
IMPORTANT: Speech recognition accuracy will improve with each additional training of the Speech Recognition Engine. In testing, we found substantial improvement in accuracy between the second and third training. After five sessions, the recognition accuracy is even greater. We suggest reading all of the available training selections to your computer in order to realize optimum speech recognition accuracy.
Other Settings under the Speech Recognition Tab
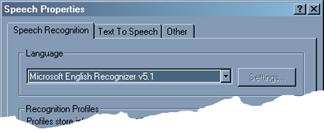
Language
The language must be set to “Microsoft English Recognizer (v5.0, v5.1 or v6.1)” in order for CoolInfo™ to work properly. Do not change the speech recognition engine, except to select a more recent version of “Microsoft English Recognizer” if the default is an older version. If you choose a speech recognition engine other than one of the three SAPI versions referenced above, CoolInfo™ will not work properly.
Recognition Profiles
New
Click on the “New” button to create a new recognition profile.
Delete
Click on the “Delete” button to delete the profile that is highlighted.
Selecting a Profile
Put a check mark next to the profile you want to use. If more than one user will be using CoolInfo on your computer, each user should go to Speech Properties and check to make certain his or her profile is selected before using the program.
Settings
We do not recommend that you change the “Settings…” for your profile. In most cases, the default settings will yield the best speech recognition.
If, after several “trainings” and insuring your microphone is configured properly, you still have difficulty with the accuracy of your speech recognition, you may want to try adjusting the “Accuracy vs. Recognition Response Time” or the “Pronunciation Sensitivity.” These settings can improve accuracy in some cases.
Leave the “Background Adaptation” enabled (checked), as this allows you to continuously train the speech engine. The background adaptation feature will help to improve speech recognition accuracy with each use. For more information, see the section on Background Adaptation, below.
If you have more questions about these settings we suggest you contact Microsoft technical support.
Help
Microsoft provides complete details about speech recognition in their Help library. To learn more about the using the Microsoft speech recognition engine, from to the Speech Properties dialog box, choose the “Other” tab and select “Help.” Additional help may also be found at the Microsoft website: http://www.microsoft.com/speech
The speech engine can “learn” from corrections you make to your dictation, but only if your corrections are done within CoolInfo™. These corrections must also be done by selecting “alternates word” or “series of words” from the right click menu. Corrections typed into CoolInfo™, or made in a target application while in Advanced Mode, will not provide training to your speech recognition profile. To make corrections from the right click menu, right click on a word, or highlight a short series of words and right click, to display alternates for that word or series of words. Selecting one of the alternates (if there is one) will replace the word or words in CoolInfo™, and will have the effect of training your speech recognition profile. Note that not all words have alternates. Alternates are displayed only when the speech recognition engine detected more than one possible word or phrase with a high enough score to be probable. Also note that “Background Adaptation” must be enabled for your speech recognition profile to learn from corrections made in the right click menu. To enable Background Adaptation, go to Speech Properties, select your recognition profile, click the settings button and make sure the “Background Adaptation” box is checked.
Training and Speech Recognition Engine Accuracy
The accuracy of SAPI speech recognition will improve each time you train the speech recognition engine. Time invested in training is well worth the return in improved accuracy. When training the speech engine or using CoolInfo™, it is important that you are in a quiet environment with minimal background noise, and that you always speak clearly into the microphone in order to achieve the most accurate possible recognition.
Training Words
If the speech recognition engine consistently fails to recognize your pronunciation of certain words, you can train the Microsoft Speech Recognition Engine to recognize how you say that particular word by using the “Train Word” feature. To open the Train Word dialog, use the “click train word” voice command or click on <Tools> <Train Word> in the CoolInfo™ menu.
Type the correct spelling of the word you want to train, then click the “Record pronunciation” button and pronounce the word. After the computer recognizes your pronunciation of the word, it will be added to a custom dictionary for your recognition profile. This will change the speech engine’s recognition of that word when you say it.
To see the power of training words, open the Train Word dialog and type in the following: <CoolInfo(tm)>. Then say “speak to text” when you click the “Record pronunciation” button.
Close the Train Word dialog and then speak the words “speak to text” again and see what happens.
Tip: The Train Word feature can be used with names that are not common, or with names that are misrecognized as other names by the speech engine. An example is differentiating the names Tania and Tonya. If the speech recognition engine recognizes Tonya when you want Tania, try training the spelling you want (or the spelling you don’t want) with different pronunciations to distinguish them. Finding a pronunciation that works can be a matter of trial and error, and to succeed you might have to use a pronunciation that varies from how you pronounce the name normally. In our testing during development, the name “Tania” was a challenge. We had to record the pronunciation with an alias as “my Tania” in order to succeed at getting the speech recognition engine to recognize “Tania.” The Train Word feature can also be used with names that you want to abbreviate. For example, the name Wilfred might be abbreviated as “Wil” and if you say “wil” the speech recognition engine is likely to recognize “will.” But you can train the speech engine to write “Wil” when you say “Wilfred” or “Willy.”
Note: The Train Word dialog is part of the speech recognition engine and is not speech enabled (except for recording a pronunciation). You must use the mouse and keyboard while you are in this dialog. Speech recognition resumes when you close the Train Word dialog and return to CoolInfo™.
Tips for Achieving the Best Possible Speech Recognition
While speech recognition technology has advanced dramatically over the past few years, the technology is still far from perfect. Even the best and most expensive speech recognition systems rarely achieve accuracy greater than 98%. Following these tips will help you get the most out of this or any speech recognition program.
Although the Microsoft speech engine performs well, it is not reasonable to expect 100% accuracy. This is not a flaw in CoolInfo™ or the SAPI 5.1 speech engine, but rather is a shortcoming of speech recognition technology in general. We believe that the Microsoft SAPI 5.1 speech engine delivers comparable performance to other commercially available speech recognition engines, and if used correctly and with good equipment, it will deliver excellent performance.
Here are some tips on getting the best possible speech recognition:
Microphone – Use a high quality, noise-canceling microphone. Also, make sure your microphone is setup properly in “Speech Properties.”
Training - Train the speech engine to recognize your voice at least several times. More training greatly improves speech recognition.
Training Words – If you consistently get incorrect recognition of certain words, use the “Train Word” function in CoolInfo to enhance recognition of problem words.
Using Speech - The more speech recognition is used on your computer, the more your speech recognition accuracy will improve.
Environment - Using speech recognition in a quiet environment improves speech recognition accuracy.
Hardware - Faster computer processors and ample memory (256k sufficient, 512k or more is desirable) enables the speech engine to process speech more quickly and efficiently. A high quality, SoundBlaster compatible, input sound card is also an important factor to good recognition.
Commitment - Users must initially invest the necessary time to set-up and train their own speech recognition profile. We cannot over-emphasize the importance of training your speech recognition profile.
Speak clearly - When using CoolInfo, speak clearly into the microphone. Make certain your microphone position is consistent both in training and in use. We recommend the microphone be placed about one inch from your mouth.
Technical Support on the Microsoft SAPI Speech Recognition Engine
The redistribution of the SAPI 5.1 speech recognition engine, together with SAPI 5.0 and 6.1 available in Microsoft Office products, are Microsoft products that we cannot support. The Microsoft speech recognition engine is designed to enable you to use speech recognition with certain Microsoft programs and other third party software, like CoolInfo™, and in most cases should not require technical support. However, if you do need technical support on issues with the Microsoft SAPI speech recognition engine, go to the speech section of the Microsoft website – http://www.microsoft.com/speech. You can also contact Microsoft technical support.
USING CoolInfo
Starting CoolInfo
To start CoolInfo™, either click the CoolInfo icon on your desktop or use the Windows Program menu (StartàProgramsàCoolInfo).

![]()
CoolInfo Trial Startup Dialog
Unregistered copies of CoolInfo cause the CoolInfo trial startup dialog to open before the program starts. Unregistered copies run as a trial for 30-days. Registration is FREE, and removes the 30-day limitation, the Trial Startup dialog and its banners.
The trial startup dialog tells you how many days you have left in your trial period and offers six choices:

Get Free Key – Click on the “Get Free Key” button and the CoolInfo™ registration page will open in your default web browser. Fill in the form and click ”Submit.” We will email your free registration key and user info within 24 hours. Meanwhile, you can continue using CoolInfo™ in trial mode.
If you have a spam filter, please make sure you can receive email from CoolSoftLLC.com.
The trial version of CoolInfo is automatically converted to a full version when you enter your registration key. You do not need to reinstall the software.
30 Day Trial – Lets you continue using CoolInfo in trial mode. The trial button will be unavailable after 30 days, and you will no longer be able to start the CoolInfo until the program is registered.
Enter Key - Opens the registration dialog where you can type your user information and registration key. Unregistered versions of CoolInfo function as a trial version until you enter your user information and registration key. The user information and registration key you must input into this dialog are case sensitive. You must enter this information exactly as it appears in the confirmation email you receive when you purchased your license and registration key for CoolInfo. We recommend you cut-and-paste your registration key from this confirmation email. For more information on the registration process, see the section on Registering CoolInfo, below.
Cancel - Exits without starting the program.
Personalized Greeting – You can put your name or any other text here - this is how CoolInfo™ will greet you when you start the program.
Enable Personalized Greeting Checkbox - Check this box to enable the greeting. Uncheck it to disable the greeting. The program default is checked.
Trial Version Limitations:
· 30 day life
· Displays the startup dialog and two additional banners
Note: In unregistered copies of CoolInfo™, the first banner displayed in the startup dialog and the second banner displayed as CoolInfo™ is starting get their banner content from our website. If you are not connected to the Internet when you start CoolInfo™ in trial mode, the appearance of the trial dialog will be delayed for a short time while CoolInfo™ waits for an Internet connection to get the first banner. If an Internet connection is not found after this brief pause, CoolInfo™ will start and display the banners which are installed with the program.
Registering CoolInfo
Before you Register
In order to register CoolInfo™, your computer must be connected to the Internet. If you are not connected to the Internet, or if the connection is broken before the process is completed, you will not be able to complete the registration process.
Entering Your User Information and Registration Key
From the CoolInfo™ Trial Startup Dialog (shown above), click on the “Enter Key” button. The CoolInfo™ Registration Dialog will appear (shown below). Enter your user information and registration key exactly as it appears in the email you received, and click “Register” in the lower right hand corner.
IMPORTANT: Your user information, including your first name, last name, email address and your registration key are case sensitive and must be entered exactly as they appear in the confirmation email you received when you purchased your license and registration key. Hint: Cut-and-paste your registration key from the confirmation email.
What Happens When You Click Register
CoolInfo™ sends your registration key and email address (as you have entered it in the registration dialog) to our server to confirm that your email address and registration key are valid. When your key is validated, registration is completed.
COOLSOFT, LLC PRIVACY POLICY FOR REGISTERING COOLINFO – CoolSoft does not take any information from your computer in the registration process other than registration key and your email address (which you already provide when you signed up for your registration key).
Note: After you register CoolInfo™, the Startup Dialog will no longer appear. To change your greeting options after registering, use the “Greeting” tab in the CoolInfo Settings dialog. To open Settings by speech, say “click settings.” You can also access Settings from the CoolInfo Tools menu or by clicking on the “Settings” button.
The CoolInfo™ Interface
This is what you will see when CoolInfo™ opens. In the graphic below, we have labeled the buttons and included their corresponding speech commands:
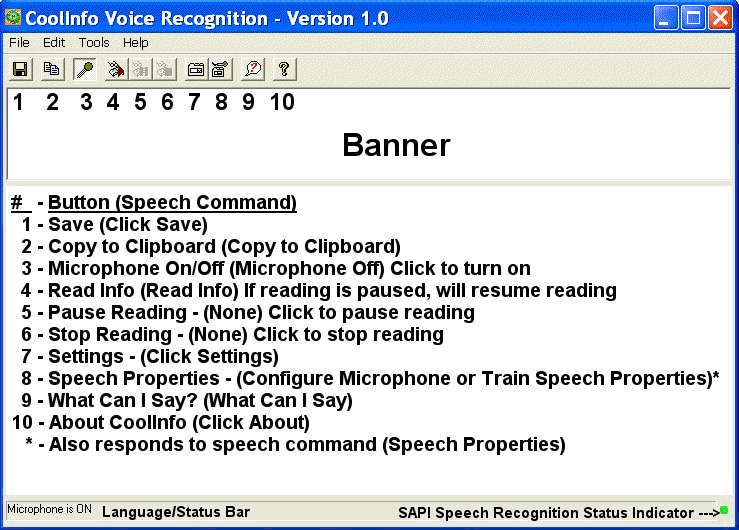
Language and Status Bar
The Language and Status Bar displays information about CoolInfo and the speech it is recognizing. For example, as shown above it indicates the Microphone is ON. As CoolInfo recognizes your speech, the text is displayed in this area. The words in the language bar may not always be the exact words you spoke, and the words may change as the speech recognition engine analyzes your speech. This is normal, and when a command is recognized it will be processed by CoolInfo™.
SAPI Status Indicator
At the far right of the status bar is the SAPI Speech Recognition Status Indicator light. This indicator is green when the Microphone is on and CoolInfo has exclusive control of the SAPI speech recognition engine. When the Microphone is turned off or another CoolSoft speech application (such as SpeakToText™ 2.50 and greater) has exclusive control of the SAPI speech recognition engine, this indicator is red.
NOTE: Only one speech recognition program should be used with the SAPI speech recognition engine at any given time. CoolInfo™ is designed to manage sharing of the speech recognition engine between itself and versions of SpeakToText™ 2.50 or greater. Future releases of CoolSoft speech recognition products will also have this functionality. However, older versions of CoolSoft speech recognition products (Speak-to-Mail™ 1.0 and versions of SpeakToText™ prior to 2.35) and third party SAPI speech recognition products do not have this feature. Using CoolInfo™ when other SAPI speech recognition programs are running may cause either or both programs to become unstable or produce undesirable results. With the exception of CoolInfo™ 1.0 and SpeakToText™ 2.50 or greater, (which may be used together because they manage sharing of the speech engine) we recommend closing one SAPI speech recognition program before starting the other.
Controlling CoolInfo
Unlike other CoolSoft™ speech recognition products, CoolInfo™ has only Command and Control commands. It cannot be used for dictation.
There are three ways to use commands in CoolInfo:
· Speech Commands
· Buttons
· Menu Items
The main program functions can be controlled by all three of the above options. Commands to retrieve information or custom commands are available exclusively by speech.
To view a list of available Speech Commands, say “What
can I say” or click on the “What can I say?” button ![]() . You can also click on
“What can I say?” from the help menu. The “What can I say?” dialog is dynamic
and displays only speech commands that are available at that time, depending on
the current situation in CoolInfo™.
. You can also click on
“What can I say?” from the help menu. The “What can I say?” dialog is dynamic
and displays only speech commands that are available at that time, depending on
the current situation in CoolInfo™.
Subset Command and Control Commands are active only in CoolInfo™ dialogs which display messages and do not have any menu items. For example, the confirm dialog box that appears when you clear CoolInfo has only three choices: “Yes,” “No,” and “Check...” You can either click on the buttons or say “yes,” “no” or “check” to make your choice. For more information on these, see ‘CoolInfo Prompt Dialogs and Speech,’ below.
General Operation
Starting CoolInfo™
To start CoolInfo, either click the CoolInfo icon on your desktop or use the program menu (StartàProgramsàCoolInfo).
CoolInfo can also be started from SpeakToText versions 2.50 and greater by saying “start CoolInfo” or by clicking on the CoolInfo button in SpeakToText. Note that the start CoolInfo button and speech command in SpeakToText work only after the first time you have started CoolInfo.
![]()
SpeakToText Start CoolInfo Button
Internet Connection and Internet Security Software
You must be connected to the Internet in order for CoolInfo to download its configuration file on startup, get program updates and retrieve information from the Internet. CoolInfo functions best when you are connected to the Internet before starting the program.
Important: If you are running an Internet security program or firewall on your computer or network, it must be configured to allow CoolInfo to access the Internet.
Microphone On-Off
By default, CoolInfo starts with the microphone in the on position.
To turn the microphone on: Click the microphone button.
To turn the microphone off: Say “microphone off” or click the microphone button.
![]()
![]()
Microphone On Microphone Off
Button Depressed Button Raised
Note: We recommend turning the microphone off if CoolInfo is running and you are not using it. Random speech overheard by CoolInfo is comparable to leaning on your keyboard and can produce similar results. Once the microphone is turned off, CoolInfo cannot hear you. To turn the Microphone on again, you must use your mouse to click on the microphone button.
CoolInfo and Internet Security Software
In order to retrieve information and to download the latest CoolInfo Commands and updates, CoolInfo must have access to the Internet.
CoolInfo and Background Noise
CoolInfo is designed to act on commands only, and does not accept dictation. With programs like SpeakToText for example, if a speech input is not recognized as a command, it is assumed to be dictation. Not so with CoolInfo, which looks for a command in all inputs it receives. As a result of this, CoolInfo is particularly prone to interpreting background noise as commands. This may result in commands being processed when none were spoken. For example, background noise, or even speaking to someone in the room, without turning the Microphone off, may result in webpages being opened in your browser, opening the What Can I Say? dialog, or user commands being processed. As the author was writing this section, he cleared his throat and the www.cnn.com opened in his web browser.
There are two solutions to this issue. You can leave CoolInfo running all the time when you are not using it. However, when you are not speaking commands to CoolInfo, you should turn the Microphone off. This is the best solution. Another solution is to enable background noise filtering and use trial and error to find the optimal settings. See the Filtering Tab section below for more information.
Using CoolInfo to Get and Read Information
CoolInfo Commands
Each time you start CoolInfo and are connected to the Internet, CoolInfo downloads its configuration file from our website with the current CoolInfo commands. The current configuration file includes the latest information categories, updates and any new categories we may add from time to time. Currently available CoolInfo commands can be viewed in the What Can I Say?” dialog or you can see a list on our website at:
http://www.CoolSoftLLC.com/CoolInfo/CoolInfoCommands.htm
At the time of the initial release, CoolInfo comes with four information categories, four search categories, and four speak commands. They are:
Information Category Speech Command
Headline News Headline News
Weather Weather Zip Code ##### (eg. Weather Zip code 32963)
Joke of the Day Joke of the Day
Horoscope Horoscope “Sign” (eg. Horoscope Taurus)
Information commands open in CoolInfo and we refer to this as a CoolBrowse. When you speak a CoolBrowse command, CoolInfo retrieves the information requested and your computer reads it to you. The information read may include a sponsor message.
Search Category Speech Command
Google Search Search Google “search term”
MSN Search Search MSN “search term”
Yahoo Search Search Yahoo “search term”
eBay Search Search eBay “search term”
Example: Say “search Google Speech Recognition” or “search eBay silver dollars.”
When you speak a search command, the results open in your computer’s default browser. CoolInfo may read a sponsor message or refresh its banner. Note that because of potential speech recognition errors, when searching with CoolInfo, the speech recognition engine may not always recognize all the words in your search term correctly. If this happens, it is best to refine your search from the search page in your web browser.
Speak Commands- Say This Computer Speaks This
Hello Computer Hello
Good morning computer Good Morning. Have a great day!
Good night computer Good night and happy dreams!
Say hi to my friends. Hi my friends.
Speak commands are included for fun, and to give your computer personality. They are also included to give an example of the speak commands you can create yourself in the User Commands tab, under the Settings dialog.
Note: Your speakers and the volume must be turned on in order for you to hear your computer speak.
Read Commands
To read or re-read the information displayed in CoolInfo, say “Read Info” or click the Read Info button.
To pause or stop reading, click the Pause Reading or Stop Reading buttons. The Pause Reading and Stop Reading buttons are not speech enabled because the microphone is turned off during reading to prevent the speech recognition engine from recognizing the text that is being read.
To resume reading after pausing, say “Read Info” or click the Read Info button. Reading will resume from the point where it stopped. Note when reading is paused, the Microphone button becomes gray which indicates reading is paused. The microphone is still functional, and returns to its normal color when you resume/finish reading the selection or stop reading.
![]()
Read Info, Pause Reading and Stop Reading Buttons
Note: The Read Info button resumes reading if reading is paused, and otherwise starts from the beginning. If you have paused reading and want to start over from the beginning, click the Stop Reading button before using the Read Info speech command or button.
Note: If you pause reading on one page in CoolInfo, and do not resume or stop reading before a new page loads, then the next time you use the “Read Info” command, reading will resume where it was paused (even though that page may have been replaced). When this happens, click on the “Stop Reading” button, then use the “Read Info” command again to start reading the new page.
Read Clipboard Command
You can have CoolInfo read text that you have copied to the clipboard by saying “Read Clipboard.” The read clipboard command is a speech command only and does not have an associated button.
Use this command to read WebPages or portions of WebPages, documents, emails and much more. Note that although an entire webpage or document can be copied to the clipboard for reading, it is better to select and copy to the clipboard only the text you want to have read.
Copy to Clipboard Command
You can copy the contents of CoolInfo to the clipboard by saying “copy to clipboard” or using the Copy to Clipboard button. The contents of the clipboard can then be pasted into other documents.
![]()
Copy to Clipboard Button
Saving a Page In CoolInfo
To save a page in CoolInfo, say “Click Save” or click on the Save button. The page will be saved as an .html file.
![]()
Save Button
Navigating Within CoolInfo
The CoolInfo window (CoolBrowse) is designed to get specific information and read it. Many pages that load in CoolInfo have been edited to display and read only the desired content. Sometimes the source page for the information is opened in the default web browser.
We recommend that links in the CoolInfo window be opened in Internet Explorer, particularly if you are going to follow the link through several pages. To open a link from CoolInfo in Internet Explorer, right click on the link and select “Open In New Window” from the right click menu.
To follow a link in CoolInfo, click on the link. To read the page, say “Read Info.”
To go back and forward in CoolInfo, right click in the CoolInfo window in any place other than over a link, and select back or forward from the right click menu.
Clicking on the banner window opens the link to the banner in the default web browser.
Other CoolInfo Features and Commands
Calculator
With CoolInfo, you can use your computer’s calculator with speech commands. Just say “Start Calculator” and the calculator will open. Read and follow the instructions below before using the calculator with CoolInfo.
Instructions for Using the Calculator with CoolInfo
To enter numbers in the calculator, you must speak each number individually, just as you would punch the keys on a calculator individually. For example, 1,234 is entered by saying one two three four, with a short pause between each number. Saying one thousand two hundred thirty four will not work. See Calculator Commands below for a complete list of calculator speech commands.
The “Standard” mode must be selected in the Calculator View Menu (default), and “Digit Grouping” should be unchecked (also default). See below for the correct settings.

Known Issues with CoolInfo and Calculator
If you say “start calculator” again while calculator is open, a second incidence of calculator will open. This is not recommended. Only one copy of calculator should be used with CoolInfo.
After using the calculator, it should be closed before using other commands with CoolInfo. Having CoolInfo and the calculator open together while other applications have the active focus, may result in unwanted text or commands being delivered to those applications. For example, when CoolInfo and the calculator are open at the same time and you switch focus to Microsoft Word, unwanted numbers, commands and background may go into your Word document. To prevent this, close the calculator after you are finished using it, or turn the Microphone off in CoolInfo. You can turn it back on when you need to use the calculator or CoolInfo again.
Note: After using the calculator with CoolInfo, if speech or background noise causes unwanted input into other applications, turn the microphone off while you are in the other application(s), or close CoolInfo until you are ready to use it again.
Calculator Commands
Here is a list of calculator speech commands. You can also refer to the What Can I Say? dialog, which displays a list of calculator commands when the calculator is started from CoolInfo.
Speech Command Result
Zero Press Key 0
One Press Key 1
Two Press Key 2
Three Press Key 3
Four Press Key 4
Five Press Key 5
Six Press Key 6
Seven Press Key 7
Eight Press Key 8
Nine Press Key 9
Plus Press Key +
Point Press Key .
Decimal Press Key .
Equal Press Key =
Minus Press Key –
Divide Press Key /
Divided Press Key /
Times Press Key *
Multiply Press Key *
Clear Press Key CE
Clear All Press Key C
Backspace Press Key Backspace
Change Sign Press Key +/-
Memory Clear Press Key MC
Memory Recall Press Key MR
Memory Store Press Key MS
Memory Add Press Key M+
Reciprocal Press Key 1/x
Percent Press Key %
Square Root Press Key sqrt
User Commands
With CoolInfo you can create your own speech commands from the User Commands tab in the Settings dialog.
To create a new User Command, click on “New.”
Note: You can create multi-step User Commands to perform more than one function with a single speech command. The text in the Command field (what you speak to trigger the command) must be identical for each step in a multi-step User Command.
Note: The “Enable these Commands” checkbox must be checked in order for User Commands to function.
To edit a User Command, select the command you want to edit, and click on “Edit” and make the changes to the command, then say or click “ok” or “apply.”
To delete a User Command, select the command you want to delete, and click on “Delete.”
User commands are sorted in the sequence in which they are created, and not alphabetically. The “Move Up” and “Move Down” buttons apply only to multiple step User Commands. Moving the commands up or down sets the sequence in which the command steps in a multi-step User Command are processed when you speak the command. Use these buttons to move a command step up or down in sequence within a group of steps for a multi-step User Command. The Move Up/Move Down buttons do not move single-step User Commands in the command list.
To enable User Commands, check the “Enable these Commands” box in the upper left side of the dialog.
Creating and Editing User Commands
After clicking on the “New” or “Edit” buttons, the Create User Command dialog appears. As shown below, the Create User Command dialog has the “Action” field dropdown expanded. The “Target” field remains grayed out until an action is selected.
There are four elements to a user command. They are the Command, Action Target and Comment/Tip. Each is explained below:
Command: Enter the word(s) or phrase that you want to speak to run the command. When User Commands is enabled, these commands will appear in the “What Can I Say?” dialog, and the command will be processed when you speak the words you entered in this field.
Action: Choose the action you want SpeakToText to take when you say the command. There are eight possible actions for a User Command in the Action dropdown menu.
· Browse – Opens the default web browser to the website address (URL) specified in the target field. Use “Browse” to create speech commands that will open webpages which you visit often.
· CoolBrowse – A “CoolBrowse” opens the webpage in CoolInfo instead of the default web browser.
· Focus – After processing a user command, use “Focus” to bring CoolInfo back to the foreground.
· Open – The computer will open the target file you have selected. Use “Open” to create speech commands that will open documents you use often, or to play your favorite music files and videos.
· Read – The computer reads the contents of CoolInfo. Use the “Read” action when you want to create a multi-step User Command to open a webpage in CoolInfo read the page after it loads.
· Run – The computer will run the target program you have selected. Use “Run” to create speech commands for programs that you start often.
· Sleep – When processing a multi-step User Command, CoolInfo pauses for the number of seconds in the Target field before going on to the next step. Examples of using the Sleep action are to give a CoolBrowse page time to load before starting reading, or to delay a Focus command after starting a program or opening a file.
· Speak – The computer will speak the phrase you entered in the Target field. Use “Speak” if you want the computer to say a word or phrase when you say the command. Use this to give your computer personality and make it talk back to you.
Note: “Run” and “Open” perform the same Action and are interchangeable. We recommend using “Open” with files, and “Run” with programs, although you can use either.
Target: This is the field where you enter you want the computer to do when you say the command. In this field you can enter a webpage URL, a file to open, a program to run, or text for a phrase that you want the computer to speak when you say the command. In multi-step User Commands, you can create steps with sleep and focus command components. If the Action for the command is “Run” or “Open” you can browse to the program or file you want to run or open to insure the path is entered correctly. Use the “Browse” button to the right of the Target field (shown below).

Browse Button in Create User Command Dialog Target Field
Note: The Focus and Read Actions have no target. When one of these two Actions is selected, the Target field remains grayed out.
For more detail on creating User Commands to run programs or open files, see the Running Programs and Opening Files with User Commands section below.
Comment/Tip: Enter a description or tip for your command that will appear as a tool tip when you place the pointer over the command in the “What Can I Say?” dialog. You can also leave this field blank, and no tool tip will appear.
Testing:
When are finished entering or editing the data for the User Command, you are satisfied with your command, click “OK” to continue. Note that the “Apply” button is unavailable after creating a User Command because the new User Command is applied when you click “OK” in the Create User Command dialog. Also note that if the first letter of a User Command is not capitalized, it will appear at the bottom of the list in the User Commands section in the “What Can I Say?” dialog, as sorting is done alphabetically first by upper case letters, then lower case letters.
Creating Multi-Step User Commands
You can create multi-step User Commands. To do this, the entry in the “Command” field (the words you want to speak to run the command) must be identical for each step. When you say the command, the steps in a multi-step user command will be processed in the sequence in which they appear in the User Commands list.
Setting the Tool Tip for a Multi-Step User Command:
Enter the desired tool tip in the Comment/Tip field when you are creating the first step of this User Command. Leave the Comment/Tip field blank in the other steps and when you click OK as you create each additional step, the tool tip entered in the first step will be attached to each step.
To change or edit the tool tip, return to the User Commands tab, select one of the steps in the desired multi-step User Command (preferably the first step in the sequence) and click “Edit.” Change the text in the Comment/Tip field to the desired tool tip and click OK. This will set the tool tip for all steps of this User Command.
To change the sequence of steps in a multi-step User Command, select the step you want to move and use the Move Up and Move Down buttons in the User Commands tab. User commands are sorted in the order they are created, and the Move Up/Move Down buttons are only for adjusting the sequence of steps within groups of multi-step User Commands.
Browse Commands in a Multi-Step User Command
When you create a multi-step User Command, the If one of the steps in a multi-step User Command is “Browse,” then depending on the speed of your Internet connection, the step(s) following the “Browse” step of the command may not be processed if the webpage takes too long to load. To avoid this problem, a “Sleep” step should be created and placed in the sequence after the “Browse” step. The number of seconds in the “Sleep” step should be sufficient time for the webpage in the “Browse” step to load before going on to the next step. Trial and error may be necessary to determine the appropriate number of seconds to place in the “Sleep” step.
Tips on Running Programs and Opening Files with User Commands
To open a document or file in the default application for that file type, select “Open” from the dropdown in the Action field, and browse to the location of the document or file in the Target field. The document or file will open in the default application. For example “C:\My School Work\Science Term Paper.txt” should open in Notepad (the default for documents with the .txt extension). If the document ends in the .doc extension, it should open in Microsoft Word. Similarly, the file “My Favorite Song.mp3” will open in the default music player.
To start a program, select “Run” from the dropdown in the Action field, and browse to the location of the program’s executable in the Target field. Most programs are located in a sub-folder of C:\Program Files.
When creating a User Command, it is best to browse to the document, file or program to insure accuracy (instead of typing the path). This is particularly important with User Commands to open documents or files in the My Documents folder, because the My Documents folder for each user on a computer has a unique path. Simply entering “C:\My Documents\My Music\My Favorite Song.mp3” will not work. For example, users Simon and Susan have different paths for their “My Documents” folder and the path to "My Favorite Song.mp3" for these users would appear as follows. Note the differences in the path in bold type:
Simon: C:\Documents and Settings\Simon\My Documents\My Music\My Favorite Song.mp3
Susan: C:\Documents and Settings\Susan\My Documents\My Music\My Favorite Song.mp3
Sending Commands to a Program with User Commands
Starting with SpeakToText Version 2.51, User Commands can process commands that contain command syntax for an application. The vertical slash "|" is used to separate the application path and the command syntax. For example:
Application Path|Command Syntax
Note: There is no space between the application path, the vertical slash and the command syntax.
When a User Command such as this is called, the application will run with the command syntax that is appended after the vertical slash. Typically, any “Application Path|Command Syntax” combination that runs from the command line, will also run in User Commands by speech.
User Command Tips:
· The fields in the Create User Command dialog are not speech enabled. You need to type in the command parameters.
· On some systems and in some environments, the Create User Commands dialog can be highly sensitive to background noise, causing it to close or change tabs after creating a User Command. If this happens on your system, simply turn the microphone off and user your mouse to navigate to the Create User Commands dialog (Settings button, User Commands Tab, New).
· When entering a website address (URL), be sure to enter the full address including the “www.” (for example “www.mypage.com” – not “mypage.com”). To insure accuracy, it’s best to cut and paste the URL from your browser into the “target” field.
· If you are using the “Run” or “Open” commands, it is best to browse to the desired program or file using the browse button to the right of the target field “…” This will insure that the full and correct path to the program or file is included in “target” field. If your User Command includes a file to be opened by the program you are starting, browse to the program first. Then enter the vertical slash, and then browse to the file you want the program to open. If the command contains command syntax for the program to run when it starts, browse to the program first, enter the vertical slash, then type in the command syntax.
· If your User Command opens a file (for example, a music file or document) and then you later rename the file or move it to a different folder, the User Command you created for that will no longer work. You will need to delete the User Command and create a new one with the new file name and/or folder path.
User Command Tips for Advanced Users
If you are creating User Commands to run programs that are registered with the Windows, and you know the correct name of the “target” program, simply type the name of the program file in the appropriate field. For example, to run Notepad, type “notepad” in the target field. To determine if an application is registered with Windows go to the command line (start, run) and enter the name of the application (for example “winword” or “notepad”). If the application starts, then it is registered with Windows.
User Command Examples
Here are some examples of single step commands. Each command performs a single task:
|
Command |
Action |
Target |
Result (what the computer will do) |
|
Computer |
Speak |
What do you want |
The computer will speak the words "what do you want." |
|
Start Internet Explorer |
Run |
C:\Program Files\Internet Explorer\Messenger\iexplore.exe |
The computer will start Internet Explorer. |
|
Start Internet Explorer (Advanced) |
Run |
Iexplore |
The computer will start Internet Explorer. |
|
Go to homepage |
Browse |
www.myhomepage.com or http://www.myhompeage.com |
The computer will open www.myhomepage.com in the default web browser. |
|
Go to homepage |
CoolBrowse |
www.myhomepage.com or http://www.myhompeage.com |
The computer will open www.myhomepage.com in CoolInfo. |
|
Play my favorite song |
Open |
c:\My Documents\My Music\MyFavoriteSong.mp3 |
The computer will play MyFavoriteSong.mp3. |
Here is an example of a multiple step command. A single command performs multiple tasks on multiple programs:
|
Command |
Action |
Target |
Result (what the computer will do) |
|
Start my day |
Speak |
Good Morning |
|
|
Start my day |
Run |
Outlook |
|
|
Start my day |
Browse |
www.cnn.com |
|
|
Start my day |
Open |
c:\My Documents\My Music\MyFavoriteSong.mp3 |
|
|
|
|
|
When you say “start my day” the computer will speak “good morning,” start Microsoft Outlook, open the default web browser to CNN.com and play MyFavoriteSong.mp3. |
Here is another example of a multiple step command. A single command opens a webpage and causes CoolInfo to sleep, focus and read:
|
Command |
Action |
Target |
Result (what the computer will do) |
|
Browse CNN |
CoolBrowse |
www.cnn.com |
|
|
Browse CNN |
Sleep |
20 |
|
|
Browse CNN |
Focus |
|
|
|
Browse CNN |
Read |
|
|
|
|
|
|
When you say “browse CNN” the computer will in sequence open CNN.com in CoolInfo (note CoolBrowse is the specified action), wait 20 seconds for CNN.com to load in CoolInfo, bring CoolInfo to the foreground, and start reading the contents of CNN.com. |
Click Focus Speech Command
If CoolInfo disappears behind another window, saying “click focus” will bring CoolInfo to the foreground with an active focus.
Note: This command will not work if the microphone is turned off. If the microphone is turned off and you can no longer see CoolInfo, then you can locate it in the taskbar or system tray and click on it to restore focus on SpeakToText.
Click Minimize Speech Command
To minimize CoolInfo, you can use the “Click Minimize” speech command, and CoolInfo will minimize to the taskbar. You can also use your mouse to click on the minimize button in the upper right corner of CoolInfo.
Scroll Up and Scroll Down Speech Commands
The “Scroll Up” and “Scroll Down” speech commands scroll up and down the CoolInfo window. If the “What Can I Say?” dialog is open, then the “Scroll Up” and “Scroll Down” speech commands will act on the “What Can I Say?” dialog instead.
CoolInfo Prompt Dialogs and Speech
CoolInfo also incorporates informational dialogs to prompt or advise you at key points throughout the program. These dialog boxes have important messages about using CoolInfo and are intended to help you learn how to best use CoolInfo quickly. Most of these dialog boxes have a checkbox so you can choose not to display them again as you become proficient with using CoolInfo.
Most of these CoolInfo message dialogs are speech enabled. A speech enabled dialog will have the message at the top “CoolInfo is listening for ….” and will list the words that correspond to the message dialog buttons. Typically these commands include “yes,” “no,” “okay,” “cancel,” “apply” or “check” depending on the nature of the message dialog.
Using the “CHECK” Speech Command with Some CoolInfo Message Dialogs
When a CoolInfo message dialog contains a checkbox (other than those found in the tabs of the Settings dialog), you can check or uncheck the checkbox by saying “check.” Each time you say “check,” the state of the checkbox will change. You might ask why we didn’t use two commands for “check” and “uncheck.” We found that using only one word (“check”) to toggle the settings in checkboxes provided far greater reliability than having separate commands.
Note: The following dialogs are not speech enabled.
- Trial Dialog
- Registration Dialog
- Training Reminder Dialog (shows on startup only if the default speech recognition profile is selected in Speech Properties)
- Settings within the individual tabs of the Settings dialog
- Speech Properties dialog (this is a Microsoft SAPI speech recognition dialog and is not part of SpeakToText)
- Update Dialogs after “Check for Updates” is started
Help Features
Tool Tips
Convenient tool tips appear when move the arrow over a button, indicating the Speech Commands for that button.
What Can I Say?
The “What Can I Say?” feature opens a window that lists the speech commands that are active at that particular point in the program. To open this window say, “what can I say,” click on the “What Can I Say?" button, or select “What Can I Say?” from the Help Menu. To close the “What Can I Say?” window, say “close me” or click on the “Close Me” button at the bottom of the “What Can I Say?” window.
What Can I Say? Button ![]() Close Me Button
Close Me Button ![]()
Note: The commands displayed in the “What Can I Say?” window will vary depending on which commands are active at that point in CoolInfo.
Note: If you enable and create custom commands, these will also appear in the What Can I Say? dialog.
Note: When you move the cursor over a command in the What Can I Say? dialog, a tool tip appears to give you more information about that command. This is particularly useful for speech commands which do not have buttons or menu item equivalents. If these tool tips do not appear after some period of use, cycling the microphone off and on again will restore the missing tool tips.
The first time the “What Can I Say?” dialog is opened during a session of CoolInfo, it opens at a minimum size on the left side of CoolInfo. You can move and resize the “What Can I Say?” dialog. If you close it and then reopen it later in the same session, it will appear in the same place and at the same size as when it was last closed. Note that this applies only to the current session. If you close CoolInfo, the next time you start it, the “What Can I Say?” dialog will again appear in the starting position on the left side.
Manual and Quick Start Guide
The Manual and Quick Start Guide can be accessed from the Help Menu. You can also say “open manual” or “open quick start.”
How to Setup and Train Speech Recognition Video
CoolInfo includes a brief and informative video on setting up and training a speech recognition profile. This video can be accessed from the Help Menu, or in the CoolInfo program group by clicking Startà ProgramsàCoolInfo.
Feedback
If you have suggestions on how we can make CoolInfo better, or if there are information categories you would like to see covered by CoolInfo, please send an email with your suggestions to support@CoolSoftLLC.com and include” CoolInfo Suggestion” or “CoolInfo Feedback” in the subject line.
Menus and Controls
File Menu

Save Text
Saves the text in CoolInfo as a text (.txt) file. If the text has not been saved before, it opens a Save dialog box and prompts for a file name.
Speech Command: “Click Save”
Button: ![]()
Exit
Closes CoolInfo. If the text in CoolInfo has not been saved or copied, it prompts for a confirmation.
Speech Command: “Click Exit”
Button: None – use the close program “X” ![]() button at the upper right
corner of CoolInfo.
button at the upper right
corner of CoolInfo.
Edit Menu
Copy to Clipboard
Copies the contents of CoolInfo to the Windows clipboard, where it can be pasted into any application which will accept content from the clipboard.
Note: Using this command may overwrite the current content in the clipboard from another application.
Speech Command: “Copy to Clipboard”
Read Info
Reads the information displayed in CoolInfo.
Speech Command: “Read Info”
Button: ![]()
Stop Reading
Aborts reading.
Speech Command: “None”
Button: ![]()
Pause Reading
Pauses reading so it can be resumed where it was paused.
Speech Command: “None”
Button: ![]()
Tools Menu
Microphone On/Off
Turns the microphone on and off. When checked, the microphone is turned on. When unchecked the microphone is turned off.
Speech Command: To turn the microphone off, say “Microphone Off.”
Button: ![]() When the button
is depressed the microphone is on.
When the button
is depressed the microphone is on.
![]() When the button is
raised, the microphone is off.
When the button is
raised, the microphone is off.
IMPORTANT NOTES ON THE MICROPHONE
Once the microphone is turned off, it is unavailable and cannot be turned on by speech. To turn the microphone on, you must select the menu item or click the microphone button. Turning the microphone off also disables the start/stop listening buttons.
When the microphone is on, CoolInfo has exclusive access to the microphone. The microphone must be turned off to allow other applications (like Speech Properties) to use the microphone and the SAPI speech recognition. CoolInfo will inform you before it turns the microphone off.
The default startup for CoolInfo is Microphone On, Listening Off. To start using CoolInfo, you must say “start listening” or “wake up.” You can change the default to have CoolInfo start with Listening on in the General tab of the Settings dialog.
When you are using the keyboard with CoolInfo, the microphone turns off and stays off for three seconds after the last keyboard character is received. This prevents spoken text from unintentionally being inserted into sections where you are typing.
When viewing a speech enabled dialog box, the microphone in CoolInfo is turned off (microphone button becomes raised) so the dialog box can have speech focus. This is normal; the microphone will come back on when you close the dialog box.
Settings
Opens the CoolInfo Settings dialog box.
Speech Command: “Click Settings”
Button: ![]()
For a more detailed explanation of the Settings dialog and options, see the section on “Settings” below.
Speech Properties
Opens the Speech Properties dialog box for the Microsoft speech recognition engine.
Speech Command: “Click Speech Properties” “Train Speech Profile” and “Configure Microphone”
Button: ![]()
Details on the various options in the Speech Properties dialog box are explained in detail in the “Setting Up and Training the Microsoft SAPI 5.1 Speech Recognition Engine” section of this manual.
Note: The Speech Properties dialog box needs exclusive access to your microphone, hence, when you enter Speech Properties the microphone will be turned off. When you close Speech Properties and return to CoolInfo, you can turn the microphone on by clicking on the microphone button or selecting the menu item.
You can also access Speech Properties from the Windows Control Panel. However, if you do this while CoolInfo is running, without first turning off the microphone (not recommended), this may cause conflicts between CoolInfo and the Speech Properties dialog functions.
Train Word
Opens the “Train Word” dialog box from the speech recognition engine.
Speech Command: “Train Word”
Button: None
If the speech engine is having trouble recognizing certain words or if there are unique words or names that you want the speech engine to recognize in a certain way, the “Train Word” feature will help. For example, in our offices, we have trained CoolInfoÔ 1.0 as a word, so it appears as “CoolInfoÔ 1.0” when we say “cool info.” For more detailed information on the use and functionality of the “Train Word” feature, see the “Training Words” section above.
Help Menu
What Can I Say?
Opens the “What Can I Say?” window that displays a list of the command and control speech commands that are available at any given point in CoolInfo.
Speech Command: “What can I say” to open, and “Close Me” to close.
Button: Open ![]() Close
Close 
Commands displayed in the What Can I Say? window will vary, depending on the commands available to you at that particular time in the program.
Open Quick Start Guide
Opens the CoolInfo Quick Start Guide.
Speech Command: “Open Quick Start”
Open Manual
Opens the CoolInfo Users Manual
Speech Command: “Open Manual”
Notes on the Quick Start Guide and Manual
The HTML version of the CoolInfo Quick Start Guide and Manual are installed on your system when you install CoolInfo. When you select either the Quick Start Guide or Manual from the Help menu, the selection opens the Quick Start Guide or Manual in a new window in your computer’s default browser or in the program set as the default program for HTML files.
Typically, when you update CoolInfo, the updated Quick Start Guide and Manual will be included in the update. You can also get the most recent version of the Quick Start Guide and Manual in the Support section of the CoolSoft, LLC website. You can go to www.CoolSoftLLC.com and click through SupportàManualsàCoolInfo.
Play video “How to Setup and Train Speech Recognition”
Plays a short and informative video on how to setup and train the Microsoft SAPI 5.1 speech recognition engine to recognize your voice. We recommend that you watch it when first starting to use CoolInfo.
Check for Updates
Looks for an available update and, if one is available, CoolInfo instantly downloads the update and launches the update installation.
Speech Command: “Check for Updates”
Button: There is a “Check for Updates” button in the “About” dialog box (See below).
![]()
Click on this button, or say “Check for Updates.”
Note: You must be connected to the Internet before checking for updates. Otherwise, CoolInfo is unable to find any updates and will tell you that you are running the most current version.
CoolInfo will minimize when it starts to check for updates, and you must use your mouse to click your way through the remainder of the update dialogs and complete the installation. If CoolInfo finds an update, it will download and install the update. When the update is finished, CoolInfo will restart.
Important: Before updating CoolInfo, if text is present in CoolInfo, you are prompted to save your work. If CoolInfo finds an update, CoolInfo must shut down to install the update, and you will lose your work if you do not save it.
About CoolInfo
Opens the ‘About’ dialog box, which displays information about CoolInfo (the current version installed on your computer), your user information and registration key. Also displays the “Check for Updates” button.
Speech Command: “Click About”
Button: ![]()
CoolInfo Settings Dialog
The CoolInfo Settings dialog box has three tabs.
· General Tab
· Filtering Tab
· User Commands Tab
The function of each tab is explained in the sections below:
Note: The Settings dialog is speech enabled, and you can navigate between tabs with speech by saying “tab.” However, the tabs are not speech enabled, and you must use your mouse and keyboard within each tab to make changes.
When you are finished changing settings in any of the tabs mentioned above, click or say “apply” to save the settings before moving to the next tab. Click or say “OK” when you are finished to save your settings and close the Settings dialog box. You can also click or say “cancel” to exit Settings without applying the changes.
General Tab
There are three settings in the General tab. When you have finished changing settings, click on “Apply” or “OK” to save your changes. Click on “Cancel” to ignore the changes and return to CoolInfo.
Greeting
You can choose to have CoolInfo can greet you personally when it starts. In this section, you can enter how you want CoolInfo to greet you when it starts, and enable/disable the greeting feature. To test how your greeting will sound, click the “Say it” button.
Automatically Read Information Upon Download
The default setting is enabled (checked). Whenever you retrieve information from one of the CoolInfo information categories, CoolInfo automatically reads the information to you. Uncheck this option if you do not want CoolInfo to automatically read information it retrieves.
Restore Prompts Button
Clicking on this button will restore confirmation dialog prompts to default. If you have previously selected to opt-out of certain prompts, these prompts will be restored.
Filtering Tab
In the Filtering Tab, you can enable/disable/adjust Background Noise Filtering for commands.
Most users working in a quiet room will not find it necessary to enable filtering. If you need to enable Background Noise Filtering, go to Settings and select the “Filtering” tab. Check “Enable filtering of background noise for Commands” if you want to filter commands.
What is background noise in speech recognition?
In some instances, the speech engine recognizes background noise as commands and processes the commands even though they were not spoken.
Whether or not background noise is a problem varies according to your system and environment. Your system (sound card and microphone) and environmental factors such as the acoustics of the space you are in, the materials in this space and the activity around you can all contribute to background noise errors. If background noise is a problem on your system, you can “enable” and fine tune Background Noise Filtering for commands, dictation, or both, depending on your needs.
When do I use Background Noise Filtering?
You should enable Background Noise Filtering for commands only if you experience a frequent incidence of commands that you did not speak being processed, or if the program is consistently not responding to some, or all, of your spoken commands. If CoolInfo is consistently not responding to commands, before you enable Background Noise Filtering, you should try repeating the unresponsive command(s) after a brief pause – this often resolves the issue.
The mid-range position on the slider bar in both sections works best in most environments and on most systems. However, each combination of environment and system varies, and finding the optimal settings for your system and environment may require some trial and error before you find the settings that work best for you. If you are using a notebook computer, the environmental factors are likely to change from place to place.
Tips on Background Noise Filtering
If, after enabling Background Noise Filtering for Commands, you still experience a frequent incidence of commands that you did not speak being processed, you can move the slider to the right (stricter filtering). If spoken commands appear in the Language Bar but are not processed or do not appear in the Language Bar at all, you can move the slider to the left (looser filtering).
Before you enable filtering for commands, you should note that it is normal for unspoken commands to appear and immediately disappear in the Language Bar from time to time. This indicates that the speech engine initially tried to interpret background noise as a command, then determined on its own that the background noise was not actually a command. As long as these unspoken commands are not being processed, then you do not need to enable filtering for commands. In some environments, you may find that Command filtering needs to be set at a lower level than the setting for Dictation filtering.
Conversely, if filtering for commands is not enabled (the default setting), and you are speaking commands that appear in the Language Bar and are not processed or are not being recognized, then you can enable filtering for commands (we suggest moving the slider all the way to the left (looser filtering) at first). This should solve the problem; However, it may also result in some background noise being processed as commands. If this happens, you can use trial and error to adjust the level, by gradually moving the slider to the right (stricter filtering) until you find the optimal level where spoken commands are correctly processed and background noise is not misrecognized as a command.
User Commands Tab
Under the User Commands tab, you can create your own custom speech commands to make your computer speak, browse WebPages, open files and run programs. To create or edit your own User Commands, first click on the “New” or “Edit…” buttons. To enable the User Commands you have created, check the “Enable these Commands” checkbox and click on “Apply” or “OK.”
The functionality of the User Commands tab is explained in detail in the section on User Commands above.
TROUBLESHOOTING
Solutions for Poor Recognition Accuracy
If you are experiencing less than normal accuracy in your speech recognition, possible solutions include:
· Check your microphone settings. Go to the Speech Properties in the Control Panel and check your microphone settings.
· Make sure your microphone is positioned correctly (about one inch from your mouth), and that this position is consistent with the position of the microphone when you trained your speech recognition profile.
· Minimize background noise.
· Use the “Train Word” feature with words that are consistently being misrecognized.
If recognition was good when you started using CoolInfo and it starts to deteriorate, closing and restarting CoolInfo will often restore good recognition. If this doesn’t work, try restarting your computer.
Today My Voice is not as Clear
If you are experiencing poor recognition because your voice is not clear (for example, if you have a cold or sore throat), CoolInfo is a fully Mouse and Keyboard compliant Windows application.
Another solution for poor recognition when your voice is not clear is to spend a few minutes creating and training another speech recognition profile. The new profile will work better with the current state of your voice.
Support Resources
CoolInfo is designed to be simple and easy to use and, in most cases, any issues you may encounter are covered in this Users Manual or in FAQ’s section of the support pages on our website at http://www.coolsoftllc.com/support). Using these self-help resources will help you get answers to your questions quickly and efficiently.
If you do encounter an issue that you need help with, support is available on our website. To get support, go to the Support page at www.coolsoftllc.com. There you will find all the resources you need for self-help and technical support. Use our convenient web form to submit your support request. We need all of the requested information in order to help you; not providing complete information will delay or prevent us from processing your support request.
Before requesting technical support, we ask that you take some steps to troubleshoot the problem yourself. Usually you will find a solution, and you won’t have to wait for support. If your own troubleshooting does not result in a solution, knowing what steps you took in trying to resolve the issue on your own will be helpful to our support staff in finding a solution to your problem. So, please document and report any steps you have taken.
To find out about our support policy, refer to Appendix B, CoolSoft, LLC Technical Support Policy, below.
APPENDIX A
CoolInfo Speech Commands List
Program Commands*
|
What Can I Say Commands |
|
|
Close me |
Closes the What Can I Say? dialog |
|
What Can I Say |
Opens the What Can I Say? dialog |
|
Program Commands |
|
|
Click About |
Opens the About CoolInfo dialog |
|
Click Exit |
Closes CoolInfo |
|
Click Focus |
Brings CoolInfo to the foreground with the active focus |
|
Click Minimize |
Minimizes CoolInfo |
|
Click Save |
Saves the contents of CoolInfo as an .html file (webpage) |
|
Click Settings |
Opens the settings dialog |
|
Configure Microphone |
Opens the speech properties dialog |
|
Copy to Clipboard |
Copies the contents of CoolInfo to the Windows clipboard. |
|
Microphone Off |
Turns the Microphone off - you must click on the Microphone button to turn it back on. |
|
Open Manual |
Opens the CoolInfo Manual in the default web browser |
|
Open Quick Start |
Opens the CoolInfo Quick Start Guide in the default web browser |
|
Read Clipboard |
Reads the contents of the Windows clipboard (the clipboard must contain text) |
|
Read Info |
Reads the contents of CoolInfo - Resumes reading if paused |
|
Scroll Down |
Scrolls down CoolInfo (acts on What Can I Say? dialog if open) |
|
Scroll Up |
Scrolls up CoolInfo (acts on What Can I Say? dialog if open) |
|
Speech Properties |
Opens the speech properties dialog |
|
Start Calculator |
Starts and speech enables the Windows calculator |
|
Train Speech Profile |
Opens the speech properties dialog |
|
Train Word |
Opens the train word dialog |
|
Settings Dialog and Prompt Commands |
|
|
Apply |
Applies the changes |
|
Cancel |
Cancels out of the dialog |
|
Check |
Toggles the dialog checkbox if present |
|
Okay |
Saves changes and closes the dialog |
|
Tab |
Moves to the next tab in the Settings dialog |
*These commands do not change unless CoolInfo is updated.
The following is a list of the default CoolInfo commands as of the initial
release of CoolInfo:
If your computer is connected to the Internet, these CoolInfo commands are updated when CoolInfo starts. These commands can change regularly as we modify them and add new commands and information categories. The CoolInfo commands that come with your copy of CoolInfo may also vary depending on the sponsor from which you obtained your copy.
For the most current list of CoolInfo info commands, check the What Can I Say? dialog or visit
http://www.CoolSoftLLC.com/CoolInfo/CoolInfoCommands.htm
CoolInfo Commands
|
CoolSoft Commands – Say This |
Response |
|
Cool Soft |
Opens the www.CoolSoftLLC.com home page in the default web browser |
|
Buy Flying House |
Opens the default web browser a the CoolSoftLLC.com store page with one unit of FlyingHouse in the shopping cart |
|
Buy Speak to Mail |
Opens the default web browser a the CoolSoftLLC.com store page with one unit of Speak-to-Mail in the shopping cart |
|
Buy Speak To Text |
Opens the default web browser a the CoolSoftLLC.com store page with one unit of SpeakToText in the shopping cart |
|
Buy Spam Monster |
Opens the default web browser a the CoolSoftLLC.com store page with one unit of SpamMonster in the shopping cart |
|
Information Commands - Say This |
Response |
|
Headline news |
Opens and reads the USAToday.com headline news in CoolInfo^ |
|
National news |
Opens and reads the USAToday.com national news in CoolInfo^ |
|
Washington news |
Opens and reads the USAToday.com Washington news in CoolInfo^ |
|
World news |
Opens and reads the USAToday.com world news in CoolInfo^ |
|
Sports news |
Opens and reads the USAToday.com sports news in CoolInfo^ |
|
Money news |
Opens and reads the USAToday.com money news in CoolInfo^ |
|
Entertainment news |
Opens and reads the USAToday.com entertainment news in CoolInfo^ |
|
Technology news |
Opens and reads the USAToday.com technology news in CoolInfo^ |
|
Science and Space news |
Opens and reads the USAToday.com headline news in CoolInfo^ |
|
Fox News |
Opens the Fox News home page in the default web browser |
|
New York Times |
Opens the New York Times home page in the default web browser |
|
Wall Street Journal |
Opens the Wall Street Journal home page in the default web browser |
|
CNN |
Opens the CNN home page in the default web browser |
|
MSNBC |
Opens the MSNBC home page in the default web browser |
|
BBC |
Opens the BBC home page in the default web browser |
|
CBC |
Opens the CBC home page in the default web browser |
|
Weather + zip code |
Opens and reads the weather for the desired zip code in CoolInfo (USA zip codes only) |
|
Weather UK |
Opens the www.uk.weather.com home page in the default web browser |
|
Weather Canada |
Opens the Canadian Weather Office home page in the default web browser |
|
Horoscope + Sign |
Opens and reads today's horoscope for the desired sign in CoolInfo. |
|
Joke of the day |
Opens and reads the Joke of the Day in CoolInfo |
|
^Top three stories |
|
|
Hint: You can create your own information commands with User Commands. Use the "Browse" Action to open a webpage in the default web browser. Use the "CoolBrowse" and "Read" Actions to display and read a webpage in the CoolInfo window. |
|
|
|
|
|
Search Commands – Say This |
Response |
|
Search Google + search term* |
Searches Google for the search term and displays the results in the default web browser |
|
Search MSN + search term* |
Searches MSN for the search term and displays the results in the default web browser |
|
Search Yahoo + search term* |
Searches Yahoo for the search term and displays the results in the default web browser |
|
Search eBay + search term* |
Searches eBay for the search term and displays the results in the default web browser |
|
Search You Tube + search term |
Searches YouTube for the search term and displays the results in the default web browser |
|
* CoolInfo released on CD in the United Kingdom searches the .co.uk version of these websites. |
|
|
Speak Commands*** - Say This |
Response |
|
Hello Computer |
Computer speaks "Hello" |
|
Good morning computer |
Computer speaks "Good Morning. Have a great day!" |
|
Good night computer |
Computer speaks "Good night and happy dreams!” |
|
Say hi to my friends |
Computer speaks "Hi my friends." |
**These commands change whenever we update the commands configuration file.
***Your speakers and volume must be turned on in order for you to hear your computer speak.
Note: If you enable and create User Commands, these will also appear in the What Can I Say? dialog.
APPENDIX B
CoolSoft, LLC Technical Support Policy for CoolInfo
Because CoolInfo™ Voice Recognition Version 1.0 is being made available free of charge, CoolSoft, LLC provides technical support to registered users only on a best efforts basis. We will do our best to help you resolve your issue, but we cannot guaranty a solution.
We cannot respond to requests for support on the following:
· How-to questions or technical issues that are covered in the Users Manual, Release Notes or in our FAQ’s. For example, a question where it is obvious that the user has not taken the time to read the manual, FAQ’s or other resources and follow the instructions.
· Issues related to the Microsoft speech recognition engine, or issues with CoolInfo that are caused by the Microsoft speech recognition engine.
· Issues related to third party programs such as your web browser or programs you run with User Commands, or problems with CoolInfo caused by those programs.
· Questions from unregistered users. CoolInfo 1.0 is free, but users must register so we can determine usage for our sponsors. To get support, you need to provide your email address and a valid registration key for CoolInfo, and submit your request through the convenient on-line form in the Support section of or website.
· We cannot respond to requests for support that do not provide the required information that we need to solve your problem.
Support with the Microsoft Speech Recognition Engine
If you need help with the Microsoft Speech Recognition Engine or issues caused by the Microsoft engine, you can use the help resources in the Speech Properties dialog under the “Help” tab, (Startà Settingsà Control Panelà Speechà Other Tabà Help). You can also visit the speech section of the Microsoft website at http://www.microsoft.com/speech or you can contact Microsoft technical support directly.
Support on Third Party Software
If you need support with another program or issues caused by another program, use the help feature in that program, or contact the manufacturer’s technical support directly.
APPENDIX C
Examples for Creating User Commands in CoolInfo
The following are examples for creating typical user commands in CoolInfo:
User Command to Run a Program Registered with Windows (Notepad in this example)
User Command to Run a Program Not Registered with Windows (Winamp in this example)
To determine if an application is registered with Windows go to the command line (start, run) and enter the name of the application (for example “winword” or “notepad”). If the application starts, then it is registered with Windows and you can follow the first example above. Otherwise it is not, and you need to enter the full path to the application as in the second example in order for the User Command to work.
To insure accuracy, its best to use the browse button to the right of the Target field (labeled “Program” in the two examples above) to browse to the target application for your command.
User Command to Open a Webpage in the Default Browser
To insure accuracy, it is best to copy the website URL from your web browser and paste it into the Target field (labeled “Web site” in the example above).
Multi-Step User Command to Open a Webpage, Display the Page for 60 Seconds, and Return Focus to CoolInfo
When creating a multi-step User Commands, the Command field (the words you want to speak to run the User Command) must be identical for each step and are case sensitive.
Step 1
Step 2
Step 3
User Command to Open a Webpage in CoolInfo (CoolBrowse)
To insure accuracy, it is best to copy the website URL from your web browser and paste it into the Target field (labeled “Web site” in the example above).
Multi-Step User Command to Open a Webpage in CoolInfo (CoolBrowse), Pause While the Page Loads, and Read the Page)
When creating a multi-step User Commands, the Command field (the words you want to speak to run the User Command) must be identical for each step and are case sensitive.
Step 1
Step 2
Step 3
User Command to Open a File in the Default Application (an .mp3 music file in this example)
To insure accuracy, its best to use the browse button to the right of the Target field (labeled “Document” in the example above) to browse to the target file for your command.
User Command to Make the Computer Speak
Release Notes for CoolInfo™ Voice Recognition, Version 1.10
As of the January 21, 2007 release date, the there are no Release Notes for CoolInfo™ Voice Recognition, Version 1.10. Future release notes will be posted under the release notes section on the CoolSoftLLC.com support page. For additional information, please see the following section on Known Issues.
Known Issues for CoolInfo™ Voice Recognition, Version 1.10
As of the January 21, 2007 release date, the following known issues apply to CoolInfo™ Voice Recognition Version 1.10. Many of these items are related to functionality that is normal behavior for CoolInfo, and the discussion gives recommendations for dealing with them. Other issues may be addressed in future releases, so we recommend that you check for updates periodically using the “Check for Updates” button in the ”About” dialog or the “Check for Updates” selection from the Help menu.
The CoolInfo Install Takes a Long Time
This is normal on many systems. First of all, the SAPI 5.1 speech engine is a large file that takes time to unpack and setup. Second, if you are running anti-virus software, it may be scanning some of the files being installed - this can slow down the process. Third, installs are particularly slow on older systems (with slower processors or less than 256 megs of memory). Combine these three factors together on one system, and the install can take a long time (over five minutes).
If the install is taking a long time, please be patient and wait for the install to complete. Chances are that nothing is wrong and the install will finish normally. If you stop and start over again, it will just end up taking longer, so do not cancel and restart the install unless you are cretins the system has stopped responding.
Install Failures
CoolInfo is installed with the Wise Installer. There are two known issues with the installer which are described below. If you encounter one of these problems and the recommended solution does not work for you, then submit a technical support request in the support section of the www.coolosftllc.com website.
If the install hangs, it is likely that another program has installed a copy of UNWISE.EXE in the root of the C:\ drive. The recommended workaround is to look in C:\ for the file “UNWISE.EXE. If you find it rename the file to UNWISE.OLD (so you can rename it back to .EXE if another program ever needs it), then try the install again.
If you are installing the full version of CoolInfo after a previous install of the trial version, or if you are reinstalling CoolInfo without having uninstalled it first, you may get an error message that says: “The file 'C:\Program Files\CoolInfo\UNWISE.EXE' could not be opened…” If this happens the recommended workaround is to exit the install, and start the install over. This second time you start the install, it should run through to completion.
Startup and Shutdown Related
Crash After Default Speech Properties Warning Dialog
If you are using the default speech recognition profile, CoolInfo prompts you with a dialog reminding you to create and train a speech recognition profile, and offers you the option to go to Speech Properties to do this training. If you enter Speech Properties, the startup of CoolInfo is suspended, and resumes when you exit Speech Properties. This delay in the startup of CoolInfo may cause the program to crash. If this happens, it does not affect the training you did in Speech Properties. Restart CoolInfo and it will function normally.
Shutdown
If you close CoolInfo while it is reading, CoolInfo may remain active in the background. If this happens, go to the task manager (press “CTRL + ALT + DEL) and click on the task manager button. If CoolInfo appears in either the Applications or Processes tab, highlight CoolInfo and click on the End Task/Process button in the respective tab
User Command Issues
Focus Command Step Does Not Always Work
If you create a multi-step user command, the command you speak must be the same for each step, and only the tool tip for the first command in the sequence will be displayed. You can use the move buttons in the User Commands Dialog to adjust the sequence of multi-step user commands. If one of the steps in a multi-step user command is Focus (the equivalent of the speech command “Click Focus”), this may cause a race condition where the Focus command wins the race and is executed before the other steps in the command. This gives the appearance that the focus command failed to execute, when in reality it was processed before the other commands in the sequence and CoolInfo was then covered by the other program(s) in the command sequence. To avoid this problem, the Focus step in a multi-step user command should be the last command in the sequence, and should be preceded by a “Sleep” command with a value that allows enough time for the other commands in the sequence to be processed before the Focus command is executed. For example, the command of “start my favorite programs” can execute the following commands:
Browse = www.cnn.com
Start = notepad.exe
Sleep = 10
Focus
This results in ww.cnn.com opening in the default browser, and Notepad starting, both of which will open on top of CoolInfo. The sleep command pauses for 10 seconds (allowing these programs to open), and then executes the Focus command which brings CoolInfo to the foreground, achieving the desired result.
The Command Step Following a Browse Command Step Does Not Always Work
If you are creating multiple step user commands, a sleep command needs to follow a browse command, or the command(s) that follow the browse command may not be executed. The time of sleep command following a browse command depends on speed of internet connection, and you need to experiment to find a sleep interval that works best for your system and connection speed. Note that a single step browse command, or a browse command that is the last command in a multiple step user command do not require a sleep command.
Background Noise and the Create User Commands Dialog
On some systems and in some environments, the Create User Commands dialog can be highly sensitive to background noise, causing it to close or change tabs after creating a User Command. If this happens on your system, simply turn the microphone off and user your mouse to navigate to the Create User Commands dialog (Settings button, User Commands Tab, New).
What Can I Say? Dialog Issues
What Can I Say? Dialog Opens Randomly
There is a known issue where background noise may cause the What Can I Say? dialog to open randomly. Likewise, background noise may cause some user commands, such as commands to browse webpages to be executed. To avoid this, turn the microphone off when you are not actively using CoolInfo.
Opening the “What Can I Say?” Dialog In Both CoolInfo and CoolInfo at the Same Time
If you open the “What Can I Say” dialog in both CoolInfo and CoolInfo, they are likely to open in the same place, so that one superimposes on the other. This makes it possible to confuse the “What Can I Say?” dialog of the two programs. If you are running both CoolInfo and CoolInfo together, it is best to close the What Can I Say dialog in one program before opening it in the other.
Tool Tips Missing from the “What Can I Say?” Dialog
When you place the cursor over a command in the “What Can I Say?” dialog, a tool tip should appear indicating the speech command for that command. After some period of use, the tool tips in the “What Can I Say?” dialog may stop appearing. To solve this problem, simply turn the microphone off and back on again.
Turning the Microphone Off While Speaking
If you turn the microphone off while you are speaking, the speech engine will stop recognition but the microphone button will not respond until you stop speaking. This occurs because the speech engine does not release the microphone while it is receiving input. To avoid this problem, stop speaking when you turn the microphone off.
Language Settings and CoolInfo
When using CoolInfo with the system language set to other than US ENGLISH, some unwanted character translation may occur. Using CoolInfo with other than US ENGLISH is not recommended.
The Microphone and Text to Speech
When you use any of the “Read” commands, CoolInfo turns the microphone off while it is reading your selection. This prevents the speech recognition engine from trying to recognize the words that are being read. When CoolInfo is finished reading, or when you use the “stop reading” button, the microphone is turned on again. If you use the Settings button while CoolInfo is reading, the microphone does not come back on when reading is finished, and you need to click on the Microphone button to turn it back on.
Running Two Copies of CoolInfo
When starting, CoolInfo checks to see if another copy is running, and if so it does not allow the second copy to start. This check does not work if a second copy of CoolInfo is launched while the first copy is still starting, because it is not fully initialized.
Also, in configurations where the default speech recognition profile is selected in Speech Properties, CoolInfo displays a dialog to prompt you to train your own speech recognition profile, and suspends the startup process until the user cancels out of the dialog, or enters and exits Speech Properties. Under these conditions, while startup is suspended it is possible to start a second copy of CoolInfo, although we do not recommend or support this. Running more than one copy of CoolInfo at one time may cause unusual behavior or a crash in one or both copies. This is not recommended and not supported.