
Making it FUN and EASY to use
SPEECH with your COMPUTER!
CoolSoft, LLC
SpeakToText 2.5 Speech Recognition
User Manual (Version 2.51)
INTRODUCTION
SpeakToText™ 2.5 Speech Recognition, Version 2.51 is a powerful speech recognition program that is fun, easy to use and affordable. You can dictate text directly into SpeakToText and copy it into Microsoft Word or save it to a text file entirely by speech. You can also use SpeakToText in Advanced Mode to dictate directly into other applications. Write documents, create and send chat messages or emails just by speaking into your computer. SpeakToText can also read documents to you and recognize .wav files that you create on your computer or personal recorder. SpeakToText Speech Recognition Version 2.5 includes many improvements, new features and commands:
· User transparent enhancements to the speech recognition layer, update feature, audio file processing and management of the SAPI speech recognition engine.
· A system tray icon and corresponding right click menu permit SpeakToText to be used in Advanced Mode while fully minimized in the system tray.
· Enhancements to the “Text to Speech” capabilities including “Pause” and “Resume” reading buttons.
· A Green/Red indicator in the lower right corner of the interface shows green when SpeakToText has active control of the SAPI speech recognition engine.
· Additional speech commands including “scroll up”, “scroll down” and “tab” functions. “Caps Lock” speech command now functions in both Basic and Advanced modes.
· “Start CoolInfo” button & speech command that launches CoolInfo from SpeakToText. CoolInfo is a sponsored* CoolSoft speech recognition program that lets users retrieve and read information from the Internet by speech, create their own speech commands, and much more. CoolInfo will be available for download on the www.CoolSoftLLC.com website free of charge starting in the fall of 2006.
· An “Autosend chat messages” feature lets users send text of their speech when using voice chat programs such as Skype.
· New - User Commands can now process commands that contain command syntax for other programs. For example, you can create your own speech commands to run modules in a home automation system such as the X10 Active Home Pro System.
Other SpeakToText features include:
· Advanced Mode – Just tell SpeakToText to go into Advanced Mode, and you can dictate into almost any application that accepts text. And you can easily switch between applications just by placing the cursor in the program where you want your dictation to appear.
· Text-To-Speech – SpeakToText will read your dictation back to you with a simple speech command. SpeakToText can read emails, documents and webpages too.
· User Commands – You can create your own speech commands to start programs, browse webpages, play videos, music and much more. You can even make your computer talk back to you. Just say the command you created and SpeakToText will run the command for you without touching your mouse or keyboard!
· A “Send Message” feature makes it easy to chat with all your friends without using your hands! You can create and send your message entirely by speech in MSN Messenger, AOL Instant Messenger, Yahoo Messenger, ICQ and PalTalk. You can even compose and send emails by speech in Outlook, Outlook Express and Netscape Mail.
· A “.wav file” feature that lets you convert .wav files that you create into text.
· An ”update” feature checks for and installs SpeakToText updates as they become available.
· Speech enabled dialog boxes, tool tips and a “What Can I Say?” feature that make it easy for you to use SpeakToText. The Manual, Quick Start Guide and a “how to” video on setting up and training speech recognition are easily accessible from the help menu.
*CoolSoft, LLC respects your privacy. CoolInfo sponsor messages are delivered only within CoolInfo, and only when you choose to run it. CoolInfo does not collect any personal information from your computer, and does not install any adware or spyware. When you close CoolInfo, it remains closed until you start it again.
© Copyright 2002-2006. CoolSoft, LLC – All rights reserved.
SpeakToText, CoolInfo and CoolSoft are trademarks and the sole and exclusive property of CoolSoft, LLC
SpeakToText 2.5, Version 2.51
Table of Contents
Do You Already Have SAPI Speech Recognition Installed?
Setting Up and Training the Microsoft SAPI 5.1 Speech Recognition Engine
Setting Up and Configuring Your Microphone
Training the Microsoft SAPI Speech Recognition Engine
Other Settings under the Speech Recognition Tab
Training and Speech Recognition Engine Accuracy
Tips for Achieving the Best Possible Speech Recognition
SpeakToText Trial Startup Dialog
Listening and Microphone On-Off
Overview of SpeakToText Basic Terminology
Speech Recognition Engine Functionality
The SpeakToText Interface in Basic Mode
The SpeakToText Interface in Advanced Mode.
Taskbar Icon, System Tray Icon and Right Click Menu
Command and Control Speech Commands
Text to Speech (Read) Commands
Scroll Up and Scroll Down Speech Commands
Right Click Menu (SpeakToText dictation dialog in Basic Mode)
Using Speech with SpeakToText Message Dialogs
Converting Audio Files to Text
Solutions for Poor Recognition Accuracy
Today My Voice is not as Clear
SpeakToText Speech Commands List
SpeakToText 2.5 Speech Commands – Basic Mode
SpeakToText 2.5 Speech Commands – Advanced Mode
SpeakToText 2.5 Commands – For Microphone On And Listening Off
CoolSoft, LLC Technical Support Policy
Examples for Creating User Commands in SpeakToText
Using SpeakToText User Commands to Operate X10 Modules in Active Home Pro by Speech
Known Issues for SpeakToText™ 2.5 Speech Recognition – Version 2.51
Release Notes for SpeakToText™ 2.5 Speech Recognition - Version 2.51
SpeakToText™ 2.5 Speech Recognition Quick Reference Guide - Version 2.51
GETTING STARTED
System Requirements
System requirements for SpeakToText are:
|
Operating System: |
Windows 2000 or Windows XP (Home or Professional) with all the latest updates. This version of SpeakToText is not compatible with or supported in Windows Vista. |
|
Memory: |
At least 256 MB RAM, 512 MB or better preferred. |
|
System Processor: |
A PC with a 500mhz or greater, Pentium III, Pentium IV or Pentium compatible processor. |
|
Disk Space: |
100 MB free disk space. |
|
Software: |
Microsoft SAPI 5.1 Speech Recognition Engine* |
|
Hardware: |
A good quality, noise-cancellation microphone. A good quality, “SoundBlaster” compatible sound card. |
|
User: |
About 15 to 30 minutes of your time to install SpeakToText and the Microsoft SAPI 5.1 speech recognition engine* and train your recognition profile to recognize your voice. |
*Available by redistribution with SpeakToText, with other CoolSoft or with third party products that include the SAPI 5.1 speech recognition engine, or directly from Microsoft. Included with Office XP and Office 2003.
Installing SpeakToText
Downloaded Program Installation
To install the program, simply double click on the installation file “SpeakToText2_0Install.exe” (or “SpeakToText2_0TrialInstall.exe” if you are installing the trial version), and follow the install screen instructions.
Installing from CD
Insert the CD. From the main screen, click on “Install” and follow the instructions.
If you purchased a registration key, both downloaded and CD installations of SpeakToText include the speech recognition engine, which is not included in the trial version. Installation is a two-step process and the speech recognition engine installation step may take a while. Please be patient. See the release notes for more details about the speech recognition engine.
Trial Version
If you downloaded the trial version of SpeakToText, the speech recognition engine is not included. Unless you have SAPI 5.0 (Microsoft English Recognizer Version 5.0) or greater installed on your computer, you will not be able to use speech with the trial version. You will be able to try many of the program’s features with your mouse and keyboard - this will give you a good idea of the functionality of the speech enabled version. Examples of other programs which include SAPI are Speak-to-Mail™ 1.0, Microsoft Office XP, and Microsoft Office 2003. If you have already installed one of these programs, the trial version should be speech enabled.
What Do I Do Next?
After installing SpeakToText, there are a several things you need to do:
If this is your first time using SAPI speech recognition, your first three steps are to 1) create a personal speech recognition profile; 2) configure your microphone; and 3) train the speech recognition engine to recognize your voice. This is done from the Speech Properties dialog which is accessed from the Control Panel or the Speech Properties button in SpeakToText. We cannot over emphasize the importance of these three steps – they are essential for success with speech. This is done in “Speech Properties” which is part of the SAPI Speech Recognition Engine. “Speech Properties” can be accessed from the Windows Control Panel (StartàSettingsàControl Panel), or by the Speech Properties menu item button or by saying “click speech properties,” “train speech profile” or “configure microphone” from SpeakToText.
If you already had Microsoft SAPI 5.0 or greater installed on your computer and had already trained the speech engine before installing SpeakToText, it is not necessary to create a new personal speech profile. . However, you should check for and select the latest version of SAPI speech recognition. How to do this is explained in the following section.
Do You Already Have SAPI Speech Recognition Installed?
Check if you have the Microsoft SAPI speech recognition engine installed on your computer. SpeakToText will work with SAPI versions 5.0 (comes with Office XP), SAPI 5.1 (comes with SpeakToText, Speak-to-Mail, CoolInfo or other applications that include a redistribution of the Microsoft SAPI 5.1 speech recognition engine) or SAPI 6.1 (comes with Office 2003).
If you are using the trial version of SpeakToText, you must have Microsoft SAPI speech recognition engines from one of the above sources installed on your computer in order to see the full potential of SpeakToText. Otherwise, using the buttons and menu items with your mouse and keyboard, you will only preview the program highlights and menus,.
If you are installing the full version of SpeakToText, the installation program will automatically install the Microsoft SAPI Version 5.1, permitting full functionality of SpeakToText.
(Step 1) -- Check if you have the Microsoft speech recognition engine:
1. Open the control panel (StartàSettingsàControl Panel).
Look for the Speech icon shown below. 
2. If you see the Speech icon, double click on it and you will see the Speech Properties dialog.
Note: If the Speech icon is not present, then you do not have the speech recognition engine on your computer and you can skip the rest of this section.
(Step 2) -- Check the version of the Microsoft speech recognition engine:
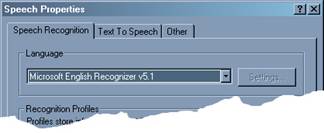
If the version of the Microsoft speech recognition engine is “Microsoft English Recognizer v5.0, v5.1 or v6.1” as shown in the “Language” section of the Speech Properties dialog, then you already have one of the correct versions of the Microsoft SAPI speech recognition engine, and you should select the highest version as the default.
NOTE: THERE IS A DIFFERENCE BETWEEN THE ENGLISH RECOGNIZER v5.0 THAT COMES WITH OFFICE XP, ENGLISH RECOGNIZER v5.1 THAT COMES WITH SpeakToText, AND ENGLISH RECOGNIZER v6.1 THAT COMES WITH OFFICE 2003. SpeakToText FUNCTIONS WITH ALL THREE OF THE ABOVE REFERENCED VERSIONS OF SAPI, AND YOU CAN SWITCH VERSIONS WITHOUT HAVING TO RETRAIN YOUR SPEECH RECOGNITION PROFILE. USING THE MOST RECENT VERSION OF SAPI WILL GIVE YOU THE BEST PERFORMANCE. ACCORDINGLY, IF YOU HAVE ENGLISH RECOGNIZER v5.0, YOU SHOULD SWITCH TO THE v5.1 THAT COMES WITH SpeakToText. IF YOU HAVE IT, THE ENGLISH RECOGNIZER v6.1, WHICH IS INCLUDED WITH MS OFFICE 2003 IS PREFERABLE TO THE ENGLISH RECOGNIZER v5.1 THAT IS INSTALLED WITH SpeakToText.
Note: If you access the Speech Properties dialog from SpeakToText and change the version of SAPI, SpeakToText needs to be closed and restarted in order for the changes to take effect.
Setting Up and Training the Microsoft SAPI 5.1 Speech Recognition Engine
Start “Speech Properties”
Go
to the Windows Control Panel (StartàSettingsàControl Panel). Find and double click the “Speech”
icon. To edit these settings after SpeakToText is installed, within
SpeakToText, click on the Speech Properties button, or say “train speech
profile” or “configure microphone.” You can also say “click speech
properties.”
The “Speech Properties” dialog appears:
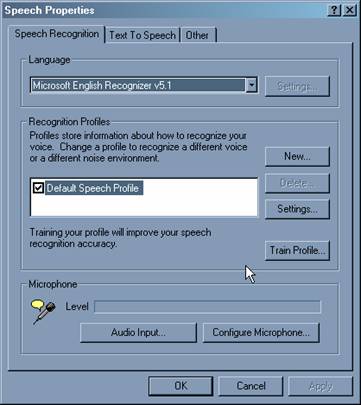
Setup your Recognition Profile
We recommend not using the “Default Speech Profile,” but rather creating a new speech recognition profile with a unique name – especially if there will be others using speech with this computer. To create a new profile, click on “New…” and follow the prompts.
After creating your new profile, click “Next” to configure your microphone and train your profile (do not click “finish”). The next two sections are extremely important in achieving good speech recognition and the highest possible level of accuracy.
Setting Up and Configuring Your Microphone
Microphone Quality
In selecting the correct microphone headset, consider: 1) Sound in the environment (a noise canceling microphone is required) and 2) Fit and style (Will you be comfortable?). Cost is usually not a factor. A less expensive microphone may fit your needs better than a more costly one. There are many suppliers of high quality speech recognition microphones. Please check our website where you can purchase a variety of recommended headset microphones.
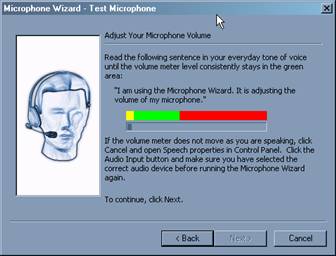
Configure the Microphone
To achieve the best speech recognition accuracy, we recommend configuring your microphone each time before beginning a speech recognition session. This can be done easily from SpeakToText by saying “Configure Microphone,” which opens the Speech Properties dialog where you can do this.
Select Audio Input
The “Audio Input” should be set to your system’s default audio device. If your system has more than one sound card, you can use this button to select a new audio input device. If you are not sure which is the correct device, please see the user manual for your computer or contact technical support for the manufacturer of your computer.
Training the Microsoft SAPI Speech Recognition Engine
You can access the Speech Properties dialog from
SpeakToText by clicking on the Speech Properties button ![]() or saying “train
speech profile.”
or saying “train
speech profile.”
The installation of SpeakToText now includes a short and informative video on setting up and training a speech recognition profile for the Microsoft SAPI speech recognition engine. This video can be accessed from the SpeakToText Help Menu or from the Windows Program menu by clicking Start buttonàProgramsàSpeakToTextàPlay video “How to Setup and Train SAPI Speech Recognition” as shown below.
![]()
Training Overview
Although the Microsoft Speech Recognition Engine is much better than previous speech engines, it still needs a sample of each user’s speech to correctly convert sound into written words. Each speaker and each computer audio system has unique characteristics, which must be sampled and used to adjust the engine. This process is called “training.”
Each user must setup and train their own individual speech recognition profile. The initial setup and training of your speech recognition profile typically takes less than 15 minutes. During this process, speak in a normal and even tone of voice and insure that the microphone is properly configured and positioned about one inch from your mouth.
Start Training
To start training, click on the “Train Profile” button from the Speech Recognition tab and follow the instructions. When you first establish your profile, the training session reading excerpt is chosen for you. If this is not the first time you have trained this profile, you will be given a choice of literature to read aloud to your computer for training.
Select a title and click on “Next>.” Read the selection and follow the instructions to complete your training session.
Note: If it has been some time since the initial training of your profile, we recommend using the “Introduction to Microsoft Speech Recognition” session to re-familiarize yourself with how training works.
If you want to take a break, click on the “Pause” button. Training will be paused and the “Pause” button will change to “Resume.” When you are ready to start reading again, click the “Resume” button.
As you complete each reading excerpt, you will have the option to select “Finish” or “More Training.”
IMPORTANT: Speech recognition accuracy will improve with additional training of the Speech Recognition Engine. In testing, we found substantial improvement in accuracy between the second and third training. After five sessions, the recognition accuracy is even greater. We suggest reading all of the available training selections to your computer in order to realize optimum speech recognition accuracy.
Other Settings under the Speech Recognition Tab
Language
The language must be set to “Microsoft English Recognizer (v5.0, v5.1 or v6.1)” in order for SpeakToText to work properly. Do not change the speech recognition engine, except to select a more recent version of “Microsoft English Recognizer” if the default is a an older version. If you choose a speech recognition engine other than one of the three SAPI versions referenced above, SpeakToText will not work properly.
Recognition Profiles
New
Click on the “New” button to create a new recognition profile.
Delete
Click on the “Delete” button to delete the profile that is highlighted.
Selecting a Profile
Put a check mark next to the profile you want to use. If more than one user will be using SpeakToText on your computer, each user should go to Speech Properties and check to make certain his or her profile is selected before using the program.
Settings
We do not recommend that you change the “Settings…” for your profile. In most cases, the default settings will yield the best speech recognition.
If, after several “trainings” and insuring your microphone is configured properly, you still have difficulty with the accuracy of your speech recognition, you may want to try adjusting the “Accuracy vs. Recognition Response Time” or the “Pronunciation Sensitivity.” These settings can improve accuracy in some cases.
Leave the “Background Adaptation” enabled (checked), as this allows you to continuously train the speech engine. With use, the background adaptation feature will help improve speech recognition accuracy. For more information, see Notes on Background Adaptation, below.
If you have more questions about these settings we suggest you contact Microsoft technical support.
Help
Microsoft provides complete details about speech recognition in their Help library. To learn more about the using the Microsoft speech recognition engine, from to the Speech Properties dialog box, choose the “Other” tab and select “Help.” Additional help may also be found at the Microsoft website: http://www.microsoft.com/speech
The speech engine can “learn” from corrections you make to your dictation, but only if your corrections are done within SpeakToText. These corrections must also be done by selecting “alternates word” or “series of words” from the right click menu. Corrections typed into SpeakToText, or made in a target application while in Advanced Mode, will not provide training to your speech recognition profile. To make corrections from the right click menu, right click on a word, or highlight a short series of words and right click, to display alternates for that word or series of words. Selecting one of the alternates (if there is one) will replace the word or words in SpeakToText, and will have the effect of training your speech recognition profile. Note that not all words have alternates. Alternates are displayed only when the speech recognition engine detected more than one possible word or phrase with a high enough score to be probable. Also note that “Background Adaptation” must be enabled for your speech recognition profile to learn from corrections made in the right click menu. To enable Background Adaptation, go to Speech Properties, select your recognition profile, click the settings button and make sure the “Background Adaptation” box is checked.
Training and Speech Recognition Engine Accuracy
The accuracy of SAPI speech recognition will improve each time you train the speech recognition engine. Time invested in training is well worth the return in improved accuracy. When training the speech engine or using SpeakToText, it is important that you are in a quiet environment with minimal background noise, and that you always speak clearly into the microphone in order to achieve the most accurate possible recognition.
Training Words
If the speech recognition engine consistently fails to recognize your pronunciation of certain words, you can train the Microsoft Speech Recognition Engine to recognize how you say that particular word by using the “Train Word” feature. To open the Train Word dialog, use the “click train word” voice command or click on <Tools> <Train Word> in the SpeakToText menu.
Type the correct spelling of the word you want to train, then click the “Record pronunciation” button and pronounce the word. After the computer recognizes your pronunciation of the word, it will be added to a custom dictionary for your recognition profile. This will change the speech engine’s recognition of that word when you say it.
To see the power of training words, open the Train Word dialog and type in the following: <SpeakToText(tm)>. Then say “speak to text” when you click the “Record pronunciation” button.
Close the Train Word dialog and then speak the words “speak to text” again and see what happens.
Tip: The Train Word feature can be used with names that are not common, or with names that are misrecognized as other names by the speech engine. An example is differentiating the names Tania and Tonya. If the speech recognition engine recognizes Tonya when you want Tania, try training the spelling you want (or the spelling you don’t want) with different pronunciations to distinguish them. Finding a pronunciation that works can be a matter of trial and error, and to succeed you might have to use a pronunciation that varies from how you pronounce the name normally. In our testing during development, the name “Tania” was a challenge. We had to record the pronunciation with an alias as “my Tania” in order to succeed at getting the speech recognition engine to recognize “Tania.” The Train Word feature can also be used with names that you want to abbreviate. For example, the name Wilfred might be abbreviated as “Wil” and if you say “wil” the speech recognition engine is likely to recognize “will.” But you can train the speech engine to write “Wil” when you say “Wilfred” or “Willy.”
Note: The Train Word dialog is part of the speech recognition engine and is not speech enabled (except for recording a pronunciation). You must use the mouse and keyboard while you are in this dialog. Speech recognition resumes when you close the Train Word dialog and return to SpeakToText.
Tips for Achieving the Best Possible Speech Recognition
While speech recognition technology has advanced dramatically over the past few years, the technology is still far from perfect. Even the best and most expensive speech recognition systems rarely achieve accuracy greater than 98%. Following these tips will help you get the most out of this or any speech recognition program.
Although the Microsoft speech engine performs well, it is not reasonable to expect 100% accuracy. This is not a flaw in SpeakToText or the SAPI 5.1 speech engine, but rather is a shortcoming of speech recognition technology in general. We believe that the Microsoft SAPI 5.1 speech engine delivers comparable performance to other commercially available speech recognition engines, and if used correctly and with good equipment, it will deliver excellent performance.
Here are some tips on getting the best possible speech recognition:
Microphone – Use a high quality, noise-canceling microphone. Also, make sure your microphone is setup properly in “Speech Properties.”
Training - Train the speech engine to recognize your voice at least several times. More training greatly improves speech recognition.
Training Words – If you consistently get incorrect recognition of certain words, use the “Train Word” function in SpeakToText to enhance recognition of problem words.
Using Speech - The more speech recognition is used on your computer, the more your speech recognition accuracy will improve.
Environment - Using speech recognition in a quiet environment improves speech recognition accuracy.
Hardware - Faster computer processors and ample memory (256k sufficient, 512k or more is desirable) enables the speech engine to process speech more quickly and efficiently. A high quality, SoundBlaster compatible, input sound card is also an important factor to good recognition.
Commitment - Users must initially invest the necessary time to set-up and train their own speech recognition profile. We cannot over-emphasize the importance of training your speech recognition profile.
Speak clearly - When using SpeakToText, speak clearly into the microphone. Make certain your microphone position is consistent both in training and in use. We recommend the microphone be placed about one inch from your mouth.
Technical Support on the Microsoft SAPI Speech Recognition Engine
The redistribution of the SAPI 5.1 speech recognition engine, together with SAPI 5.0 and 6.1 available in Microsoft Office products, are Microsoft products that we cannot support. The Microsoft speech recognition engine is designed to enable you to use speech recognition with certain Microsoft programs and other third party software, like SpeakToText, and in most cases should not require technical support. However, if you do need technical support on issues with the Microsoft SAPI speech recognition engine go to the speech section of the Microsoft website – http://www.microsoft.com/speech. You can also contact Microsoft technical support.
Starting SpeakToText
To start SpeakToText, either click the SpeakToText icon on your desktop or use the Windows Program menu (StartàProgramsàSpeakToText).
![]()
Trial versions and unregistered versions of SpeakToText cause the SpeakToText trial startup dialog to open before the program starts. SpeakToText will also display three banner ads when running in trial mode: one in the startup dialog, a second when the program is launching and a third in the program window. The trial and unregistered versions of SpeakToText have some functionality limitations. These are explained under “Trial Version Limitations,” below.
Program registration will eliminate the trial startup dialog and banners from appearing when you launch SpeakToText, and the trial version limitations are removed.
SpeakToText Trial Startup Dialog
This dialog displays only if you are using a trial version or unregistered copy of SpeakToText. It tells you how many days you have left in your trial period and offers six choices:
Buy – Opens a window in your default web browser and takes you to the CoolSoft, LLC store page. Your shopping cart will contain one unit of SpeakToText. To complete your purchase, please follow the instructions and provide the required information. If you have an anti spam filter, please make sure its settings will allow you to receive email from CoolSoftLLC.com. Otherwise you will not receive the email we send with your user information and registration key. After buying your license and registration key for SpeakToText, you may also want to continue shopping to see our other products, or to purchase other items such as a microphone. .
30 Day Trial – Lets you continue using SpeakToText in trial mode. The trial button will be unavailable after 30 days, and you will no longer be able to start the SpeakToText until the program is registered.
Register - Opens the registration dialog where you can type your user information and registration key. The full version of SpeakToText functions as a trial version until you enter your user information and registration key. The user information and registration key you must input into this dialog are case sensitive. You must enter this information exactly as it appears in the confirmation email you receive when you purchased your license and registration key for SpeakToText. We recommend you cut-and-paste your registration key from this confirmation email. For more information on the registration process, see the section on Registering SpeakToText, below.
Cancel - Exits without starting the program.
Personalized Greeting – You can put your name or any other text here - this is how SpeakToText will greet you when you start the program.
Enable Personalized Greeting Checkbox - Check this box to enable the greeting. Uncheck it to disable the greeting. The program default is checked.
Trial Version Limitations:
· 30 day life
· 1000 character limit
· “Send Message” embeds the following signature in the target application before sending your message: “Copied by SpeakToText. Get your copy at: http://www.coolsoftllc.com/store.asp?product=9”
· Updates are not available for trial versions.
· The Microsoft SAPI v.5.1 Speech Recognition Engine is not included with the trial version. To use speech recognition with the trial version, you must already have a Microsoft SAPI Speech Recognition Engine installed on your computer. Otherwise, you can still try the speech-to-text features with your mouse and keyboard.
Note: The trial and unregistered versions of SpeakToText get their banner content from our website. If you are not connected to the Internet when you start the SpeakToText in trial mode, the appearance of the trial dialog will be delayed for a short time while SpeakToText waits for an Internet connection to get the first banner. If an Internet connection is not found after this brief pause, SpeakToText will start and display the banners which are installed with the program.
Registering SpeakToText
Obtaining a Registration Key
If you have purchased a license and registration key for SpeakToText from the CoolSoft, LLC website, you will receive a purchase confirmation email followed by a second email with your registration key. If you have an anti spam filter, please make sure the settings allow you to receive email from CoolSoftLLC.com. Otherwise you will not receive the email we send with your user information and registration key.
If you obtained your copy of SpeakToText on CD from a third party reseller, there is an activation key on the back of the CD. You need to go to www.CoolSoftLLC.com/Register and use this activation key to sign up for your registration key. Your SpeakToText registration key will be emailed within 24 hours. Meanwhile, you can continue using SpeakToText in trial mode.
If you obtained your copy of SpeakToText by download from a third party reseller, you received an activation key with your purchase. You need to go to www.CoolSoftLLC.com/CoolRegister and use this activation key to sign up for your registration key. Your SpeakToText registration key will be emailed within 24 hours. Meanwhile, you can continue using SpeakToText in trial mode.
An unregistered version of SpeakToText may be converted to a full version by either visiting our website, http://www.CoolSoftLLC.com/, or by clicking on the “Buy” button on the start-up dialog as explained above.
Note: If you are using the trial version without speech recognition enabled, and you do not have Microsoft SAPI v.5.0 or v6.1 as part of Microsoft Office XP or 2003, then you will need to download and install the full version of SpeakToText in order to install the SAPI 5.1 speech recognition engine on your computer. When you install the full speech enabled version of SpeakToText, the trial version will be uninstalled first, but SpeakToText will retain any settings that you configured in the trial version.
Before you Register
Before you start to register, your computer must be connected to the Internet. If you are not connected to the Internet, or if the connection is broken before the process is completed, you will not be able to complete the registration process, and you will have to try again after connecting to the Internet.
Entering Your User Information and Registration Key
From the SpeakToText Trial Startup Dialog (shown above), click on the “Register” button. The SpeakToText Registration Dialog will appear (shown below). Enter your user information and registration key exactly as it appears in the email you received, and click “Register” in the lower right hand corner.
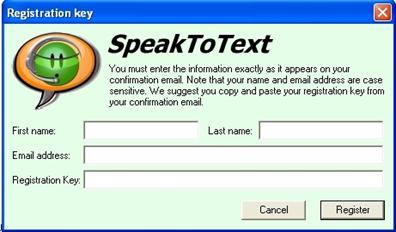
IMPORTANT: Your user information, including your first name, last name, email address and your registration key are case sensitive and must be entered exactly as they appear in the confirmation email you received when you purchased your license and registration key. Hint: Cut-and-paste your registration key from the confirmation email.
What Happens When You Click Register
SpeakToText sends your registration key and email address (as you have entered it in the registration dialog) to our server. If your key was validly obtained and has not been used five times, your registration is validated and completes. If you purchased SpeakToText from one of our sponsors, the sponsor ID is also provided to our server.
Note: We do not take any other information from your computer in the registration process.
Note: According to your license for SpeakToText, your registration key can be used up to five times. Each time you register, your registration is recorded and if the number of previous registrations is less than the number allowed by your license, your registration is validated (permitted). If the number of registrations for your registration key exceeds the number of registrations allowed by your license, you will not be able to complete the registration and you will have to purchase another license and registration key.
COOLSOFT, LLC PRIVACY POLICY FOR REGISTERING SPEAKTOTEXT – During the SpeakToText registration process, CoolSoft does not gather or send any personal information from your computer other than the information you already provided to CoolSoft when you purchased your license, your registration key itself, and the sponsor information (if you obtained your copy of SpeakToText from one of our CoolSoft sponsors).
Note: After you register SpeakToText, the program will be banner free and the Startup Dialog will no longer appear. To change your greeting options after registering, use the “Greeting” tab in the SpeakToText settings. To open Settings by speech, say “click settings.” You can also access Settings from the SpeakToText Tools menu or by clicking on the “Settings” button. Once you complete the registration, the trial version limitation of 1,000 characters and the signature file that SpeakToText inserts when you use the “Send Message” command are removed. The update feature in the “About” dialog is also enabled.
USING SpeakToText
General Operation
Listening and Microphone On-Off
The default settings when SpeakToText starts are “microphone on” and “listening off.” Essentially, SpeakToText is muted to prevent SpeakToText from recognizing background noise and conversations until you are ready to dictate. To activate listening, say “start listening” or “wake up.” To turn off listening, say “stop listening” or “go to sleep.” You can also use the start/stop listening buttons. The Stop/Start Listening buttons are shown below.
![]()
![]()
Listening Off Listening On
Stop Listening Button Depressed Stop Listening Button Raised
Start Listening Button Raised Start Listening Button Depressed
Note: Some users may notice that the Start/Stop listening commands act to toggle the listening mode. With some speech recognition profiles, the speech recognition engine misrecognizes these commands, and this effect can vary between users and systems. For this reason, we created the alternative “wake up” and “go to sleep” speech commands, which perform the same functions.
To turn the microphone off: Say “microphone off” or click the microphone button.
![]()
![]()
Microphone On Microphone Off
Button Depressed Button Raised
Note: Once the microphone is turned off, you will need to click on the microphone button to turn it back on (it cannot hear you when it is turned off). However, you can toggle between listening on/off with speech. We also recommend that you “stop listening” or turn the microphone off when you are not using SpeakToText. For example, answering the phone or engaging in conversation with a co-worker with SpeakToText listening is comparable to leaning on the keyboard, and will produce similar results.
SpeakToText may be
started with “listening on.” Click the “General” tab under SpeakToText
“Settings.” To get to SpeakToText Settings, say “click settings” or click on
the
”settings” button.
Overview of SpeakToText Basic Terminology
Before using SpeakToText, read this section to become familiar with the terminology used by the program. The main purpose of SpeakToText is to use speech recognition to input text by speech into SpeakToText or into other applications. When SpeakToText is being used with another application, that application is referred to as the Target Application. SpeakToText works with the Microsoft speech recognition engine. When you speak, your speech is processed by the speech recognition engine, which sends the recognized text to SpeakToText, and when in Advanced Mode, into a Target Application.
Advanced Mode
When using SpeakToText in Advanced Mode, the dictation area of SpeakToText will close and the dictated text will appear in the Target Application where you have placed the cursor. The cursor must be placed in the Target Application in the same location as you would place it if you were typing (at the insertion point). It is not sufficient to just click on the Target Application. Once in Advanced Mode, you can minimize SpeakToText to the taskbar if desired. Use the “click minimize” speech command to minimize SpeakToText, and the “click focus” speech command to bring it back.

Target Application
In Advanced Mode, this is the application where you have placed the cursor. In order for SpeakToText to work in Advanced Mode, the area of the application where you have placed the cursor must be able to accept input from the keyboard. Just use your mouse to click where you would normally type.
Phrase or Utterance
A phrase or utterance is a string of text recognized by the speech recognition engine. If you speak a short phrase or sentence, it will usually be recognized as a single phrase. If you speak a long sentence or paragraph, it may be recognized as multiple phrases, which may or may not be complete sentences. Accordingly, commands such as “Scratch Last” may not always act on the entire block of text you have dictated.
Spoken Text vs. Reformatted Text
SpeakToText displays two types of text: “spoken” text and “reformatted” text. Reformatted text is spoken text that has been changed by SpeakToText or the speech recognition engine. For example, the speech recognition engine reformats the word “mister” to “Mr.” Another example is the “cap all text” command in SpeakToText which capitalizes all letters in the selected text. In both examples, the output is different from what was spoken. Using the following sentence as an example:
“It is the right thing to do to write a letter of apology to Mr. Wright.”
When this sentence is spoken, this is what the speech engine hears:
“it is the right thing to do to write a letter of apology to mister wright period”
The words “mister” and “period” are reformatted to “Mr.” and “.”
Some speech commands do not work with reformatted text because the text has been changed from what was originally spoken. In the above example, when you use the “select last sentence” command, SpeakToText will only select up to the word “Wright.” because the logic used to select the last sentence looks for the next period preceding the words immediately to the left of the cursor, ignoring the first period if there are no words between it and cursor. This results in “Mr.” being determined as the end of the last sentence, and the “W” in “Wright” is selected as the beginning of the last sentence.
Note: Text placed into an application from Advanced Mode (reformatted or not) is no longer under the control of SpeakToText and must be managed in the Target Application. As a result, some commands that SpeakToText uses to reformat text in basic mode (like “cap all text” are not available in Advanced Mode. The same applies to other commands, like “select” commands which are also not available in Advanced Mode. If you need to use these commands, it is best to dictate your text within SpeakToText (in basic mode) then copy your dictation to the desired target application by way of the clipboard. Say “select all” and “copy to clipboard” then go to the desired application where you want to paste your dictation. Right click and select paste.
Speech Recognition Engine Functionality
Sharing the SAPI Speech Recognition Engine
SpeakToText needs exclusive use of the Microsoft SAPI speech recognition engine. It should be the only speech recognition application running. Starting with Version 2.50, SpeakToText is designed to have exclusive control of the Microsoft SAPI speech recognition engine when the microphone is turned on, and to release it when the microphone is turned off. If you need to run another speech application, you can do so without closing SpeakToText. Just turn the microphone off.
SpeakToText is designed to manage sharing of the SAPI speech recognition engine with future releases of CoolSoft speech recognition applications. If another CoolSoft speech application with this feature is using the SAPI speech recognition engine when you turn the microphone on in SpeakToText, the microphone in the other CoolSoft speech recognition application will be turned off. If you return to the other CoolSoft application and turn the microphone on again, the microphone in SpeakToText will be turned off.
Using SpeakToText when third party speech recognition applications are running is not recommended. With the exception of some CoolSoft speech applications, which are designed to manage sharing of the SAPI speech recognition engine*, running more than one speech recognition application at the same time may cause unpredictable and undesirable results, including a crash of one or both such programs or the operating system itself.
*At the time of release of version 2.50 of SpeakToText, the only other CoolSoft speech application designed to manage sharing of the SAPI speech recognition engine is CoolInfo. As other CoolSoft speech recognition applications start to incorporate this feature, they will be identified by the SAPI Status Indicator in the Language Bar in lower right corner of the interface.
Getting Ahead of the Speech Engine – Clearing the Speech Buffer
If you are dictating and the speech recognition accuracy or speed begin to deteriorate, try pausing for a short while to allow the speech engine to “catch up.” If pausing does not improve recognition, try clearing the speech buffer by clicking on the “clear speech buffer” icon, pressing the escape “Esc” key (SpeakToText must have the active focus if you are using the “Esc” key, otherwise the application with the active focus will receive the command from the “Esc” key.), or by using the menu (EditàClear Speech Buffer). Note that the speech buffer cannot be cleared by a speech command. Also, once you clear the speech buffer, you should stop speaking and wait for the microphone to turn itself off. After the microphone turns off, you can turn it back on and start using SpeakToText again.
Speech Recognition Accuracy
The accuracy of speech recognition generally improves each time you train the speech recognition engine. Time invested in training is well worth the return in improved recognition accuracy. While training the speech engine and using SpeakToText, it is important that you are in a quiet environment with minimal background noise. Always speak clearly into a good quality headset microphone and configure your microphone each time before starting. Remembering these points will help you achieve the most accurate possible speech recognition for your given system and environment.
Supported Target Applications
SpeakToText is designed to work with most applications that can accept text or send messages. However, SpeakToText has been tested with and is supported with the following applications:
Word Processing Applications
Microsoft Word 2000, XP and 2003
Microsoft Wordpad
Microsoft Notepad
Windows Clipboard
Microsoft Internet Explorer – Webmail application text boxes
Open Office 1.1.3
EMail and Web Browsers (Compose Message and Browser with Webmail application text boxes)
Internet Explorer
Netscape 7.x
Mozilla
FireFox/Thunderbird
Microsoft Outlook (Office 2000, XP and 2003)
Microsoft Outlook Express Versions 5 and 6)
Chat Programs
MSN Messenger
AOL Instant Messenger
Yahoo Messenger
ICQ
PalTalk
Skype
Pointers on Using SpeakToText with Chat Applications
· Set your chat application so the message dialog does not close every time you send a message. For example, in ICQ, if you click on "Msg Mode" at the top in the ICQ dialog above the text area where you type, this keeps the dialog open after you send each message.
· SpeakToText Advanced Mode now lets you easily switch between chat dialogs, so now you can chat with more than one friend at a time. All you need to do is use your mouse to move the cursor between the desired windows. You must click in the area where you can type text.
· If your chat program displays a dialog after each message, disable that dialog so you don’t have to use the mouse after every message. Typically, this is done with a “do not display again” option, or in the chat application settings.
· Disable audio prompts or turn down the volume on your speakers. Many chat applications beep when a message is sent or received. Turning down the volume on your speakers (or disabling the beeps) will prevent this background noise from being misrecognized as commands or text. Alternatively, if background noise is a problem, you can enable background noise filtering for both commands and dictation in the Formatting tab of the Settings dialog.
· Some chat applications send the contents of the message dialog when they receive the “enter” character. You should avoid using the “new line” or “new paragraph” command in your chat messages because these commands send the “enter” character to the target application (which will send the message).
Feedback
If you have tried applications other than the ones listed above with SpeakToText and are satisfied with the results, we would like to list them in our next update. Please send an email to support@coolsoftllc.com to tell us about it.
SpeakToText Overview
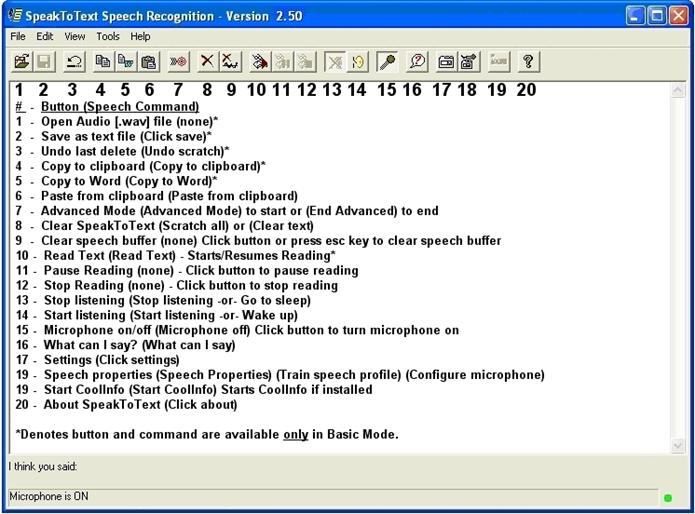
The SpeakToText Interface in Basic Mode
This is what you’ll see when SpeakToText opens. In the graphic below, we have labeled the buttons and included their corresponding speech commands:
Language and Status Bars
There are two message bars at the bottom of SpeakToText: the “Language Bar” and the “Status Bar”.

“Language Bar”
The Language Bar is located at the bottom of the SpeakToText window (it is the top line where “I think you said:” appears). When you speak into the microphone, this is the first place where commands and recognized text appear. It will be preceded by the words “I think you said:” Note that the Language Bar will often not display the text you spoke, or the text that is displayed will change as the speech recognition engine analyzes your speech. This is normal, and typically the correct text will eventually be recognized. Words may change as the speech recognition engine and SpeakToText are doing their work. Sometimes the correct word will be displayed and then will change to another word. This may be frustrating, but it is an inherent flaw in the statistical models that speech recognition engines use to help them guess the correct word, and this is beyond the control of SpeakToText itself. While the correct word may have been recognized, the statistical model has given greater weight to another probable word. Essentially, the speech engine has “guessed” incorrectly. Current speech recognition technology, though highly accurate most of the time, is still far from perfect.
“Status Bar”
The Status Bar is located on the bottom of the SpeakToText window, below the Language Bar. It is the bottom line where “Microphone is ON” initially appears. This is where the current status of SpeakToText is shown. Typically, it displays the last command that was processed.
“SAPI Status Indicator”
At the far right of the status bar is the SAPI Speech Recognition Status Indicator light. This indicator is green when the Microphone is on and SpeakToText has exclusive control of the SAPI speech recognition engine. When the Microphone is turned off or another speech application has exclusive control of the SAPI speech recognition engine, this indicator is red.
The SpeakToText Interface in Advanced Mode
The following shows SpeakToText in Advanced Mode. To enter Advanced Mode, say “Advanced Mode” and SpeakToText will switch to the following view.

SpeakToText shown in Advanced Mode
When SpeakToText enters Advanced Mode, you can leave the window visible where it is, move it to another place on the desktop or minimize it with the “click minimize” speech command. In Advanced Mode, SpeakToText is still fully functional when minimized. You can bring the SpeakToText window back to the foreground by saying “click focus” or by clicking on SpeakToText in the system tray. For more on the SpeakToText system tray icon and right click menu, see the section on “System Tray Icon and Menu,” below.
![]()
SpeakToText shown in the system tray
Note: SpeakToText at the far left of the system tray. The position of SpeakToText icon in the system tray may vary depending on when SpeakToText and other programs are started.
When entering Advanced Mode, if there is any text in the SpeakToText dialog, you will be prompted to save your text. You can choose “yes” or “no” - but keep in mind that if you do not save the text, once SpeakToText enters Advanced Mode, the text will be discarded and you will not be able to recover it.
Important: When SpeakToText is in Advanced Mode, the desired target application MUST have the active focus (be in the foreground), and the cursor MUST be placed in the text area of the desired target application, where you would normally type your text (at the insertion point.).
Note: When in Advanced Mode, you may switch between any number of target applications or their sub-dialogs by clicking sub-dialogs. Simply click to place the cursor in the desired text area where you want your dictation to go (the insertion point where you would normally type). For example, when using a chat application, if you are chatting with more than one friend, you can move between friends just by clicking on typing area of the desired chat window.
Commands and Buttons Disabled in Advanced Mode
The following is a list of commands and buttons that are disabled in Advanced Mode because SpeakToText cannot control functions of other applications. Specifically, SpeakToText cannot select and modify text once it has been placed in a target application. If you would like to use the following commands, dictate your text directly into SpeakToText, then copy and paste it to the target application.
· Buttons and menu items – Open Sound File, Save and Save As, Undo Last Scratch, Copy to Clipboard, Copy to Word, Paste from Clipboard, and Clear SpeakToText.
· Scratch Commands and menu items - All (including Clear Text, Delete Selection and Undo Delete)
· Select Commands - All
· Navigation Commands - All (Go to Top/Beginning/End/Bottom) You need to navigate text in the target application with you mouse or keyboard
· Copy and Paste Commands - All (SpeakToText is placing text directly to the target application in Advanced Mode and there is no text to copy from SpeakToText. )
· View Menu - All selections are disabled. Text size needs to be managed in the target application.
· Cap Commands - Cap Text and Cap All Text
· Backspace and Space Bar
· Scroll Commands
Advanced Mode Application Selection Overwrite Protection
When dictating directly into SpeakToText, selected (highlighted) text is protected from being overwritten by SpeakToText. However, SpeakToText cannot control what happens in third party applications. Because of this, SpeakToText has an overwrite protection feature in Advanced Mode that prevents unintended deletion of selected text in the target application. The default for this feature is “enabled,” and when this feature is enabled, the cursor will always move to the end of the text in the target application.
This feature prevents text that you have selected in the target application (for example text you highlighted and copied to the clipboard) from being overwritten by speech, whether intentional or from background noise. It also prevents you from inserting text in the target application at any point other than the end, and it may cause some chat or other programs to beep whenever you dictate new text into those applications. If these side-effects are undesirable, you can disable this feature in one of two ways.
· Disable/enable the overwrite protection by using the “Insert” key on your keyboard. This change is temporarily effective only for the current session.
· Disable/enable the overwrite protection from the General tab in the Settings dialog. This change remains effective in the current and all future sessions, until you enable/disable it.
Note: In some applications, if overwrite protection is enabled and the cursor is not at the end of the document, the cursor may not move to the end of the document when your text is inserted by SpeakToText. If this happens, you will not see your text appear in the application. Just scroll down to the end of the document to find the text you have dictated.
Important: When using the “Insert” key to disable/enable overwrite protection, SpeakToText MUST HAVE THE ACTIVE FOCUS when you press the “Insert” key. Otherwise, the “Insert” key will act only on the application that has the active focus. To bring SpeakToText to focus, say “Click Focus” or click on SpeakToText (either on the SpeakToText window or in the taskbar). Press the “Insert” key, then bring the target application to focus by saying “Click Minimize” or use your mouse to on the target application where you want your dictation to appear.
Important: If you disable the overwrite protection feature, we suggest that you save your work before selecting text or turn “Listening” or the microphone off to avoid losing your work. If selected text is deleted by mistake, use the undo button in the target application (if this feature is available) to recover the text.
Taskbar Icon, System Tray Icon and Right Click Menu
Starting with Version 2.50, SpeakToText has a system tray icon and system tray right click menu. The system tray is located in the lower right corner of your desktop to the left of the clock.
When SpeakToText is minimized from Basic Mode, it minimizes to both the task bar and the system tray as shown below. Clicking on either will restore SpeakToText to the foreground, as will the speech command “click focus.”
![]()
SpeakToText Minimized in Basic Mode
Note: SpeakToText is located in the taskbar on the far left, and is the last item on the left in the system tray which is located to the left of the system clock.
When SpeakToText is minimized from Advanced Mode, it minimizes exclusively to the system tray as shown below (SpeakToText is at the far left of the system tray). SpeakToText does not appear in the taskbar to the left as it does when it is minimized from Basic Mode.
![]()
SpeakToText Minimized in Advanced Mode
Clicking on the SpeakToText system tray icon will restore SpeakToText to the foreground, as will the speech command “click focus.” Note that when SpeakToText is minimized in Advanced Mode, it is fully functional and can be used with all available speech commands even though it is not visible.
System Tray Icon Right Click Menu
The SpeakToText system tray icon has a right click menu with ten items.
SpeakToText System Tray Icon Right Click Menu
Stop Reading - Stops reading
Clear Speech Buffer - Stops speech recognition, clears the speech buffer and turns the microphone off. To resume using SpeakToText, you must click on the microphone button to turn the microphone on.
Microphone On/Off - Toggles the microphone on and off.
Listening On/Off - Toggles listening on and off.
Advanced Mode - Toggles between Basic Mode and Advanced Mode.
Overwrite Protection - Toggles Application Selection Overwrite Protection on and off (Advanced Mode only).
Settings - Opens the settings dialog.
Speech Properties - Opens the Speech Properties Dialog
Help --> About - Displays the About Dialog
Exit - Closes SpeakToText
Send Message Speech Command
When SpeakToText is in Advanced Mode, and the target application is a chat or email program, when you say “send message” SpeakToText delivers a “send command” to the target application to send your message. This enables you to dictate and send chat messages and email without using your mouse and keyboard.
Sending Chat Messages Automatically
Below the “When I send Message….” dropdown, is a checkbox to ”Automatically ‘Send Message’ every 30 seconds.” When this is enabled (checked), SpeakToText will deliver the Send Message command to the target application every 30 seconds, in accordance with the selection in the dropdown. When this is enabled, you no longer need to speak the “Send Message” command, although this command is still functional.
This feature is particularly useful with voice chat software such, as Skype for example. If the person you are speaking with has poor audio quality because of low bandwidth or other voice over IP issues, you can use this feature to send text of your end of the conversation. Make your selection in the dropdown, and check this feature. Then enter Advanced Mode, and place the cursor in the text area of the chat window for the person you are voice chatting with. Your speech will go into the chat window, and will be sent every 30 seconds. You can have a normal conversation (without interruptions to say “Send Message”), and the person you are speaking with will have both audio and text of your speech. If he or she has trouble hearing you, they fill in the blanks by referring to the text in their chat window.
Note: In the Trial Version or unregistered copies of SpeakToText, using the Send Message feature adds the following signature to each message sent:
“– Copied by SpeakToText. Get your copy at: http://www.coolsoftllc.com/store.asp?product=9”
This signature will no longer appear once you register SpeakToText.
Note: How SpeakToText delivers the “Send Message” command to the target application is determined by the settings you choose in the General Tab of the Settings dialog. The default setting is “Let SpeakToText find the best way” and this works with all supported chat and email programs. If the target application is other than a supported chat or email program, you can try one of the other settings, using trial and error until you find one that works. For more information on how to do this, see the General Tab section under Settings below.
Internet Security
When using the trial version of SpeakToText, SpeakToText needs to be able to access the Internet to get its banners.
When using the update feature (available only in the full registered version), SpeakToText needs to be able to access the Internet to check and retrieve any available updates.
Accordingly, Internet security and firewall programs on
your computer or network must be configured to allow SpeakToText to access the
Internet.
Controlling SpeakToText
SpeakToText has two types of commands: “Command and Control Commands” and “Dictation Commands.” There are three means to use commands in SpeakToText:
· Speech Commands
· Buttons
· Tool Bar Menu Items
The main program functions can be controlled by all three of the above means. Less important functions or functions related to dictation are controlled from the Menu and Speech Commands. Some commands, like Dictation Commands or commands intended to be used only with speech, are available only by speech. The following gives an overview of each of type of command.
IMPORTANT NOTES ON USING COMMANDS:
WHEN USING EITHER COMMAND AND CONTROL OR DICTATION COMMANDS, IT IS IMPORTANT THAT YOU DO NOT PAUSE BETWEEN WORDS IN A SPEECH COMMAND, OR THE SPEECH RECOGNITION ENGINE MAY RECOGNIZE THE WORDS AS DICTATED TEXT.
WHEN DICTATING, IT IS ALSO IMPORTANT THAT YOU PAUSE FROM DICTATION BRIEFLY BEFORE SPEAKING A COMMAND. OTHERWISE, THE SPEECH RECOGNITION ENGINE WILL RECOGNIZE THE COMMAND AS DICTATED TEXT. CONVERSLEY, A SPEECH COMMAND DICTATED AS PART OF A SENTENCE, WITHOUT A PAUSE BEFORE AND AFTER, WILL BE RECOGNIZED AS TEXT.
If a command is recognized as text, simply pause, then repeat your command without pausing between the command words, and wait until the command is processed before resuming dictation.
Command and Control Speech Commands
Command and Control Commands operate the program, and can all be activated from the menu. The most important of these commands have corresponding buttons and/or speech commands. Each of these menu items, along with the associated buttons and speech commands, are discussed in the “Menu and Control” section below in the same order as they appear in the SpeakToText menu. The menu item, speech command and button for each command is are explained in the “Menu and Control” section.
To
view a list of available Speech Commands, say “What can I say” or click on the
“What can I say?” button ![]() . You can also click on “What
can I say?” from the Help menu. The “What can I say?” dialog is dynamic and
displays only speech commands that are available at that time, depending on the
current situation in SpeakToText.
. You can also click on “What
can I say?” from the Help menu. The “What can I say?” dialog is dynamic and
displays only speech commands that are available at that time, depending on the
current situation in SpeakToText.
Subsets of Command and Control Commands are active only in program dialogs that display messages and these do not have any menu items. For example, the “confirm dialog” that appears when you clear SpeakToText has only three choices: “Yes,” “No,” and “Check...” You can either click on the buttons or say “yes,” “no” or “check” to make your choice.
Dictation Commands
Dictation Commands are used in dictation only and do not have a menu item or button. An example of a dictation command is “new paragraph,” which has the effect of typing the “Enter” key twice on a keyboard. Dictation Commands are discussed under “Using Dictation Commands” section below.
To display an HTML file of Dictation Commands, say “dictation commands” or click on “Show Dictation Commands” in the Help menu. Dictation Commands are static. They do not change between Basic Mode and Advanced Mode, and are only available with dictation.
Text to Speech (Read) Commands
SpeakToText can read text that is displayed in the SpeakToText dictation area or text that you have copied to the clipboard. There are five read options and corresponding speech commands, and three read buttons. The first three apply only to, and function only with, text that is displayed in SpeakToText. The fourth, “read clipboard,” can be used at any time when SpeakToText is active. The last one, “Read Target” is available only from Advanced mode, and reads the content of the target application by copying it to the clipboard and then reading the contents of the clipboard.
Read All – Reads all the text in SpeakToText from beginning to end. If reading is paused (see Pause Reading Button in the Read Buttons section below), the Read All speech command or button will resume reading instead. This is a SpeakToText Basic Mode command only which is not available in Advanced Mode.
Read Right – Reads all the text in SpeakToText, starting with the word to the right of the cursor to the end of the text. This is a SpeakToText command only and is not available in Advanced Mode.
Read Selection – Reads the selected text. This is a SpeakToText command only and is not available in Advanced Mode.
Read Clipboard – Reads text that you have copied to the clipboard. You must first select the text you want to read from the application where it is displayed and copy it to the clipboard. For example, if you want SpeakToText to read an email, highlight the body of the email, then right click and select “Copy to clipboard” or use the Ctrl-C keyboard combination. Starting with version 2.50 of SpeakToText, the Read Clipboard is available in Advanced Mode.
Read Target – Reads all the text in the window of the target application where you have clicked with your mouse. You can also use this command to read documents, emails and webpages.
Copy Target – Copies the contents of the target application to the clipboard. This is useful if you want to copy the contents of the target application to the clipboard without having it read.
Tip: Many webpages have graphics, headings and other text that you may not want to read. When reading webpages, it is best to select only the text you want SpeakToText to read, and copy it to the clipboard (Ctrl C, or right click and select Copy).
When SpeakToText starts reading, the microphone turns off and remains turned off until SpeakToText is done reading. This prevents SpeakToText from recognizing text that it is reading, and is why there are no corresponding speech commands for the Pause and Stop reading buttons. When SpeakToText is reading, the “Stop Reading” and Pause Reading buttons become enabled.
Read Buttons
Read All - Clicking the “Read All” button starts reading at the beginning, just like the “Read All” speech command.
Pause and Stop Reading Buttons - To pause or stop reading, click on the “Pause Reading” or “Stop Reading” buttons.
Note: The “Pause Reading” and “Stop Reading” buttons are not speech enabled because the microphone is turned off during reading to prevent the speech recognition engine from recognizing the text that is being read.
To resume reading after pausing, say “Read All” or click the “Read All” button. Reading will resume from the point where it stopped. Note that the “Read All” speech command and button resumes reading if reading is paused, and otherwise starts from reading from the beginning. If you have paused reading and want to start over from the beginning, click the “Stop Reading” button before using the “Read All” speech command or button.
![]()
Read All, Pause Reading and Stop Reading Buttons
User Commands
With SpeakToText you can create your own speech commands from the User Commands tab in the Settings dialog.
To create a new User Command, click on “New.”
Note: You can create multi-step User Commands to perform more than one function with a single speech command. The text in the Command field (what you speak to trigger the command) must be identical for each step in a multi-step User Command.
Note: The “Enable these Commands” checkbox must be checked in order for User Commands to function.
To edit a User Command, select the command you want to edit, and click on “Edit” and make the changes to the command, then say or click “ok” or “apply.”
To delete a User Command, select the command you want to delete, and click on “Delete.”
“Move Up” and “Move Down” buttons apply only to multiple step User Commands. Moving the commands up or down sets the sequence in which the command steps are processed when you speak the command. Use these buttons to move a command step in a multi-step User Command up or down in the sequence.
Note that with the exception of multi-step User Commands which can be moved within a particular group, User Commands are sorted in the sequence in which they are created, and not alphabetically.
To enable User Commands, check the “Enable these Commands” box in the upper left side of the dialog.
Creating and Editing User Commands
After clicking on the “New” or “Edit” buttons, the Create User Command dialog appears.
There are four elements to a user command. They are the Command, Action Target and Comment/Tip. Each is explained below:
Command: Enter the word(s) or phrase that you want to speak to run the command. When User Commands is enabled, these commands will appear in the “What Can I Say?” dialog, and the command will be processed when you speak the words you entered in this field.
Action: Choose the action you want SpeakToText to take when you say the command. There are six possible actions for a User Command in the Action dropdown menu.
· Browse – The computer will open a website address (URL) specified by you in your default browser. Use “Browse” to create speech commands that will open webpages which you visit often.
· Focus – After processing a user command, use “Focus” to bring SpeakToText to the foreground.
· Open – The computer will open the target file you have selected. Use “Open” to create speech commands that will open documents you use often, or to play your favorite music files and videos.
· Run – The computer will run the target program you have selected. Use “Run” to create speech commands for programs that you start often.
· Sleep – When processing a multi-step User Command, SpeakToText will pause for the specified number of seconds before going on to the next step.
· Speak – The computer will speak the target phrase that you enter. Use “Speak” if you want the computer to say a word or phrase when you say the command. Use this to give your computer personality and make it talk back to you.
Note: “Run” and “Open” perform the same Action and are interchangeable. We recommend using “Open” with files, and “Run” with programs, although you can use either.
Target: This is the field where you enter you want the computer to do when you say the command. In this field you can enter a webpage URL, a file to open, a program to run, or text for a phrase that you want the computer to speak when you say the command. In multi-step User Commands, you can create steps with sleep and focus command components. If the Action for the command is “Run” or “Open” you can browse to the program or file you want to run or open to insure the path is entered correctly. Use the “Browse” button to the right of the Target field (shown below).

Browse Button in Create User Command Dialog Target Field
Note: The Focus Action has no target. When this Action is selected, the Target field remains grayed out.
For more detail on creating User Commands to run programs or open files, see the Running Programs and Opening Files with User Commands section below.
Comment/Tip: Enter a description or tip for your command that will appear as a tool tip when you place the pointer over the command in the “What Can I Say?” dialog. You can also leave this field blank, and no tool tip will appear.
Testing Your User Command: When are finished entering or editing the data for the User Command, you can test the command by clicking on the “Test” button. When you are satisfied with your command, click “OK” to continue. Note that the “Apply” button is unavailable after creating a User Command because the new User Command is applied when you click “OK” in the Create User Command dialog. Also note that if the first letter of a User Command is not capitalized, it will appear at the bottom of the list in the User Commands section in the “What Can I Say?” dialog, as sorting is done alphabetically first by upper case letters, then lower case letters.
Creating Multi-Step User Commands
You can create multi-step User Commands. To do this, the entry in the “Command” field (the words you want to speak to run the command) must be identical for each step. When you say the command, the steps in a multi-step user command will be processed in the sequence in which they appear in the User Commands list.
Setting the Tool Tip for a Multi-Step User Command:
Enter the desired tool tip in the Comment/Tip field when you are creating the first step of this User Command. Leave the Comment/Tip field blank in the other steps and when you click OK as you create each additional step, the tool tip entered in the first step will be attached to each step.
To change or edit the tool tip, return to the User Commands tab, select one of the steps in the desired multi-step User Command (preferably the first step in the sequence) and click “Edit.” Change the text in the Comment/Tip field to the desired tool tip and click OK. This will set the tool tip for all steps of this User Command.
To change the sequence of steps in a multi-step User Command, select the step you want to move and use the Move Up and Move Down buttons in the User Commands tab. User commands are sorted in the order they are created, and the Move Up/Move Down buttons are only for adjusting the sequence of steps within groups of multi-step User Commands.
Browse Commands in a Multi-Step User Command
When you create a multi-step User Command, the If one of the steps in a multi-step User Command is “Browse,” then depending on the speed of your Internet connection, the step(s) following the “Browse” step of the command may not be processed if the webpage takes too long to load. To avoid this problem, a “Sleep” step should be created and placed in the sequence after the “Browse” step. The number of seconds in the “Sleep” step should be sufficient time for the webpage in the “Browse” step to load before going on to the next step. Trial and error may be necessary to determine the appropriate number of seconds to place in the “Sleep” step.
Tips on Running Programs and Opening Files with User Commands
To open a document or file in the default application for that file type, select “Open” from the dropdown in the Action field, and browse to the location of the document or file in the Target field. The document or file will open in the default application. For example “C:\My School Work\Science Term Paper.txt” should open in Notepad (the default for documents with the .txt extension). If the document ends in the .doc extension, it should open in Microsoft Word. Similarly, the file “My Favorite Song.mp3” will open in the default music player.
To start a program, select “Run” from the dropdown in the Action field, and browse to the location of the program’s executable in the Target field. Most programs are located in a sub-folder of C:\Program Files.
When creating a User Command, it is best to browse to the document, file or program to insure accuracy (instead of typing the path). This is particularly important with User Commands to open documents or files in the My Documents folder, because the My Documents folder for each user on a computer has a unique path. Simply entering “C:\My Documents\My Music\My Favorite Song.mp3” will not work. For example, users Simon and Susan have different paths for their “My Documents” folder and the path to "My Favorite Song.mp3" for these users would appear as follows. Note the differences in the path in bold type:
Simon: C:\Documents and Settings\Simon\My Documents\My Music\My Favorite Song.mp3
Susan: C:\Documents and Settings\Susan\My Documents\My Music\My Favorite Song.mp3
Sending Commands to a Program with User Commands
Starting with SpeakToText Version 2.51, User Commands can process commands that contain command syntax for an application. The vertical slash "|" is used to separate the application path and the command syntax.
To create a User Command that runs an application and gives it a command, the entry in the Target field of the Create User Command dialog has two parts: (Application Path|Command Syntax). The first part before the vertical slash must contain the path to the application, and the second part after the vertical slash contains the command to be processed by the application when it runs.
Typically, any “Application Path|Command Syntax” combination that runs from the command line, will also run in User Commands by speech. Take the following example for turning on Module A1 in an X10 Active Home Pro home automation system.
C:\Program Files\Common Files\X10\Common\ahcmd.exe|sendplc a1 on
Note: There is no space between the application path, the vertical slash and the command syntax.
User Command Tips:
· The fields in the Create User Command dialog are not speech enabled. You need to type in the command parameters.
· On some systems and in some environments, the Create User Commands dialog can be highly sensitive to background noise, causing it to close or change tabs after creating a User Command. If this happens on your system, simply turn the microphone off and user your mouse to navigate to the Create User Commands dialog (Settings button, User Commands Tab, New).
· When entering a website address (URL), be sure to enter the full address including the “www.” (for example “www.mypage.com” – not “mypage.com”). To insure accuracy, it’s best to cut and paste the URL from your browser into the “target” field.
· If you are using the “Run” or “Open” commands, it is best to browse to the desired program or file using the browse button to the right of the target field “…” This will insure that the full and correct path to the program or file is included in “target” field. If your User Command includes a file to be opened by the program you are starting, browse to the program first. Then enter the vertical slash, and then browse to the file you want the program to open. If the command contains command syntax for the program to run when it starts, browse to the program first, enter the vertical slash, then type in the command syntax.
· If your User Command opens a file (for example, a music file or document) and then you later rename the file or move it to a different folder, the User Command you created for that will no longer work. You will need to delete the User Command and create a new one with the new file name and/or folder path.
User Command Tips for Advanced Users
If you are creating User Commands to run programs that are registered with the Windows, and you know the correct name of the “target” program, simply type the name of the program file in the appropriate field. For example, to run Notepad, type “notepad” in the target field. To determine if an application is registered with Windows go to the command line (start, run) and enter the name of the application (for example “winword” or “notepad”). If the application starts, then it is registered with Windows.
User Command Examples
Here are four examples of basic User Commands that you can create (one for each available action).
|
Command |
Action |
Target |
Result (what the computer will do) |
|
Computer |
Speak |
What do you want |
The computer will speak the words "what do you want." |
|
Start Internet Explorer |
Run |
C:\Program Files\Internet Explorer\Messenger\iexplore.exe |
The computer will start Internet Explorer. |
|
Start Internet Explorer (Advanced) |
Run |
Iexplore |
The computer will start Internet Explorer. |
|
Go to homepage |
Browse |
www.myhomepage.com or http://www.myhompeage.com |
The computer will open www.myhomepage.com in the default web browser. |
|
Play my favorite song |
Open |
c:\My Documents\My Music\MyFavoriteSong.mp3 |
The computer will play MyFavoriteSong.mp3. |
Click Focus Speech Command
If SpeakToText disappears behind another window, saying “click focus” will bring SpeakToText to the foreground with an active focus.
Note: This command will work if “Listening” is off, but it is not operational if the microphone is turned off. If the microphone is turned off and you can no longer see SpeakToText screen, then you can locate SpeakToText in the taskbar or system tray and click on it to restore focus on SpeakToText.
Note: When in Advanced Mode, using the “Click Focus” command removes focus from the target application, and your dictation will no longer go into the target application until it is returned to active focus. To return focus to the target application, use the “Click Minimize” speech command or use the mouse to minimize SpeakToText or bring the target application to focus. In some applications you may also need to click on the target application where you type in order to resume dictation into that application.
Click Minimize Speech Command
To minimize SpeakToText, you can use the “Click Minimize” speech command, and SpeakToText will minimize to the taskbar. You can also use your mouse to click on the minimize button in the upper right corner of SpeakToText.
Scroll Up and Scroll Down Speech Commands
When SpeakToText is in Basic Mode, the “Scroll Up” and “Scroll Down” speech commands scroll up and down the text displayed in SpeakToText. If the “What Can I Say?” dialog is open, then the “Scroll Up” and “Scroll Down” speech commands will act on the “What Can I Say?” dialog instead. When running in Advanced Mode, the “Scroll Up” and “Scroll Down” speech commands are available only in the “What Can I Say?” dialog.
Right Click Menu (SpeakToText dictation dialog in Basic Mode)
The Right Click Menu can also be used to perform the following functions. A right click in the dictation area in Basic Mode) opens the Right Click Menu. The functions of the Right Click menu options are identical to the corresponding menu and speech commands.
A view of the Right Click Menu showing alternate words after right clicking over the word “write.”
Note: When text is selected (highlighted) in SpeakToText Basic Mode, the “Copy to Clipboard” and “Copy to Word” selections in the right click menu act only on the selected text. The “Paste from Clipboard” selection will not overwrite selected text. To paste from the clipboard with the Right Click menu, you need to unselect the text first. This feature prevents selected text from being overwritten unintentionally.
The Right Click Menu also enables you to easily access the Train Word feature.
The “Properties…” option displays the properties for the selected word. When alternate words are available, they will be displayed below “Properties..,” as shown in the example above for the word “write.” Clicking on the desired alternate word will replace the selected word with the alternate. Note that only spoken words have properties and alternates. As a result, these options do not appear for alternate words previously chosen from the Right Click Menu. Once a word is replaced by an alternate word, the new word is treated as reformatted text, which is the same as text typed into SpeakToText using your keyboard or for text pasted from another application. This reformatted text will not have alternates. Not all words will have alternates - alternate words are displayed only for words where the speech recognition engine recognized potential alternate words.
NOTE: Using the Right Click Menu with more than a few words selected, particularly a long phrase, sentence or paragraph, will result in a period of unresponsiveness as the speech engine calculates the word properties for the entire selection. For this reason, avoid using “Properties” from the Right Click menu on large blocks of selected text.
Using Speech with SpeakToText Message Dialogs
Most of the SpeakToText message dialogs are speech enabled. A speech enabled dialog will have the message at the top “SpeakToText is listening for ….” and will list the words that correspond to the message dialog buttons. Typically these commands include “yes,” “no,” “okay,” “cancel,” “apply” or “check” depending on the nature of the message dialog.
Using the “CHECK” Speech Command with Some SpeakToText Message Dialogs
When a SpeakToText message dialog contains a checkbox (other than those found in the tabs of the Settings dialog), you can check or uncheck the checkbox by saying “check.” Each time you say “check,” the state of the checkbox will change. You might ask why we didn’t use two commands for “check” and “uncheck.” We found that using only one word (“check”) to toggle the settings in checkboxes provided far greater reliability than having separate commands.
Note: The following dialogs are not speech enabled.
- Trial Dialog
- Registration Dialog
- Training Reminder Dialog (shows on startup only if the default speech recognition profile is selected in Speech Properties)
- Microphone On/Listening On dialog when SpeakToText first starts
- Settings within the individual tabs of the Settings dialog
- Speech Properties dialog (this is a Microsoft SAPI speech recognition dialog and is not part of SpeakToText)
- Update Dialogs after “Check for Updates” is started
Converting Audio Files to Text
SpeakToText can recognize audio files that you create on your computer or personal recorder, and covert them to text for you. The following applies to converting an audio file to text.
· The Microphone must be turned on. Listening can be on or off.
· The recording must be done by the person who trained the speech recognition profile that is currently selected in Speech Properties.
· The recording must be a .wav file.
· The recording quality must be at least 22.000 kHz, 8 Bit, Mono.
· Maximum time by default is 300 seconds (5 minutes). This time limit can be increased in the SpeakToText Settings under the “General” tab.
· Audio files can be processed only from “Basic Mode.“ This feature is not available from “Advanced Mode” where the button and menu item are unavailable.
To process an audio file, just drag and drop a .wav audio file into the Basic Mode text dialog (the area where text appears when you dictate), or use the Open Sound File button or File Menu item.
![]()
Open Sound File Button
Important: Before you start processing an audio file read this section completely.
As SpeakToText processes your audio file you can see the progress as it places blocks of text in the dictation area as they are recognized.
If you want to abort processing of an audio file before it is finished, use the Clear Speech Buffer button, system tray, menu item, or the escape (esc) key.
Note: Performing speech recognition on audio files uses substantial system resources. If your system is low on resources, SpeakToText may stop responding for brief periods, and other programs may run more slowly. Please be patient while SpeakToText processes your audio files.
Note: Processing an audio file which contains background noise and/or music may result in SpeakToText becoming unresponsive, and is not recommended.
Recognition Time: Processing .wav files is typically real-time or better. However, this depends largely on the quality of the audio file and your system resources. On some systems this process can take up to three times the length of the recording. Please be patient. SpeakToText will restore itself when it is finished processing the audio file.
Accuracy: The audio file must be recorded by the same person who trained the speech recognition profile being used. For example, processing a sound file created by Joe using John’s speech recognition profile will likely result in lower or unacceptable accuracy.
Processing Audio Files in Trial Mode: When processing an audio file in the trial version or unregistered copy of SpeakToText, when the 1000 character trial limitation is reached, SpeakToText will stop processing and some unresponsiveness may occur. This unresponsiveness will generally resolve on it’s own after some time, but you may need to close and restart SpeakToText. Processing large audio files (longer than one minute) is not recommended when running SpeakToText in Trial Mode.
CoolInfo
CoolInfo is a sponsored program that lets you retrieve information from the Internet by speech, and will become available on the CoolSoft website in the fall of 2006. If CoolInfo is installed on your computer and has been started once, it can be started from SpeakToText. Just say “Start CoolInfo” or click on the “Start CoolInfo” button.
Speech Command: Start CoolInfo
![]()
Start CoolInfo Button
Note: When this button or speech command starts CoolInfo, the microphone in SpeakToText will be turned off. CoolInfo will start with its microphone on and take control of the speech recognition engine. When CoolInfo is already running and you use this command, CoolInfo will come to the foreground. To use CoolInfo you need to turn the microphone by clicking on the microphone button. This will turn off SpeakToText and activate CoolInfo.
Note: If CoolInfo is not installed on your computer, or if CoolInfo is installed and has not been run at least once prior to starting SpeakToText, the Start CoolInfo button is grayed out and the button and speech command are not available.
Note: CoolSoft, LLC respects your privacy Although CoolInfo is a sponsored program, it is not adware or spyware and it does not collect any personal information from your computer. Sponsored content is delivered ONLY through CoolInfo, and ONLY when you choose to run it. When you close CoolInfo, it stays closed until you start it again.
Using CoolInfo
CoolInfo comes with a complete user manual. If you have CoolInfo installed on your computer, then start CoolInfo and refer to the CoolInfo User Manual in the Help menu of CoolInfo.
Help Features
Tool Tips
Convenient tool tips appear when you place the pointer over a button, indicating the Speech Commands for that button.
What Can I Say?
The “What Can I Say?” feature opens a window that lists the speech commands that are active at that particular point in the program. To open this window, either say “what can I say,” click on the “What Can I Say?" button or select “What Can I Say?” from the Help Menu. To close the “What Can I Say?” window, say “close me” or click on the “Close Me” button at the bottom of the “What Can I Say?” window.
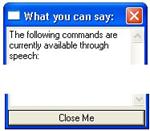
What Can I Say? Button ![]() Close Me
Button
Close Me
Button ![]()
Note: The commands displayed in the “What Can I Say?” window will vary depending on which commands are active at that point in SpeakToText.
Note: If you enable and create User Commands, these will also appear in the What Can I Say? dialog.
NOTE: If you place the cursor over a command in the What Can I Say? dialog, a tool tip appears to give you more information about that command. This is particularly useful with speech commands that do not have buttons or menu items, and for User Commands as well.
The first time the “What Can I Say?” dialog is opened during a session of SpeakToText, it opens to one side of SpeakToText and has the same height as the SpeakToText window. You can move and resize the “What Can I Say?” dialog and if you close it, and then reopen it later in the same session, it will return in the same place and at the same size as when it was last closed. Note that this applies only to the current session. If you close SpeakToText, the next time you start it, the “What Can I Say?” dialog will again appear in the starting position along side SpeakToText.
Manual and Quick Start Guide
Both the Manual and Quick Start Guide can be accessed from the Help Menu. You can also say “open manual” or “open quick start.”
How To Setup and Train Speech Recognition Video
SpeakToText includes a brief and informative video on setting up and training a speech recognition profile for the Microsoft SAPI speech recognition. This video can be accessed from the SpeakToText Help Menu, or from Windows in the SpeakToText program group by clicking Startà Programs àSpeakToText àHow to Setup and Train SAPI Speech Recognition.
Dictation Commands
To view a list of SAPI and SpeakToText Dictation Commands: From the help menu, select “Open Dictation Commands list” or say “open dictation commands.” This will open a new window in your web browser and display a list of available Dictation Commands.
Message Dialog Prompts
SpeakToText includes message dialogs to prompt or advise you at key points throughout the program. These dialogs have important messages about using SpeakToText and are intended to help you learn how to best use SpeakToText quickly. Many of these dialog have a checkbox so you can choose not to display them again as you become proficient with using SpeakToText.
Menus and Controls
File Menu
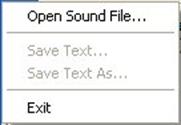
Open Sound File
Opens a .wav sound file to be recognized by SpeakToText.
Button: ![]()
![]()
Drag & Drop Feature: You can also drag and drop a .wav audio file into the SpeakToText text area. This will have the same effect as selecting the file through the menu or button.
For more information on processing audio files, see the section on Converting Audio Files to Text above.
Save Text
Saves the text in SpeakToText as a text (.txt) file. If the text has not been saved before, it opens a Save dialog and prompts for a file name.
Speech Command: “Click Save”
Button: ![]()
Note: After you save text, the save text button and menu item are not available until you enter more text or modify the existing text.
Save Text As
Saves the current file under a different name.
Exit
Closes SpeakToText. If the text in SpeakToText has not been saved or copied, it prompts for a confirmation.
Speech Command: “Click Exit”
Button: None – use the close program “X” ![]() button at the upper right
corner of SpeakToText.
button at the upper right
corner of SpeakToText.
Edit Menu
Undo Last Scratch
Restores the last incidence of text that was deleted by any of the scratch commands.
See the “Correcting Text” section under Dictation Commands to see a list of the scratch commands. This function only works for spoken text, up to the next insertion of text. If you delete text and then insert new text, undo last scratch will no longer restore the text that was deleted prior to the insertion of new text. This is because new text has taken the place of the text that was deleted. This can be compared to a web browser, where if you go back from Page B to Page A, then go to Page C, you can go back to Page A, but Page C has taken the place of Page B, so you cannot return to Page B with the back button.
Speech Command: “Undo Scratch”
Button: ![]()
Clear SpeakToText
Clears all text in SpeakToText.
Speech Command: “Clear Text” or “Scratch All”
Button: ![]()
By default, using the “clear text” speech command or button prompts you to confirm that you want to delete the text. You can disable this prompt by checking the “do not ask me again” box before proceeding; if you do, SpeakToText will delete the text without asking you for a confirmation.
If you have cleared SpeakToText using the “clear text” or “scratch all” commands or button, you can recover the deleted text by using the “undo scratch” command or button, or by selecting the “Undo last scratch” Edit menu item. You can only recover deleted text if you have NOT inputted any new text since the deletion. Once you dictate new text after clearing SpeakToText, the cleared text can no longer be recovered because it has been replaced by the new text. We recommend copying text to the clipboard before clearing SpeakToText or saving the text so that you have a backup.
If you disabled the prompt to confirm the “clear text” command or button, you can re-enable the prompt dialog (and any other disabled prompts) from the General tab of the Settings dialog. To re-enable the prompts, say “click settings” and click the “Restore Prompts” button in the General tab of Settings.
Clear Speech Buffer
This command stops any speech recognition, clears any unprocessed input from the speech recognition engine, turns off the microphone and enables you to start fresh. After using this command, you need to click on the microphone button to turn the microphone on again before you resume using SpeakToText.
Keyboard Command: ESC (Escape)
Button: ![]()
Examples of when this command might be used are when you have dictated a long string of text and you want to abort the recognition, or if SpeakToText is not responding properly because the speech buffer may be full. This could result from the microphone and Listening being left on for long periods of time, during which SpeakToText is processing background noises and conversations. The “Clear Speech Buffer” command gives you a way to abort that processing.
After using the "Clear Speech Buffer" command, the microphone is turned off. To turn the microphone back on you must click the microphone button with your mouse. If SpeakToText is still not responding properly after you clear the speech buffer, we recommend closing and restarting SpeakToText.
Important: In order for the “Esc” key to clear the speech buffer, SpeakToText MUST have the active focus. Otherwise, the application with the active focus will received the command from the “Esc” key. Before pressing the “Esc” key, click on SpeakToText in the taskbar, or click directly on SpeakToText to bring it back to focus.
Note: There is no speech command for clearing the speech buffer. The reason being that a speech command for this function would be last in the speech buffer and would therefore be ineffective for the intended purpose.
Delete Selection
Deletes selected (highlighted) text.
Speech Command: “Delete Selection”
Copy to Clipboard
Copies the contents of SpeakToText into the clipboard where it can be pasted into any application that will accept content from the clipboard.
Note: using this command may overwrite the current content in the clipboard from another application.
Speech Command: “Copy to Clipboard”
Button: ![]() (Also
available from the right click menu.)
(Also
available from the right click menu.)
Copy to Word
Copies the content of SpeakToText into Microsoft Word. Starts Microsoft Word if it is not already open (Word must be installed on your computer).
Speech Command: “Copy to Word”
Button: ![]() (Also available from
the right click menu.)
(Also available from
the right click menu.)
If Word is not open, SpeakToText will open a new document in Word before copying the text. If Word is open without an open document, a new document will be opened. If a document is already open, SpeakToText will copy the text to the open document at the position where the cursor is located. If more than one document is open, SpeakToText will copy the text to the last document that had the active focus.
Paste from Clipboard
Pastes the contents of the clipboard into SpeakToText at the point where the cursor is located.
Speech Command: “Paste from Clipboard”
Button: ![]() (Also available from
the right click menu.)
(Also available from
the right click menu.)
Note: SpeakToText is designed to accept only text characters. If the clipboard contains graphics, the graphics will not be pasted into SpeakToText.
Note: The Paste from Clipboard command does not work when text is selected. If text is selected and you want to paste from the Clipboard, you need to unselect the text before doing so. This prevents you from overwriting text by mistake.
Advanced Mode
When the Advanced Mode command is invoked, the SpeakToText textbox closes, and SpeakToText compresses into the upper right hand corner of your desktop. Once in Advanced Mode, all dictation appears directly in the Target Application (the text area of the application where you have placed the cursor) in real time. When SpeakToText is in Advanced Mode, it can be minimized or moved to the desired location on your desktop.
Speech Command: “Advanced Mode” to start Advanced Mode and “End Advanced” to end Advanced Mode. You can also use the Edit menu and uncheck Advanced Mode or click on the Advanced Mode button to toggle in and out of Advanced Mode.
Button: ![]() When Advanced Mode is active, the Advanced Mode button becomes
indented.
When Advanced Mode is active, the Advanced Mode button becomes
indented.
Advanced Mode lets you dictate text directly into other applications just by placing the cursor in the application where you want the dictated text to appear. For more detailed information, see the Advanced Mode section above.
Note: While Advanced Mode is active, some SpeakToText buttons, menu items and speech commands are disabled. See the section on Commands and Buttons Disabled in Advanced Mode for more information.
Note: When starting Advanced Mode, if you already have text in SpeakToText, you will be prompted to save the text. If you select “No” any unsaved text will be lost and cannot be recovered.
Important: When SpeakToText is in Advanced Mode, the desired target application must have the active focus, and the cursor must be placed in the text area of the desired target application, where you would normally type your text. It is not sufficient to just click anywhere on the application.
View Menu

Text Size
Changes the size of the text in the dictation window. “Medium” is the Default.
Notes about the Text Size function:
· Determines the size of the text that will be displayed in SpeakToText.
· Applies to SpeakToText only. When text is copied to the target application, it will be copied in the font being used by the target application.
· The default setting is “Medium.”
· “Smallest” and “Small” will display more text in smaller characters within the SpeakToText window.
· “Large” and “Largest” will display less text in larger characters within the SpeakToText window.
Note: The View Menu items are not available in Advanced Mode, as SpeakToText does not display text from Advanced Mode.
Tools Menu
Microphone On/Off
Turns the microphone on and off. When checked, the microphone is turned on. When unchecked the microphone is turned off.
Speech Command: To turn the microphone off, say “Microphone Off.”
Button: ![]() When the button is depressed the
microphone is on.
When the button is depressed the
microphone is on.
![]() When
the button is raised, the microphone is off.
When
the button is raised, the microphone is off.
IMPORTANT NOTES ON THE MICROPHONE
Once the microphone is turned off, it is unavailable and cannot be turned on by speech. To turn the microphone on, you need to click on the menu item or microphone button. Turning the microphone off also disables the start/stop listening buttons.
When the microphone is on, SpeakToText has exclusive access to the microphone. The microphone must be turned off to allow other applications (like Speech Properties) to use the microphone and the SAPI speech recognition. SpeakToText will inform you before it turns the microphone off.
The default startup for SpeakToText is Microphone On, Listening Off. To start using SpeakToText, you must say “start listening” or “wake up.” If desired, you can change the default to have SpeakToText start with Listening on in the General tab of the Settings dialog.
When you are using the keyboard with SpeakToText, the microphone is disabled and stays off for three seconds after the last keyboard character is received. This prevents spoken text or background noise from unintentionally being inserted into sections where you are typing.
When SpeakToText is reading, the microphone is disabled to prevent what is being read from being recognized as text.
When viewing a SpeakToText message dialog, the speech is directed to the dialog, and you cannot dictate until you close it.
Start Listening
When listening is turned on, SpeakToText is listening, and will recognize your speech.
Speech Command: “Start Listening” or “Wake up”
Button: ![]()
Note – When you click or say “Start Listening,” the Start Listening button is
depressed and the Stop Listening button is raised. ![]() SpeakToText is ready
to recognize your speech.
SpeakToText is ready
to recognize your speech.
Stop Listening
When listening is turned off, SpeakToText is muted, and is listening only for the “Start Listening” or “Wake up” commands.
We suggest you use this command when you want to take a break or when you are interrupted during a dictation session.
Speech Command: “Stop Listening” or “Go to Sleep”
Button:
![]() When you click or say “Stop Listening,” the Stop
Listening button is depressed and the Start Listening button is raised.
When you click or say “Stop Listening,” the Stop
Listening button is depressed and the Start Listening button is raised. ![]() SpeakToText
is muted, but will respond to the speech commands “start listening” or “wake
up”.
SpeakToText
is muted, but will respond to the speech commands “start listening” or “wake
up”.
Note on Listening Buttons: The startup default for SpeakToText is Microphone On and Listening Off (SpeakToText is muted and listens only for the “Start Listening” or “Wake Up” speech commands). This combination of “Microphone On” and “Listening Off” enables hand-free operation (you can toggle between “Listening On” (muted) and “Listening Off” (un-muted) by speech) and prevents unintentional speech or background noise from being recognized until you are ready to dictate. Note that this differs from the Microphone Off command, which turns the microphone off entirely, cutting all speech input into SpeakToText. Once the Microphone is turned off, the only way to turn it back on is to click on the Microphone button with your mouse or use the Microphone menu item.
Train Word
Opens the “Train Word” dialog of the speech recognition engine.
Speech Command: “Click Train Word” (Also available from the right click menu.)
If the speech engine is having trouble recognizing certain words or there are unique words or names that you want the speech engine to recognize in a certain way, the “Train Word” feature will help. For example, in our offices, we have trained SpeakToTextÔ 2.0 as a word, so it appears as “SpeakToTextÔ 2.0” instead of “speak to text” when spoken. For more detailed information on the use and functionality of the “Train Word” feature, see the “Training Words” section above.
Start CoolInfo
Starts “CoolInfo” if CoolInfo is installed on your computer and has been run at least once. For more information, see the section on CoolInfo.
Speech Command: “Start CoolInfo”
Button: ![]()
Settings
Opens the SpeakToText Settings dialog.
Speech Command: “Click Settings”
Button: ![]()
The SpeakToText Settings dialog has four tabs. The function of each tab is explained in below:
· General Tab
· Greeting Tab
· Formatting Tab
· User Commands Tab
Note: The Settings dialog is speech enabled, and you can navigate between tabs with speech by saying “tab.” However, the tabs are not speech enabled, and you must use your mouse and keyboard within each tab to make changes.
When you are finished changing settings in any of the tabs mentioned above, click or say “apply” to save the settings before moving to the next tab. Click or say “OK” when you are finished to save your settings and close the Settings dialog. You can also click or say “cancel” to exit Settings without applying the changes.
The following four sections provide details of the selections available in each tab.
General Tab
There are seven settings in the General tab. When you have finished changing settings, click on “Apply” or “OK” to save your changes. Click on “Cancel” to ignore the changes and return to SpeakToText.

Start Listening upon Startup
The default setting is for SpeakToText to start with Listening off (muted). This prevents unintentional recognition of speech until you are ready to start dictating. When this box is checked, SpeakToText will start with Listening on (un-muted).
Do not ask before clearing SpeakToText
When this box is checked, you are not prompted to confirm when you clear SpeakToText (by saying “clear text” or “scratch all”). This box becomes checked automatically when you check the “Please do not ask me again” box in the Confirm Clear dialog that appears by default when you clear all text.
Clear SpeakToText upon Copy
When this box is checked, the text area of SpeakToText will be cleared each time you copy to Word or the clipboard. When this feature is enabled, it essentially makes the copy function act as a cut command; when you copy, the text is cut from SpeakToText and pasted into Word or the clipboard. This is especially useful when dictating with SpeakToText in Basic Mode and copying the dictated text into other applications.
Disable Application Selection Overwrite Protection (in Advanced Mode)
By default, when operating in Advanced Mode, SpeakToText protects selected text in the Target application from being overwritten by sending all dictation to the end of the text rather than exactly where the cursor is situated. The side effect is that dictation cannot be placed anywhere in the target application other than at the end of text. Also note that some applications may beep each time SpeakToText places text in those applications. If these side effects are undesirable, you can disable this feature by checking the “Disable Application Selection Overwrite Protection” checkbox or using the “insert key” on your keyboard (SpeakToText must have focus when you press the “insert key”). For more information on how this feature functions, see the section on Advanced Mode Application Selection Overwrite Protection above.
When I use the “Send Message” command, I want SpeakToText to:
The default is “Let SpeakToText find the best way” (since this option works with all supported chat and email applications).
If you are using a non-supported chat or email application, we recommend keeping this default setting if it works in your target application. Other choices are:
· Send the <Enter> character, then click the ‘Send’ button
· Click the ‘Send’ button
· Send the <Enter> Character
· Send <Ctrl-Enter>
If the default setting of “Let SpeakToText find the best way” does not work with your target application, try one of the other settings. We recommend trying “Send <Ctrl-Enter>” first, as this works with most programs.
If none of these choices work, you can try using a “New Line” (enter) or “New Paragraph” (double enter) dictation command into your message.
If this still doesn’t work, you can still use SpeakToText to dictate the message and then you can send the message using the mouse to click the target applications send button.
Automatically “Send Message” Every 30 Seconds
When this is enabled (checked), SpeakToText will deliver the Send Message command to the target application every 30 seconds, in accordance with the selection in the dropdown above. When this is enabled, you no longer need to speak the “Send Message” command, although this is optional. This feature is particularly useful if you are using voice chat software such, as Skype for example, and you want to send both voice and text of your end of the conversation.
Limit the file size of audio (.wav) files to:
The default is 300 seconds (5 minutes), but you have the option to change it. We do not recommend processing audio files longer than five minutes because recognizing .wav files uses a lot of system resources, and it may cause SpeakToText (and possibly other programs) to become unresponsive while recognition is taking place. It is best to break large audio files into smaller segments.
Reset Prompts button
Clicking on this button will restore confirmation dialog prompts to default. If you have previously selected to opt-out of certain prompts, these prompts will be restored.
Greeting Tab
In the Greeting Tab, you can enter text for how you’d like SpeakToText to greet you when it starts.
You can enable the personalized greeting by checking the “Enable Greeting” box.
You can have SpeakToText read your personalized greeting (so you can see how it sounds) by clicking on the “Say it” button.
NOTE: If you do not like the sound of the text-to-speech voice, you can try different voices in the Speech Properties dialog under the Text to Speech tab. To get there, close the Settings dialog and use the Speech Properties command (say “click speech properties” or click the Speech Properties button). Try the different text-to speech voices that come with the SAPI speech recognition engine and select the one you like best.
Tip: If the text-to-speech engine mispronounces your name, you can use the Train Word feature to train the preferred pronunciation of your name. You can also try different spelling variations that result in the desired pronunciation.
Formatting Tab
In the Formatting Tab, you can choose how SpeakToText will format numbers between zero and twenty. You can also enable/disable/adjust Background Noise Filtering for both commands and dictation from this tab.
Formatting Numbers
In accordance with standards for writing, the SAPI 5.1 Speech Recognition Engine automatically formats numbers between zero and twenty as text, and numbers 21 and higher as numeric numbers. For example, saying “five” will return “five” spelled out and saying “twenty one” will return “21” numerically.
In the Formatting Tab, SpeakToText gives you the option to force all numbers between zero and twenty to appear numerically. This is referred to as the “Sticky Force Num” setting.
Enabling the Sticky Force Num Setting – Check the box “Format all numbers between 0 and 20 to numbers” to force all numbers between 0 and 20 to appear numerically all the time.
Note: There are no SAPI or SpeakToText setting to make numbers 21 and higher appear as text, as this is not typically standard practice in writing.
Force Num Speech Command – Instead of enabling “Format all numbers between 0 and 20 to numbers,” you can use the “force num” speech command to make individual numbers between zero and twenty output as numbers. For this command to function properly, you MUST pause briefly after you say the command “force num” and before you say the number. For example, saying “force num (pause) five” will return the number “5.” Unlike the sticky Force Num setting, the force num speech command must be used once for each number you want to format numerically.
Background Noise Filtering
SpeakToText can filter both dictation and commands for background noise. The default setting for each is “disabled” with the filtering slider in mid-range. You should work with SpeakToText for an extended period of time to determine if your environment makes it necessary to use Background Noise Filtering or not. Most users working in a quiet room will not find it necessary to use this feature.
What is background noise in speech recognition?
In some instances, the speech engine recognizes background noise as commands and processes the commands even though they were not spoken. In other instances, background noise is recognized as words that are spoken in dictation, typically at the beginning or end of sentences and often when nothing was said.
Whether or not background noise is a problem depends on your audio system (sound card and microphone), environmental factors such as the room acoustics and the activity around you. If background noise is a problem, you can enable and fine tune Background Noise Filtering for commands, dictation, or both.
When do I use Background Noise Filtering?
Enable Background Noise Filtering for dictation if, during dictation, words that you are not speaking consistently appear at the beginning or end of sentences, or if words appear when you are not speaking.
You should enable Background Noise Filtering for commands only if you experience a frequent incidence of commands that you did not speak being processed, or if the program is consistently not responding to some, or all, of your spoken commands. Before enabling Background Noise Filtering, try repeating the unresponsive command(s) after a brief pause, as this often resolves the issue.
If you decide to enable Background Noise Filtering, go to “Settings” and select the “Formatting” tab.
Check “Enable filtering of background noise for Dictation” to filter dictation, and check “Enable filtering of background noise for Commands” if you want to filter commands.
The mid-range position on the slider bar in both sections works best in most environments and on most systems. However, each combination of environment and system varies, and finding the optimal settings for your system and environment may require some trial and error before you find the settings that work best for you. If you are using a notebook computer, the environmental factors are likely to change from place to place.
Tips on Background Noise Filtering
If, after enabling Background Noise Filtering for Dictation, words that were not spoken continue to appear, increase the filtering level by moving the slider to the right (stricter filtering). If the speech engine displays and rejects words that you have spoken (you see the words appear in the language bar, or the words appear and disappear from the SpeakToText dictation area), you can move the slider to the left (looser filtering). If you have a noisy environment or a poor quality sound card or microphone, you may have to accept recognition of some background noise as a compromise to avoiding rejection of phrases that you do actually speak.
If, after enabling Background Noise Filtering for Commands, you still experience a frequent incidence of commands that you did not speak being processed, you can move the slider to the right (stricter filtering). If spoken commands appear in the Language Bar but are not processed or do not appear in the Language Bar at all, you can move the slider to the left (looser filtering).
Before you enable filtering for commands, you should note that it is normal for unspoken commands to appear and immediately disappear in the Language Bar from time to time while the speech recognition engine analyzes the input it is receiving. This indicates that the speech engine initially tried to interpret background noise as a command, then determined on its own that the background noise was not actually a command. As long as these unspoken commands are not being processed, then you do not need to enable filtering for commands. In some environments, you may find that Command filtering needs to be set at a lower level than the setting for Dictation filtering.
Conversely, if filtering for commands is not enabled (the default setting), and you are speaking commands that appear in the Language Bar and are not processed or are not being recognized, then you can enable filtering for commands (we suggest moving the slider all the way to the left (looser filtering) at first). This should solve the problem; however, it may also result in some background noise being processed as commands. If this happens, you can use trial and error to adjust the level, by gradually moving the slider to the right (stricter filtering), until you find the optimal level where spoken commands are correctly processed and background noise is not misrecognized as a command.
User Commands Tab
In the User Commands tab, you can create your own speech commands to make your computer speak, browse webpages, open files and run programs. To create a new User Command or edit parts of an existing User Commands click on the “New” or “Edit…” buttons. To enable the User Commands you have created, check the “Enable these Commands” checkbox and click on “Apply” or “OK.”
The functionality of the User Commands tab is explained in detail in the section on User Commands above.
Speech Properties
Opens the Speech Properties Dialog for the Microsoft speech recognition engine.
Speech Command: “Click Speech Properties” “Train Speech Profile” and “Configure Microphone”
Button: ![]()
Details on the various options in the Speech Properties dialog are explained in detail in the “Setting Up the Microsoft SAPI 5.1 Speech Recognition Engine” section.
Note: The Speech Properties dialog needs exclusive access to the microphone, and therefore, when you enter Speech Properties, the microphone in SpeakToText is turned off. When you close Speech Properties and return to SpeakToText, you can turn the microphone on by clicking on the microphone button or menu item.
You can also access Speech Properties from the Windows control panel. However, if you do this while SpeakToText is running (not recommended), the SpeakToText microphone will not be turned off, possibly resulting in a conflict that causes either SpeakToText or Speech Properties to malfunction.
Help Menu
What Can I Say?
Opens the “What Can I Say?” window that displays a list of the command and control speech commands that are available at any given point in SpeakToText.
Speech Command: “What can I say” to open, and “Close Me” to close.
Button: Open
![]() Close
Close

Commands displayed in the What Can I Say? window will vary, depending on the commands available to you at that particular time in the program. What Can I Say? displays only command and control commands speech commands; it does not show dictation or SAPI formatting commands. See the Help Menu Display Dictation Command section below or the “Dictation Commands” section for a detailed list of dictation and standard SAPI formatting commands.
Open Dictation Commands List
Opens an HTML file in a new window of your default web browser that displays a list of available dictation commands.
Speech Command: “Open Dictation Commands”
Open Quick Start Guide
Opens the SpeakToText Quick Start Guide.
Speech Command: “Open Quick Start”
Open Manual
Opens the SpeakToText Users Manual
Speech Command: “Open Manual”
Notes on the Quick Start Guide and Manual
The HTML version of the SpeakToText Quick Start Guide and Manual are installed on your system when you install SpeakToText. When you select either the Quick Start Guide or Manual from the Help menu, the selection opens the Quick Start Guide or Manual in a new window in your computer’s default browser or other program that is set as the default program for HTML files. Typically, this is your default web browser.
Typically, when you update SpeakToText, the updated Quick Start Guide and Manual will be included in the update. You can also get the most recent version of the Quick Start Guide and Manual in the Support section of the CoolSoft, LLC website. You can go to www.CoolSoftLLC.com and click through SupportàManualsàSpeakToText.
Play video “How to Setup and Train Speech Recognition”
Plays a short and informative video on how to setup and train the Microsoft SAPI 5.1 speech recognition engine to recognize your voice. We recommend that you watch it when first starting to use SpeakToText.
Check for Updates
Looks for an available update and, if one is available, SpeakToText instantly downloads the update and launches the install.
Button: There is a “Check for Updates” button in the “About” dialog (See below). Click on this button, or say “Check for Updates.”
Note: You must be connected to the Internet before checking for updates. Otherwise, SpeakToText is unable to find any updates and will tell you that you are running the most current version.
SpeakToText is minimized when it starts to check for updates, and you need to use your mouse to click your way through the remainder of the update dialogs. If SpeakToText finds an update, it will download and install the update. When the update is finished, SpeakToText will restart.
Important: Before updating SpeakToText, if text is present in SpeakToText, you are prompted to save your work. If SpeakToText finds an update, SpeakToText must shut down to install the update, and you will lose your work if you do not save it.
About SpeakToText
Opens the “About” dialog which displays information about SpeakToText, the current version, your user information and registration key. Also displays the “Check for updates” button.
Speech Command: “Click About”
Button: ![]()
Using Dictation Commands
Dictation commands are speech commands that generate characters in place of spoken text (for example “new paragraph” or “period”), or which are used to navigate within or manipulate text that has been dictated. This section contains a list of dictation commands broken down by category. Categories are:
Phone Numbers and Email/URL Addresses
Punctuation Marks
You can scroll down or click on a category above for details.
Note: Dictation commands do not have buttons or tool tips and do not appear in the “What Can I Say?” dialog. We recommend that when you first start using SpeakToText, you keep a printed copy of the Manual or Quick Start Guide handy to help you learn and remember dictation commands. You can also display a list of dictation commands using the speech command “open dictation commands” or the “Open Dictation Commands list” Help menu item.
Note: Some dictation commands result in reformatted text. For example, in the dictation command “new paragraph,” the words “new paragraph” are replaced by two “new line” characters, which is the equivalent of pressing the enter key twice. Another example is the date spoken as “April twenty four nineteen fifty nine” which will appear as April 24, 1959.
Please note that some commands like “scratch phrase” or “no no” will not work with some reformatted text. This is not an error, but rather is normal functionality based on how the speech recognition engine and SpeakToText manage reformatted text. The text that was spoken has been replaced by the reformatted text, and as a result, the words you want to scratch are no longer there to scratch.
Selecting Text
To select (highlight) text in SpeakToText, say:
· “select word” to select the last word to the left of the cursor.
· “select phrase” or “select last” to select the last string of text recognized by SpeakToText up to the last reformatted text (for example, a period) or section of the speech recognized. If you dictate a long paragraph the speech recognition engine may break the paragraph up into smaller phrases or sentences. So, Select Phrase or Select Last may not always select the entire paragraph you dictated. If this happens, you should use the Select Sentence or “Select Paragraph commands.
· “select sentence” to select the last sentence (text from the left of the cursor to the beginning of the first word after the last period).
· “select paragraph” to select the last paragraph (text from the left of the cursor to the beginning of the first word following the last paragraph break).
· “select all” to select all the text in SpeakToText.
· You can also select text using the mouse by dragging the cursor over the text you want to select.
Actions on Selected Text
IMPORTANT: DO NOT TYPE OVER SELECTED TEXT USING YOUR KEYBOARD. IT WILL BE ERASED, YOU WILL LOSE YOUR WORK, AND IT CANNOT BE RECOVERED. USE ONLY SPEECH, BUTTON OR MENU COMMANDS WITH SELECTED TEXT.
When you have selected text, the copy commands, buttons, and right click menu, as well as the clear text command and button, will act only on the selected text. You can also use the “Ctrl-C” command on your keyboard to copy selected text to the clipboard.
Selected text that has been cleared using the Clear Text” speech command or button cannot be recovered using the Undo Scratch” speech command or button. Before clearing selected text, make sure you are certain you want to permanently delete that text.
While text is selected, you can say “delete selection” to delete the selected text. You can also use the delete key on your keyboard. Again, make sure you want to delete the selected text. The Undo Scratch command or button will not recover selected text that has been deleted by anything other than a Scratch speech command.
While text is selected, only commands intended to act on selected text will work. This prevents the accidental deletion of selected text. So, for example, commands like “space bar” and “back space” are disabled while text is selected. If SpeakToText hears dictation while text is selected, the cursor will go to the end of the selection and will start dictation from that position.
When text is selected, the “Paste from Clipboard” command is disabled. You must unselect the text before you can use the “Paste from Clipboard” command.
To unselect text, you can use the “Go to End/Bottom” or “Go to Top/Beginning” commands, or start dictation. You can also choose to unselect text or reposition the cursor using your mouse or the arrow keys on your keyboard. Typically, using the arrow key on your keyboard will return the cursor to the space before or after where it was prior to selecting the text (direction depends on the arrow).
Erasing Text
As noted throughout this manual, today’s speech recognition technology, although the best it has ever been, is not yet capable of achieving 100% accuracy all the time. Although you may be speaking clearly from a quiet room, and are using a well-trained recognition profile and a high quality headset microphone and sound card, you can expect accuracy in the range of 90% to 98%. You can use the mouse and keyboard to correct recognition errors in your text as you dictate, or you can proof read your work and correct any errors after you are done dictating.
Often, the mouse and keyboard are the best way to make corrections or erase text, but you can also erase text with the following speech commands:
· To erase a single character, say “backspace.”
· To erase the last word, say “scratch word” or “clear word.”
· To erase the last phrase recognized by the speech engine, say “scratch phrase,” “scratch last,” or “no no.”
· To erase the last sentence, say “scratch sentence”
· To erase the last paragraph, say “scratch paragraph.”
· To erase the entire contents of SpeakToText, say “scratch all” or “clear text.”
· To erase selected (highlighted) text, say “delete selection” or “clear text.”
Note: Scratch Phrase and Undo Scratch commands will work once consecutively, but once new text is inserted after a Scratch, Undo Scratch will no longer work. Text that has been restored by Undo Scratch cannot be Scratched again. To select and Scratch text that has been restored by Undo Scratch, use the Select Sentence/Word and Delete Selection commands, or use your mouse and keyboard.
Note: Scratch commands cannot act on text within a target application.
Moving Within Dictated Text
Command – What To Say: RESULT:
Go to Bottom Moves the cursor to the end of your document.
Go to End Moves the cursor to the end of your document.
Go to Top Moves the cursor to the beginning of your document.
Go to Beginning Moves the cursor to the beginning of your document.
Scroll Up Scrolls up dictated text in Basic Mode. If the What Can
I Say? dialog is displayed, scrolls up the WCIS list instead.
Scroll Down Scrolls down dictated text in Basic Mode. If the What Can
I Say? dialog is displayed, scrolls down the WCIS
list instead.
Note: All of the “Move” commands are disabled in Advanced Mode.
Formatting Text
Command – What To Say: RESULT:
New Paragraph Presses enter key twice.
New Line Presses enter key once.
Backspace Presses the backspace key once.
Space Bar Presses space bar once.
Cap Text Capitalizes the first letter of each word in the selected
(highlighted) text.
Cap All Text Capitalizes all the letters of the selected (highlighted) text.
Caps Lock Toggles the “caps lock.” Say “caps lock” to engage caps
lock, and say “caps lock” again to disengage. Works in both
Basic Mode and Advanced Mode.
Tab Key Presses the tab key once.
Note: The Cap Text and Cap All Text commands cannot be undone. Be sure you want the changes before using these commands. Also note that the Cap All Text command can be used with a selection after the Cap Text command, but the Cap Text command cannot be used after Cap All Text. The reason being that, since the first letter of every word is already capitalized, the Cap Text command will have no visible effect.
Note: The Cap Text and Cap All Text commands are not available in Advanced Mode.
Numbers and Fractions
Number: What To Say:
Three three (the speech engine default for single numerals between zero and twenty always typed as text by the Microsoft speech engine)
“3” “Force Num (pause) three” – will return the numeral 3.
“34” thirty four OR three four
“153” one fifty three, one five three, one hundred fifty three OR one hundred and fifty three
”6091” six eight nine one
6891 six thousand eight hundred ninety one OR six thousand eight hundred and ninety one (See Note below)
6,891.525 six thousand eight hundred ninety one point (decimal) five two five OR six thousand eight hundred and ninety one point (decimal) five two five
15,451 fifteen thousand four hundred fifty one OR fifteen thousand four hundred and fifty one
183,012 one hundred eighty three thousand twelve OR one hundred eighty three thousand and twelve
$75 dollar sign seventy five (saying dollar sign before the number returns the dollar amount without cents)
$75.00 seventy five dollars
$19.95 nineteen dollars and ninety five cents
½ one half
2 1/4 two and one quarter
5/8 five eights, five slash eight OR five over eight
150/85 one fifty over eighty five
Note: There is a known issue with SAPI Speech Recognition which results in some numbers between 1,000 and 9999 not being formatted correctly. For example, six thousand eight hundred ninety one comes back as 6891 instead of the desired 6,891. As of release, we have not been able to solve this issue; however, if and when we do find a solution, it will be released in an update.
Dates and Times
Result: What To Say:
November 3, 1981 November three comma nineteen eighty one
November 03, 1981 November three nineteen eighty one OR three November nineteen eighty one (omitting the comma returns a two digit date)
24 April, 1959 twenty four April comma nineteen fifty nine
04/24/59 zero four slash twenty four slash fifty nine
24/04/59 twenty four slash zero four slash fifty nine
4:16 PM ** four sixteen p m (See Note below)
5:00 five o’clock (works with whole hours only)
Note: There is a know issue with SAPI Speech Recognition which results in some “AM” times will not be formatted correctly. For example, four sixteen am may come out as 416 am instead of the desired 4:16 AM. As of release, we have not been able to solve this issue; however, if and when we do find a solution, it will be released in an update.
Phone Numbers and Email/URL Addresses
Result: What To Say:
(954)-555-7700 nine five four five five five seven seven zero zero
1-(800)-555-1212 one eight hundred five five five one two one two
.com dot com
.net dot net
.org dot org
Note: By default, the speech engine places area codes in parentheses.
Punctuation Marks
Result: What To Say:
. period/dot
. point (say when using numbers)
; semicolon
, comma
- hyphen
? question mark
-- double dash (note – saying “dash” also returns “- -“)
! exclamation point/exclamation mark
… ellipsis
: colon
’ apostrophe
/ slash
\ back slash
“ quote/open quote
” quote/end quote/close quote
‘ single quote/open single quote
’ single quote/end single quote/close single quote
( left paren/open paren
) right paren/close paren
[ left bracket/open bracket
] right bracket/close bracket
< left angle/open angle/less than
> right angle/close angle/greater than
{ open brace/left brace
} close brace/right brace
@ at sign
# pound sign
- hyphen (use for minus sign)
+ plus sign
$ dollar sign
= equal sign
% percent sign
^ caret (note if this returns the word “carrot” emphasize the “a” in your pronunciation(kAy-ret)
& ampersand
_ underscore
* asterisk
| vertical bar
TROUBLESHOOTING
Solutions for Poor Recognition Accuracy
If you are experiencing less than normal accuracy in your speech recognition, possible solutions include:
· Check your microphone settings. Go to the Speech Properties in the Control Panel and check your microphone settings.
· Make sure your microphone is positioned correctly (about one inch from your mouth), and that this position is consistent with the position of the microphone when you trained your speech recognition profile.
· Minimize background noise.
· Use the “Train Word” feature with words that are consistently being misrecognized.
If recognition was good when you started using SpeakToTextÔ 2.0 and it starts to deteriorate, closing and restarting SpeakToTextÔ 2.0 will often restore good recognition. If this doesn’t work, try restarting your computer.
Today My Voice is not as Clear
If you are experiencing poor recognition because your voice is not clear (for example, if you have a cold or sore throat), SpeakToTextÔ 2.0 is a fully Mouse and Keyboard compliant Windows application.
Another solution for poor recognition when your voice is not clear is to spend a few minutes creating and training another speech recognition profile. The new profile will work better with the current state of your voice.
Support Resources
SpeakToText is designed to be simple and easy to use and, in most cases, any issues you may encounter are covered in this Users Manual or in SpeakToText FAQ’s on our website (http://www.coolsoftllc.com/morehtml/speaktotextfaq.asp). Using these self-help resources will help you get answers to your questions quickly and efficiently.
If you do encounter an issue that you need help with, support is available on our website. To get support, go to the Support page at www.coolsoftllc.com. There you will find all the resources you need for self-help and technical support. Use our convenient web form to submit your support request. We need all of the requested information in order to help you; not providing complete information will delay or prevent us from processing your support request.
Before requesting technical support, we ask that you take some steps to troubleshoot the problem yourself. Most of the time that will lead to a solution, and you won’t have to wait for support. If your own troubleshooting does not result in a solution, knowing what steps you took in trying to resolve the issue on your own will be helpful to our support staff in finding a solution to your problem. So, please document and report any steps you have taken.
To find out about our support policy, refer to Appendix B, CoolSoft, LLC Technical Support Policy, below.
APPENDIX A
SpeakToText Speech Commands List
Note: If you enable and create User Commands, these will also appear in the What Can I Say? dialog.
SpeakToText 2.5 Speech Commands – Basic Mode
|
Advanced Mode |
Starts Advanced Mode |
|
Backspace |
Moves the Cursor Back One Space |
|
Cap All Text |
Capitalizes All Letters in Selected (Highlighted) Text |
|
Cap Text |
Capitalizes The First Letter of Each Word in Selected (Highlighted) Text |
|
Caps Lock |
Turns Caps Lock On/Off |
|
Clear Text |
Clears SpeakToText or Deletes Selected (Highlighted) Text |
|
Clear Word |
Deletes the Last Word Spoken |
|
Click About |
Opens the About Dialog |
|
Click Exit |
Closes SpeakToText |
|
Click Focus |
Brings SpeakToText to the Foreground |
|
Click Minimize |
Minimizes SpeakToText |
|
Click Save |
Saves the Contents of SpeakToText |
|
Click Settings |
Opens the Settings Dialog |
|
Close me |
Closes the What Can I Say? Dialog |
|
Configure Microphone |
Opens The Speech Properties Dialog |
|
Copy to Clipboard |
Copies the Contents of SpeakToText to the Clipboard |
|
Copy to Word |
Copies the Contents of SpeakToText to Microsoft Word |
|
Delete Selection |
Deletes the Selected (Highlighted) Text |
|
Force Num |
Forces the Next Number Between 1 and 20 to Numeric |
|
Go To Beginning |
Moves the Cursor to the Beginning of Text |
|
Go To Bottom |
Moves the Cursor to the End of Text |
|
Go To Sleep |
Stops Listening (Mutes SpeakToText) |
|
Go To Top |
Moves the Cursor to the Beginning of Text |
|
Go to End |
Moves the Cursor to the End of Text |
|
Microphone Off |
Turns the Microphone Off |
|
No no |
Deletes the Last String of Spoken Text |
|
Open Dictation Commands |
Displays a List of Dictation Commands in the Default Browser |
|
Open Manual |
Displays the Manual in the Default Browser |
|
Open Quick Start |
Displays the Quick Start Guide in the Default Browser |
|
Paste from Clipboard |
Pastes the Contents of the Clipboard into the Target Application |
|
Read Clipboard |
Reads the Contents of the Clipboard |
|
Read Right |
Reads the Text From the Right of the Cursor to the End |
|
Read Selection |
Reads the Selected (Highlighted) Text |
|
Read Text |
Reads All the Text in SpeakToText |
|
Scratch All |
Clears SpeakToText or Deletes Selected (Highlighted) Text |
|
Scratch Last |
Deletes the Last String of Spoken Text |
|
Scratch Paragraph |
Deletes the Last Paragraph |
|
Scratch Phrase |
Deletes the Last String of Spoken Text |
|
Scratch Sentence |
Deletes the Last Sentence |
|
Scratch Word |
Deletes the Last Word Spoken |
|
Scroll Down |
Scrolls up SpeakToText in Basic Mode, and What Can I Say? when open |
|
Scroll Up |
Scrolls down SpeakToText in Basic Mode, and What Can I Say? when open |
|
Select All |
Selects (Highlights) All Text in SpeakToText |
|
Select Last |
Selects (Highlights) the Last String of Spoken Text |
|
Select Paragraph |
Selects (Highlights) the Last Paragraph |
|
Select Phrase |
Selects (Highlights) the Last String of Spoken Text |
|
Select Sentence |
Selects (Highlights) the Last Sentence |
|
Select Word |
Selects (Highlights) the Last Word |
|
Space Bar |
Enters One Space |
|
Speech Properties |
Opens the Speech Properties Dialog |
|
Start CoolInfo |
If CoolInfo is installed, starts CoolInfo, or if running gives it focus |
|
Stop Listening |
Stops Listening (Mutes SpeakToText) |
|
Tab Key |
Inserts a "tab" character |
|
Train Speech Profile |
Opens the Speech Properties Dialog |
|
Train Word |
Opens the Train Word Dialog |
|
Undo Scratch |
Undoes the last scratch if no new text has been entered |
|
What Can I Say |
Opens the What Can I Say? Dialog |
SpeakToText 2.5 Speech Commands – Advanced Mode
|
Caps Lock |
Turns Caps Lock On/Off |
|
Click About |
Opens the About Dialog |
|
Click Exit |
Closes SpeakToText |
|
Click Focus |
Brings SpeakToText to the Foreground |
|
Click Minimize |
Minimizes SpeakToText |
|
Click Settings |
Opens the Settings Dialog |
|
Close me |
Closes the What Can I Say? Dialog |
|
Configure Microphone |
Opens The Speech Properties Dialog |
|
Copy Target |
Copies the Contents of the Target Application to the Clipboard |
|
End Advanced |
Returns SpeakToText to Basic Mode |
|
Force Num |
Forces the Next Number Between 1 and 20 to Numeric |
|
Go To Sleep |
Stops Listening (Mutes SpeakToText) |
|
Microphone Off |
Turns the Microphone Off |
|
Open Dictation Commands |
Display a List of Dictation Commands in the Default Browser |
|
Open Manual |
Displays the Manual in the Default Browser |
|
Open Quick Start |
Displays the Quick Start Guide in the Default Browser |
|
Paste from Clipboard |
Pastes the Contents of the Clipboard into the Target Application |
|
Read Clipboard |
Reads the Contents of the Clipboard |
|
Read Target |
Reads the Contents of the Target Application |
|
Scroll Down |
Scrolls Down in the What Can I Say? dialog |
|
Scroll Up |
Scrolls Up in the What Can I Say? dialog |
|
Send Message |
Sends the Message in Supported Chat and Email Programs |
|
Speech Properties |
Opens the Speech Properties Dialog |
|
Start CoolInfo |
If CoolInfo is installed, starts CoolInfo, or if running gives it focus |
|
Stop Listening |
Stops Listening (Mutes SpeakToText) |
|
Tab Key |
Inserts a "tab" character |
|
Train Speech Profile |
Opens the Speech Properties Dialog |
|
Train Word |
Opens the Train Word Dialog |
|
What Can I Say |
Opens the What Can I Say Dialog |
SpeakToText 2.5 Commands – For Microphone On And Listening Off
|
Click Focus |
Brings SpeakToText to the Foreground |
|
Close me |
Closes the What Can I Say? Dialog |
|
Start Listening |
Turns Listening On (Un-mutes SpeakToText) |
|
Wake Up |
Turns Listening On (Un-mutes SpeakToText) |
|
What Can I Say |
Opens the What Can I Say? Dialog |
APPENDIX B
CoolSoft, LLC Technical Support Policy
In order to keep the cost of our products low, CoolSoft, LLC provides technical support to registered users on a best efforts basis only. We will do our best to help you resolve your issue, but we cannot guaranty a solution.
We cannot respond to requests for support on the following:
· How-to questions or technical issues that are covered in the Users Manual, Release Notes or in our FAQ’s. For example, a question where it is obvious that the user has not taken the time to read the manual, FAQ’s or other resources and follow the instructions.
· Issues related to the Microsoft speech recognition engine, or issues with SpeakToText that are caused by the Microsoft speech recognition engine.
· Issues related to third party programs such as chat or email programs or problems with SpeakToText™ 2.0 caused by those programs.
· Questions from unregistered users who have not purchased a registration key. To keep the cost of our products low, we cannot support trial users. To get support, you need to provide your email address and either your order number or a valid registration key for one of our products, and submit your request through the convenient on-line form in the Support section of or website.
· Requests for support that do not provide the required information.
Support with the Microsoft Speech Recognition Engine
If you need help with the Microsoft Speech Recognition Engine or issues caused by the Microsoft engine, you can use the help resources in the Speech Properties dialog under the “Help” tab, (Startà Settingsà Control Panelà Speechà Other Tabà Help). You can also visit the speech section of the Microsoft website at http://www.microsoft.com/speech or you can contact Microsoft technical support directly.
Support on Third Party Software
If you need support with another program or issues caused by another program, use the help feature in that program, or contact the manufacturer’s technical support directly.
APPENDIX C
Examples for Creating User Commands in SpeakToText
The following are examples for creating typical user commands in SpeakToText:
User Command to Run a Program Registered with Windows (Notepad in this example)
User Command to Run a Program Not Registered with Windows (Winamp in this example)
To determine if an application is registered with Windows go to the command line (start, run) and enter the name of the application (for example “winword” or “notepad”). If the application starts, then it is registered with Windows and you can follow the first example above. Otherwise it is not, and you need to enter the full path to the application as in the second example in order for the User Command to work.
To insure accuracy, its best to use the browse button to the right of the Target field (labeled “Program” in the two examples above) to browse to the target application for your command.
User Command to Open a Webpage in the Default Browser
To insure accuracy, it is best to copy the website URL from your web browser and paste it into the Target field (labeled “Web site” in the example above).
Multi-Step User Command to Open a Webpage, Display the Page for 60 Seconds, and Return Focus to SpeakToText
When creating a multi-step User Commands, the Command field (the words you want to speak to run the User Command) must be identical for each step and are case sensitive.
Step 1
Step 2
Step 3
User Command to Open a Document or File in the Default Application (an .mp3 music file in this example)
To insure accuracy, its best to use the browse button to the right of the Target field (labeled “Document” in the example above) to browse to the target file for your command.
User Command to Make the Computer Speak
APPENDIX D
Using SpeakToText User Commands to Operate X10 Modules in Active Home Pro by Speech
Starting with SpeakToText Version 2.51, User Commands can process commands that contain command syntax for an application. The vertical slash "|" is used to separate the application path and the command syntax.
To create a User Command that runs an application and gives it a command, the entry in the Target field of the Create User Command dialog has two parts: (Application Path|Command Syntax). The first part before the vertical slash must contain the path to the application, and the second part after the vertical slash contains the command to be processed by the application when it runs. Typically, any “Application Path|Command Syntax” combination that runs from the command line, will also run in User Commands by speech.
With this functionality you can create User Commands to speech-enable your X10 Active Home Pro home automation system. Here are instructions for creating a user command to turn on module A1.
From the Create User Commands dialog, enter the words you want to speak for your command and select Run (or Open) from the Action dropdown. In the Target field, browse to the location of ahcmd.exe and select that file as the target (typically “C:\Program Files\Common Files\X10\Common\ahcmd.exe”). Then type in "|" (vertical slash) and the desired command for the module (in this example "sendplc a1 on" to turn module A1 on). For this command, the Target field in the Create User Commands dialog should contain the following:
C:\Program Files\Common Files\X10\Common\ahcmd.exe|sendplc a1 on
Note: There is no space between the application path, the vertical slash and the command syntax.
The following are examples the User Command syntax for turning off and dimming (by 20%) module A1:
C:\Program Files\Common Files\X10\Common\ahcmd.exe|sendplc a1 off
C:\Program Files\Common Files\X10\Common\ahcmd.exe|sendplc a1 dim 20
Known Issues for SpeakToText™ 2.5 Speech Recognition – Version 2.51
As of the November 30, 2006 release date, the following known issues apply to SpeakToText™ Speech Recognition Version 2.51. Many of these items are related to functionality that is normal behavior for SpeakToText, and the discussion gives recommendations for dealing with them. Other issues may be addressed in future releases, so we recommend that you check for updates periodically using the “Check for Updates” button in the ”About” dialog or the “Check for Updates” selection from the Help menu.
The SpeakToText Install Takes a Long Time
This is normal on many systems. First of all, the SAPI 5.1 speech engine is a large file that takes time to unpack and setup. Second, if you are running anti-virus software, it may be scanning some of the files being installed - this can slow down the process. Third, installs are particularly slow on older systems (with slower processors or less than 256 megs of memory). Combine these three factors together on one system, and the install can take a long time (over five minutes).
If the install is taking a long time, please be patient and wait for the install to complete. Chances are that nothing is wrong and the install will finish normally. If you stop and start over again, it will just end up taking longer, so do not cancel and restart the install unless you are cretins the system has stopped responding.
Install Failures
SpeakToText is installed with the Wise Installer. There are two known issues with the installer which are described below. If you encounter one of these problems and the recommended solution does not work for you, then submit a technical support request in the support section of the www.coolosftllc.com website.
If the install hangs, it is likely that another program has installed a copy of UNWISE.EXE in the root of the C:\ drive. The recommended workaround is to look in C:\ for the file “UNWISE.EXE. If you find it rename the file to UNWISE.OLD (so you can rename it back to .EXE if another program ever needs it), then try the install again.
If you are installing the full version of SpeakToText after a previous install of the trial version, or if you are reinstalling SpeakToText without having uninstalled it first, you may get an error message that says: “The file 'C:\Program Files\SpeakToText v2\UNWISE.EXE' could not be opened…” If this happens the recommended workaround is to exit the install, and start the install over. This second time you start the install, it should run through to completion.
Startup Related
Unwanted Text Appears When Starting SpeakToText
When starting SpeakToText, if your speakers are turned up too loud when the greeting is spoken, or if there is a high level of background noise, a few stray words may appear in SpeakToText while the speech recognition engine is initializing. If this happens, you can simply clear the unwanted text with the “clear text” “scratch all” speech commands, or by clicking on the “Clear SpeakToText” button. You can also turn down your speakers, use the speaker(s) on your headset while using SpeakToText, or adjust your environment to eliminate/reduce the background noise.
Misrecognition of Your Speech When SpeakToText First Starts
When you first start SpeakToText or after you turn the microphone on, recognition accuracy may not stable for the first 15 to 30 seconds. This is because it takes longer for the SAPI speech recognition engine to finish initializing and become stable, than it does for SpeakToText to startup. This happens at both startup and when you turn the microphone on because when the microphone is turned off, SpeakToText releases the speech recognition engine. When the microphone is turned on again, the speech recognition engine needs to reinitialize.
The Microsoft SAPI speech recognition engine is third-party software over which SpeakToText has limited control. After you begin dictation the speech recognition engine stabilizes, and the time this takes is dependent on your system. If after starting SpeakToText or turning on the microphone, the first sentence you dictate is misrecognized or incomplete, the solution is to use the “clear text” command and start your first sentence over.
Listening Starts by Itself
There is a known issue where if the microphone is turned on, and listening is turned off, background noise may be recognized as the “wake up” or “start listening” commands. This enables listening, and after listening is enabled background noise or speech are sometimes detected as dictation. If you are in Advanced Mode, unwanted text may appear in the program which has focus (the target application). The workarounds for this are to i) enable and adjust command filtering in the formatting tab of settings; ii) turn the microphone off if you are not planning to use SpeakToText for a while; or iii) if you are using another application, return to Basic Mode (“end advanced” speech command or button).
Crash After Default Speech Properties Warning Dialog
If you are using the default speech recognition profile, SpeakToText prompts you with a dialog reminding you to create and train a speech recognition profile, and offers you the option to go to Speech Properties to do this training. If you enter Speech Properties, the startup of SpeakToText is suspended, and resumes when you exit Speech Properties. This delay in the startup of SpeakToText may cause the program to crash. If this happens, it does not affect the training you did in Speech Properties. Restart SpeakToText and it will function normally.
The First Command or Words Spoken After a Pause in Dictation May Not Be Recognized
With Commands
After a pause in dictation, commands are not always recognized. The command may appear in the Language Bar, but not be acted upon. The recommended workaround is to repeat the command. You may also try enabling the Background Noise Filtering for commands feature in the Formatting tab under Settings.
With Dictation
After a pause in dictation, the first word(s) in a sentence is (are) missed or recognized incorrectly. The recommended workaround is to use the “scratch last” or “no no” command, and repeat your dictation. You may also want to make certain you are pronouncing the first word as clearly as the rest of your words.
Background Noise and Background Noise Filtering
On some systems and in some environments, there may be a problem with background noise being recognized as commands that were not spoken or unwanted dictation resulting in “stray words” that were not spoken appearing in the dictation area. SpeakToText can filter for background noise to prevent this, and if background noise is affecting dictation or commands, enable one or both of these options.
It is best to start with the default setting of the slider in the center position, however, background noise filtering will perform differently on every system, depending on many factors like processor, memory, sound card, microphone, system resources being used by other applications, your environment, and even your voice on that day. If the default setting doesn’t work try adjusting the level. Finding the optimal level for your system can only be determined by trial and error. If filtering is too high, then commands or dictation may be rejected. If filtering is too low, then you will continue to experience unwanted text from background noise.
If you are using the SAPI 6.1 Speech Recognition Engine in Windows XP systems, background noise filtering can be sensitive on some systems. While the SAPI 6.1 Speech Recognition Engine will give you better performance in this configuration, enabling background noise filtering for dictation and/or commands in SpeakToText may result in the loss of dictation and command functionality if filtering is too strict. After you enable background noise filtering, if you lose speech command functionality or dictation appears in SpeakToText then disappears, use your mouse to return to the Settings dialog and start moving the sliders under the two filtering options to the left until command and dictation functionality returns. This is a matter of trial and error to find what levels work best on your system.
Audio File Recognition Issues
WAV File Processing – Some Buttons Do Not Gray Out
When SpeakToText first starts processing a .wav file, all buttons except the Clear Speech Buffer, Save Text and Read Text buttons are grayed out. The Clear Speech Buffer button is active in case you want to abort the .wav file processing, and the Save Text and Read Text buttons are live (although not functional at this time) because SpeakToText has placed new text in the text area. We do not recommend clicking on the Save Text and Read Text buttons while a .wav file is being processed. Doing so will abort the .wav file recognition, and you will have to start over.
WAV File Processing in Trial Mode and the 1000 Character Trial Limitation
When in trial mode, SpeakToText has a 1000 character limit. If you process a .wav file from trial mode, when SpeakToText reaches this 1000 character limit, no more text will appear; however, SpeakToText must finish cycling through the .wav file before you can turn the microphone back on. Depending on the size of your .wav file, this may take some time. Please be patient.
Nothing Happens After Dragging an Audio File into SpeakToText
You drag & drop an audio file on SpeakToText™ 2.0, and nothing happens. It’s possible that the SpeakToText confirmation dialog that appears by default before processing an audio file is hidden behind My Computer (or Windows Explorer), and minimizing that should reveal the confirmation dialog. To prevent this from happening, it is best for My Computer/Windows Explorer not to fully overlap SpeakToText™ 2.0 when selecting an audio file.
After you become familiar with using SpeakToText™ 2.0 to process audio files, the best solution to this issue is to disable this confirmation dialog by checking “Do not display this prompt again.”
User Command Issues
Focus Command Step Does Not Always Work
If you create a multi-step user command, the command you speak must be the same for each step, and only the tool tip for the first command in the sequence will be displayed. You can use the move buttons in the User Commands Dialog to adjust the sequence of multi-step user commands. If one of the steps in a multi-step user command is Focus (the equivalent of the speech command “Click Focus”), this may cause a race condition where the Focus command wins the race and is executed before the other steps in the command. This gives the appearance that the focus command failed to execute, when in reality it was processed before the other commands in the sequence and SpeakToText was then covered by the other program(s) in the command sequence. To avoid this problem, the Focus step in a multi-step user command should be the last command in the sequence, and should be preceded by a “Sleep” command with a value that allows enough time for the other commands in the sequence to be processed before the Focus command is executed. For example, the command of “start my favorite programs” can execute the following commands:
Browse = www.cnn.com
Start = notepad.exe
Sleep = 10
Focus
This results in ww.cnn.com opening in the default browser, and Notepad starting, both of which will open on top of SpeakToText. The sleep command pauses for 10 seconds (allowing these programs to open), and then executes the Focus command which brings SpeakToText to the foreground, achieving the desired result.
The Command Step Following a Browse Command Step Does Not Always Work
If you are creating multiple step user commands, a sleep command needs to follow a browse command, or the command(s) that follow the browse command may not be executed. The time of sleep command following a browse command depends on speed of internet connection, and you need to experiment to find a sleep interval that works best for your system and connection speed. Note that a single step browse command, or a browse command that is the last command in a multiple step user command do not require a sleep command.
Background Noise and the Create User Commands Dialog
On some systems and in some environments, the Create User Commands dialog can be highly sensitive to background noise, causing it to close or change tabs after creating a User Command. If this happens on your system, simply turn the microphone off and user your mouse to navigate to the Create User Commands dialog (Settings button, User Commands Tab, New).
What Can I Say? Dialog Issues
What Can I Say? Dialog Opens Randomly
There is a known issue where background noise may cause the What Can I Say? dialog to open randomly. Likewise, background noise may cause some user commands, such as commands to browse webpages to be executed. To avoid this, turn the microphone off when you are not actively using SpeakToText.
Opening the “What Can I Say?” Dialog In Both SpeakToText and CoolInfo at the Same Time
If you open the “What Can I Say” dialog in both SpeakToText and CoolInfo, they are likely to open in the same place, so that one superimposes on the other. This makes it possible to confuse the “What Can I Say?” dialog of the two programs. If you are running both SpeakToText and CoolInfo together, it is best to close the What Can I Say dialog in one program before opening it in the other.
Opening the “What Can I Say?” Dialog From Advanced Mode
When opening the “What Can I Say” dialog in Advanced Mode, the “What Can I Say?” dialog opens at a reduced size. If it is left at this reduced size and not expanded with the mouse, it is more easily lost behind SpeakToText or other programs. Under this scenario, if you cannot find the “What Can I Say” dialog, try using the “Close Me” speech command, then reopen it with the “What Can I Say” speech command. If you still cannot locate the “What Can I Say” dialog, try closing and restarting SpeakToText.
Turning the Microphone Off While Speaking
If you turn the microphone off while you are speaking, the speech engine will stop recognition but the microphone button will not respond until you stop speaking. This occurs because the speech engine does not release the microphone while it is receiving input. To avoid this problem, stop speaking when you turn the microphone off.
Clearing the Speech Buffer While Speaking
If you press the Clear Speech Buffer button (or the “esc” key) to cancel speech recognition and clear the speech buffer, this stops the speech recognition engine turns the microphone off. Note that although this stops speech recognition, the Microphone will not turn off and SpeakToText will not respond until you stop speaking. This occurs because the speech engine does not release the microphone while it is receiving input. To avoid this problem, stop speaking when you clear the speech buffer.
The same thing happens if you are processing a .wav file and you press the Clear Speech Buffer button (or the “esc” key) to cancel the process, the microphone may not turn off until the speech engine encounters a pause or has completed cycling through the .wav file. This is related to the speech recognition engine not releasing the microphone while it is receiving input. Be patient, and the microphone will turn off and SpeakToText will become responsive again.
Numbers Are Not Always Formatted Correctly
Numbers between 1,000 and 9999 are not always formatted correctly. For example, six thousand eight hundred ninety one comes back as 6891 instead of the desired 6,891. This is a speech engine issue over which we have no control, and the recommended workaround is to manually place the comma with the mouse and keyboard.
Time of Day Not Always Formatted Correctly
When speaking the time using AM or PM, morning (AM) times are not always formatted correctly. For example, four sixteen am may come out as 416 am instead of the desired 4:16 AM. This is a speech engine issue over which we have no control, and the recommended workaround is to manually correct the time using the mouse and keyboard.
A Banner Still Appears After Entering the Registration Key
After you enter your registration key and continue, the second banner still appears. This occurs only once, and it occurs because SpeakToText was launched from the Trial startup dialog. The next time you launch SpeakToTextÔ 2.0, the Trial dialog will not appear, and SpeakToText will be banner free.
New Line or New Paragraph Command Sends Message
When using SpeakToTextÔ 2.0 with MSN Messenger, the new line or new paragraph command will send the message in MSN Messenger. This happens because the enter key in MSN Messenger sends your message. In SpeakToTextÔ 2.0, the new line command sends the enter character once, and the new paragraph command sends the enter key twice. This also applies to other chat applications that use the “enter” key to send a message. The solution is not to use the “new line” or “new paragraph” speech commands when dictating chat messages. Note that in MSN Messenger, if you want to start a new line, press the “ctrl” and “enter” keys on your keyboard simultaneously. Pressing these keys twice will start a new paragraph.
“Scratch Last” and “no no” Commands Do Not Always Work
The “Scratch Last” and “no no” commands work only with spoken text. They do not work on typed or reformatted text that has been i)typed from the keyboard, ii)pasted from the clipboard or iii)restored with the “Undo Scratch” command. The same applies to spoken text that has been re-formatted by SpeakToText™ 2.0. Reformatted text is any text that has been received from the SAPI speech engine, and changed by SpeakToText, for example numbers or text that has been capitalized by the “cap all text” command.
Another issue is where the “scratch last” and “no no” commands do not always work following a paragraph break. This behavior is inconsistent with normal text, and consistent with text dictated when “caps lock” is toggled on. The recommended workaround is to use “select sentence/paragraph” command followed by the “delete selection” command.
If “scratch Last” and “no no” are not working, try using the “select sentence” or “select paragraph” commands followed by the “delete selection” command to delete the desired text. Of course, you can always use your mouse and keyboard to select and delete text.
“Select Last” Command Does Not Always Work
This is similar to the issue above with “scratch last.” The “select last” command works only with spoken text. It does not work on text that has been typed from the keyboard or pasted from the clipboard. The same applies to spoken text that has been re-formatted by SpeakToText™ 2.0, for example reformatting of numbers or text that has been capitalized by the “cap all text” command.
If “select last” is not working, try using the “select sentence” or “select paragraph” commands. Of course, you can always use your mouse and keyboard to select text.
Clear Word and Scratch Word Speech Commands Do Not Always Work
There is a known issue with the speech commands “Clear Word” and “Scratch Word.” If either are used in SpeakToText after the cursor has been moved, either command will work once the next time it is invoked, but will not work again after that. If the cursor is again moved to another place in SpeakToText (other than the end of the document), then invoking either command again will delete the word to the right of the cursor (instead of the word to the left as it does under normal conditions). It is best not to use the “Scratch Word” or “Clear Word” commands if the cursor has been moved manually with the mouse, or by speech with the “go to top/bottom” or “go to beginning/end” speech commands.
Undo Last Scratch Does Not Always Work
In order for the "undo scratch" command to work, it must be used before you insert any additional new text. If you say something after scratching text, or if the microphone picks up background noise and recognizes it as a word, the undo scratch will no longer restore the deleted selection because new text has replaced it.
The cause and result of this problem can be best illustrated by a comparison to browsing a series of WebPages. If you start at page A, go to page B, then page C, you can move back and forth between pages A, B and C. But if you are on page B and you go to page D, you can no longer get back to page C using the back button because page C has been replaced by page D, and if you use the forward button from page B, it will take to page D because page C has been removed from the sequence.
Similarly, in SpeakToText, using words A, B and C as an example. If you scratch word C, then word B will be the last word. You will be able to undo the scratch of word C only until you speak word D. Once word D is spoken, you cannot go back and restore (undo the scratch) of word C because word D has now taken its place.
The “Click Focus” command doesn’t work after using the “Copy to Word” command
After you use the “Copy to Word” command or button, if Word was not open, the “click focus” command will not be active. In this case, you need to use the mouse and click on SpeakToText in the taskbar in order to bring SpeakToText back to focus. After this, the “click focus” command will function normally. This only happens when Word was not already open when you used the “Copy to Word” command or button.
The “Force Num” Speech Command doesn’t work
After saying the “force num” command, the command is not recognized, or the number (between zero and twenty) is still spelled out.
You MUST pause briefly after saying the “force num” command and before saying the number.
Clear Speech Buffer using the “Esc” key doesn’t work
In order for the “Esc” key to clear the speech buffer, SpeakToText MUST have the active focus. Otherwise, the application with the active focus will receive the command from the “Esc” key.
Before pressing the “Esc” key, click on SpeakToText in the taskbar, or click directly on SpeakToText.
Language Settings and SpeakToText
When using SpeakToText with the system language set to other than US ENGLISH, some unwanted character translation may occur. Using SpeakToText with other than US ENGLISH is not recommended.
Copying from the Clipboard
Pasting from the clipboard when it contains graphics and characters other than text has been known to result in failure of SpeakToText on some systems, and could cause you to lose your work. While this is not typical, we do not recommend pasting from the clipboard when it contains graphics and characters other than text.
The Microphone and Text to Speech
When you use any of the “Read” commands, SpeakToText turns the microphone off while it is reading your selection. This prevents the speech recognition engine from trying to recognize the words that are being read. When SpeakToText is finished reading, or when you use the “stop reading” button, the microphone is turned on again. If you use the Settings button while SpeakToText is reading, the microphone does not come back on when reading is finished, and you need to click on the Microphone button to turn it back on.
Application Selection Overwrite Protection (Advanced Mode)
SpeakToText now has a feature to prevent selected text in the target application from being overwritten. The default setting is enabled. Side effects of this feature are that text can only be inserted into the target application at the end of the text, and it causes some applications to beep when text is being dictated. This feature can be disabled using the “Insert” key on your keyboard, or from the General tab in the Settings dialog.
When using the “insert” key to disable/enable overwrite protection, SpeakToText MUST have the focus when you press the insert key. Otherwise, the “insert” key will act on the application that does have the active focus. To do this, click on SpeakToText (either on the SpeakToText window or in the taskbar) to bring SpeakToText to focus. Press the insert key, then go back to the target application in the same manner and place the cursor where you want your dictation to appear.
If you disable this overwrite protection feature, be sure to save your work before selecting text, or make sure either listening or the microphone in SpeakToText are turned off first. If selected text is unintentionally deleted, use the undo button in the target application to recover the text.
Running Two Copies of SpeakToText
When starting, SpeakToText checks to see if another copy is running, and if so it does not allow the second copy to start. This check does not work if a second copy of SpeakToText is launched while the first copy is still starting, because it is not fully initialized.
Also, in configurations where the default speech recognition profile is selected in Speech Properties, SpeakToText displays a dialog to prompt you to train your own speech recognition profile, and suspends the startup process until the user cancels out of the dialog, or enters and exits Speech Properties. Under these conditions, while startup is suspended it is possible to start a second copy of SpeakToText, although we do not recommend or support this. Running more than one copy of SpeakToText at one time may cause unusual behavior or a crash in one or both copies. This is not recommended and not supported.
Release Notes for SpeakToText™ 2.5 Speech Recognition - Version 2.51
These Release Notes apply to SpeakToText 2.5 Version 2.51 dated December 14, 2006 and released on December 22, 2006. You will also find a section on Known Issues above, which may also be helpful. Additional release notes will be posted on our website (www.CoolSoftLLC.com) as they become available.
This Version 2.51 fixes a number of bugs found in Version 2.50, including:
· A crash upon entering settings if the microphone was turned off.
· Missing tool tips for user commands in the What Can I Say? dialog.
· An error in processing User Commands if the path contained spaces.
· A bug that prevented the Target field in User Commands from being edited.
This release also includes an important enhancement to User Commands. User Commands can now process commands that contain command syntax for an application. The vertical slash "|" is used to separate the application path and the command syntax.
To create a User Command that runs an application and gives it a command, the entry in the Target field of the Create User Command dialog has two parts: (Application Path|Command Syntax). The first part before the vertical slash must contain the path to the application, and the second part after the vertical slash contains the command to be processed by the application when it runs.
Typically, any “Application Path|Command Syntax” combination that runs from the command line, will also run in User Commands by speech. Take the following example for turning on Module A1 in an X10 Active Home Pro home automation system.
C:\Program Files\Common Files\X10\Common\ahcmd.exe|sendplc a1 on
These Release Notes apply as of September 30, 2006. You will also find a section on Known Issues above, which may also be helpful. Additional release notes will be posted on our website (www.CoolSoftLLC.com) as they become available.
Release 2.50 – Dated September 11, 2006 – Released on September 30, 2006
SpeakToText is now titled “SpeakToText 2.0 Speech Recognition” in order to more accurately represent its functionality.
New Features in SpeakToText™ 2.0 Speech Recognition, Release 2.50:
Speech Recognition
Additional enhancements to the speech recognition layer to make speech recognition more robust.
Added speech recognition engine management between CoolSoft products. If more than one CoolSoft speech recognition product is running, and the microphone is turned on in one of them, the other turns off its microphone and releases the speech recognition engine.
Improved Microphone Management. The speech recognition engine is released when the microphone is turned off. Added a red/green light to the lower right to indicate when the microphone is on and SpeakToText has control of the speech recognition engine. Microphone is turned off and the speech engine is released when the microphone button is clicked or the microphone off command is spoken, after clearing the speech buffer, when going into speech properties using the speech properties button or speech command, and when the microphone is turned on in another CoolSoft speech recognition product. The microphone is disabled during typing and reading without releasing the speech engine.
Improved .wav file processing. SpeakToText no longer minimizes and now lets you see the progress as a .wav file is being processed. Allows use of Clear Speech Buffer to abort .wav file processing. Microphone is turned back on after .wav file processing is complete.
Text to Speech
Improvements in Text to Speech. Modified Read Text button and speech command. Added pause and stop reading buttons.
Send Message Feature
Added option to auto-send chat messages every 30 seconds
User Commands
Custom Commands renamed to User Commands. Improvements to User Commands. Added “sleep” and “focus” actions, and improved management of multi-step user commands. User commands section added to What Can I Say? dialog.
New Speech Commands
Added “Tab Key” speech command to send the “tab” character.
Added Scroll Down and Scroll Up speech commands, which act on SpeakToText in basic mode, and on the What Can I Say? dialog when it is open.
Added launch CoolInfo speech command to launch CoolInfo if it is installed.
What Can I Say?
Improved sorting and management of What Can I Say? dialog. Added tool tips to What Can I Say? commands list.
Registration
Registration of a license key is now verified on-line and limited to five times, in accordance with the user license agreement. Must be connected to the Internet to register.
Added sponsor management to registration process. The registration process is now capable of giving credit to sponsors if a copy of SpeakToText comes from an approved sponsor.
Updates
Updates from previous versions also update the Manual and Quick Start Guide to the most current version 2.50. When new updates or additional release notes become available, the information will be posted in the Support section of our website at: www.coolsoftllc.com.
Documentation
Documentation in the Manual and Quick Start Guide has been updated and improved.
A Quick Reference Guide is now available at http://www.coolsoftlllc.com/downloads/SpeakToText2_0QuickReference.pdf
Release Notes and Quick Reference Guide now included in Appendix of User Manual.
Release 2.35 – Dated September 30, 2005 – Released on October 14, 2005
This latest release of SpeakToText™ 2.0 includes two major upgrades to the speech recognition layer, and the addition of three major features to enhance usability, enable users to create their own speech commands, and read text. It also includes other new features, and numerous bug fixes.
New Features in SpeakToText™ 2.0, Release 2.35:
Dynamic Grammars
SpeakToText is now enabled to use dynamic grammars. This makes SpeakToText more robust, and will enable more features in future updates. The change is user transparent.
Re-entrant .wav File Processing
This change is user transparent, and has improved performance.
Advanced Mode
Set Target and Echo to Target functionality have been replaced by Advanced Mode. The target application no longer needs to be set, and when in Advanced Mode, you can change from target to target by clicking with your mouse in the desired target application. The desired target application MUST have the active focus, and the cursor MUST be placed in the text area of the desired target application where you would normally type your text. The copy to target functionality is no longer necessary and has been eliminated. You can still copy text from SpeakToText to other applications by way of the clipboard.
Custom Commands
SpeakToText now enables the user to create their own speech commands. After a Custom Command is created, SpeakToText will run the command whenever it is spoken. To create custom commands, see the Custom Commands tab in the Settings dialog.
Text-to-Speech (TTS)
A TTS feature has been added. SpeakToText will now read text from SpeakToText, the clipboard or the target application in advanced mode. The speech commands “read all” “read selection” “read right” “read clipboard” and “read target” (advanced mode) have been added. When SpeakToText is reading, the microphone is turned off. This is so that SpeakToText cannot hear the text that is being read. A “Stop Reading” button has been added. Clicking on the “Stop Reading” stops the reading.
Click Minimize
A “Click Minimize” speech command has been added to compliment the “Click Focus” command. Saying “click minimize” will minimize SpeakToText to the taskbar.
“Copy Target” Speech Command
This speech command copies the entire contents of the target application to the clipboard.
Bug Fixes
Many user transparent and minor bugs have been fixed. Major bug fixes include:
The “What Can I Say?” dialog is now empty when the microphone is turned off, and the start/stop listening buttons are unavailable.
The “Apply” button is now enabled in all tabs of the Settings dialog after making changes.
Loss of focus after copying to Microsoft Word when Word is started by SpeakToText is fixed.
Running more than one copy of SpeakToText is now disabled. When SpeakToText starts, it now checks to see if it is already running and prevents a second copy from being started.
Unresponsiveness during updates is fixed. The update dialog shows the progress of the download, and can now be canceled. Canceling the update restores SpeakToText.
A problem that caused the first update to be repeated in subsequent updates has been corrected. This problem occurred only on some systems. If you are experiencing this problem, go to the SpeakToText v2 folder in Program Files, delete the SpeakToTextSetup.exe file, and run the update again.
Updates
Updates from previous versions also update the Manual and Quick Start Guide to the most current version 2.35. When new updates or additional release notes become available, the information will be posted in the Support section of our website at: www.coolsoftllc.com.
Documentation
Documentation in the Manual and Quick Start Guide has been improved.
Additional Changes and Known Issues Determined After Completion of the Manual
If you are installing the full version of SpeakToText after a previous install of the trial version, or if you are reinstalling SpeakToText without having uninstalled it first, you may get an error message that says: “The file 'C:\Program Files\SpeakToText v2\UNWISE.EXE' could not be opened…” If this happens, exit the install, and start the install over. This second time you start the install, it should run through to completion. If not, then submit a technical support request in the support section of our website.
If you are using the SAPI 6.1 Speech Recognition Engine in Windows XP systems, background noise filtering can be sensitive on some systems. While the SAPI 6.1 Speech Recognition Engine will give you better performance in this configuration, enabling background noise filtering for dictation and/or commands in SpeakToText may result in the loss of dictation and command functionality if filtering is too strict. After you enable background noise filtering, if you lose speech command functionality or dictation appears in SpeakToText then disappears, use your mouse to return to the Settings dialog and start moving the sliders under the two filtering options to the left until command and dictation functionality returns. This is a matter of trial and error to find what levels work best on your system.
When starting SpeakToText, if your speakers are turned up too loud when the greeting is spoken, or if there is a high level of background noise, a few stray words may appear in SpeakToText while the speech recognition engine is initializing. If this happens, you can simply clear the unwanted text with the “clear text” “scratch all” speech commands, or by clicking on the “Clear SpeakToText” button. You can also turn down your speakers or eliminate/reduce the background noise to prevent this.
If you want your speech recognition profile to learn from corrections you make to your dictation, your corrections must be done within SpeakToText, and must be done by selecting alternate words or series of words from the right click menu. Corrections typed into SpeakToText, or made in a target application while in Advanced Mode, will not provide training to your speech recognition profile. To make corrections from the right click menu, right click on a word, or highlight a short series of words and right click to display alternates for that word or series of words. Selecting one of the alternates (if there is one) will replace the word or words in SpeakToText, and will have the effect of training your speech recognition profile. Note that not all words have alternates. Alternates are displayed only when the speech recognition engine detected more than one possible word or phrase with a high enough score to be probable. Also note that “Background Adaptation” must be enabled for your speech recognition profile to learn from corrections made in the right click menu. To enable Background Adaptation, go to Speech Properties, select your recognition profile, click the settings button and there is a check box at the bottom to control Background Adaptation.
The registration dialog has been modified so the entire registration key can be seen when it is entered.
Release 2.01a – April 12, 2005
This release fixes problems with registration keys that did not work with some combinations of First name, Last Name and Email Address.
This release incorporates text in the General Tab of settings for an as yet unreleased feature. The text and checkbox, “Use Custom Commands” is grayed out and has no effect. When finished, the Custom Commands feature will be included in an update, so please check our support pages periodically for announcements about this exciting new feature.
The functionality is unchanged from Release 2.01, and the same Manual and Quick Start Guide apply to release 2.01a. If you did not have any problems with your registration key, then you do not need to upgrade.
Release 2.01 – February 28, 2005
The SpeakToText Install Takes a Long Time
This is normal on many systems. First of all, the SAPI 5.1 speech engine is a large file that takes time to unpackage and setup. Second, if you are running anti-virus software, it may be scanning some of the files being installed, and this can slow down the process. Third, installs are particularly slow on older systems (with slower processors or less than 256 megs of memory). Combine these three factors together on one system, and the install can take a long time (over five minutes).
If the install is taking a long time, please be patient and wait for the install to complete. Chances are that nothing is wrong and the install will finish normally. If you stop and start over again, it will just end up taking longer, so do not cancel and restart the install unless you are certain the system has stopped responding.
Filtering Commands for Background Noise
There was an issue in Release 2.00 where sometimes background noise was recognized as a command. For example, when listening was off and SpeakToText was not being used, on some systems “What Can I Say” would open or listening would become enabled when the command was not spoken, leading to other commands being recognized and processed when nothing was spoken. This happened because the SAPI speech engine first tries to interpret unidentifiable background noise as commands. Turning off the microphone when not using SpeakToText solved this issue, but we decided to also add filtering of commands for background noise.
Most users will not need to enable this feature, but if you are having a problem with background noise being recognized as commands, you should enable this setting. In settings under the formatting tab, a slider bar has been added to filter commands for background noise. The default setting is “off.” To enable the feature, check the box. You will need to determine the optimal level of filtering by trial and error, as the range of scores assigned to commands varies widely from system to system. Too much filtering will result in spoken commands being rejected. Too little will mean background noise continues to be recognized as commands, which are then processed. More detail is available on this feature in the “Background Noise Filtering” section of the manual, and we recommend reading that section if background noise is a problem for you.
Issue with Outlook 2003 Resolved
There was a issue in Release 2.00 with Outlook 2003, where if you closed an email compose window, SpeakToText did not release Outlook as the target, and when you went back to Outlook to create another message, text dictated after your last message was copied to the new message. This issue is resolved in release 2.01.
Listening Information Dialog Box Issue Resolved
In Release 2.00, the Listening Information Dialog Box that explains the “Listening” feature at startup was sometimes getting lost in the background if the user was working with multiple programs when they launched SpeakToText™ 2.0. This gave the appearance that SpeakToText had not started, even though that dialog was in the background waiting for the user to click on it. The Listening Information Dialog Box displayed upon startup now times out, enabling SpeakToText to start even if this dialog gets lost in the background.
Copy To Word Issues Resolved
Issues in Release 2.0 that prevented copying to Word 2000 on some systems has been fixed.
Click Focus Speech Command Added
A “Click Focus” command has been added. If SpeakToText has been minimized or moved to the background after copying text or using another application, then provided the microphone is on, saying “click focus” will return SpeakToText to view and the program will have the focus. This “click focus” command is available with listening in the off position, but like all other speech commands, it is not operational if the microphone is turned off.
Updates
The update now launches SpeakToText when finished.
Release 2.00 – December 8, 2004
None
Release 1.95 – November 30, 2004
None

SpeakToText™ 2.5 Speech Recognition Quick Reference Guide - Version 2.51
©Copyright 2002-2006 – CoolSoft, LLC – All rights reserved.
When you first start using SpeakToText, we recommend that you print a copy of the following pages and keep them available as a handy reference.
SpeakToText 2.5 - Interface in Basic Mode – Buttons and Speech Commands

SpeakToText 2.5 - Interface in Advanced Mode
SpeakToText 2.5 - Settings Dialog Tabs
![]()
Settings Button Speech Command: Click Settings
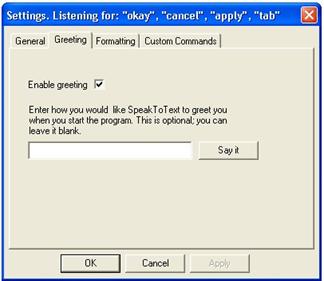
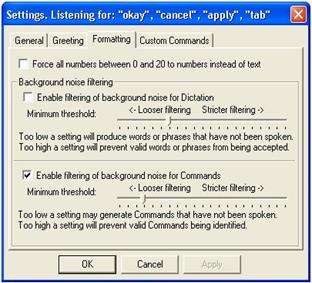
SpeakToText 2.5 - Dictation Speech Commands
Moving Within Dictated Text (not available in Advanced Mode)
Command – What To Say: RESULT:
Go to Bottom Moves the cursor to the end of your document.
Go to End Moves the cursor to the end of your document.
Go to Top Moves the cursor to the beginning of your
document.
Go to Beginning Moves the cursor to the beginning of your
document.
Formatting Text (not available in Advanced Mode)
Command – What To Say: RESULT:
New Paragraph Presses enter key twice.
New Line Presses enter key once.
Backspace Presses the backspace key once.
Space Bar Presses space bar once.
Cap Text Capitalizes the first letter of each word in the selected (highlighted) text.
Cap All Text Capitalizes all the letters of the selected (highlighted) text.
Caps Lock Toggles the “caps lock.” Say “caps lock” to engage caps lock, and say “caps lock” again to disengage.
Numbers and Fractions
Number: What To Say:
Three three (the speech engine default for single numerals between zero and twenty always typed as text by the Microsoft speech engine)
“3” “Force Num (pause) three” – will return the numeral 3.
“34” thirty four OR three four
“153” one fifty three, one five three, one hundred fifty three OR one hundred and fifty three
”6091” six eight nine one
6891 six thousand eight hundred ninety one OR six thousand eight hundred and ninety one (See Note below)
6,891.525 six thousand eight hundred ninety one point (decimal) five two five OR six thousand eight hundred and ninety one point (decimal) five two five
15,451 fifteen thousand four hundred fifty one OR fifteen thousand four hundred and fifty one
183,012 one hundred eighty three thousand twelve OR one hundred eighty three thousand and twelve
$75 dollar sign seventy five (saying dollar sign before the number returns the dollar amount without cents)
$75.00 seventy five dollars
$19.95 nineteen dollars and ninety five cents
½ one half
2 1/4 two and one quarter
5/8 five eights, five slash eight OR five over eight
150/85 one fifty over eighty five
Dates and Times
Result: What To Say:
November 3, 1981 November three comma nineteen eighty one
November 03, 1981 November three nineteen eighty one OR three November nineteen eighty one (omitting the comma returns a two digit date)
24 April, 1959 twenty four April comma nineteen fifty nine
04/24/59 zero four slash twenty four slash fifty nine
24/04/59 twenty four slash zero four slash fifty nine
4:16 PM ** four sixteen p m (See Note below)
5:00 five o’clock (works with whole hours only)
Phone Numbers and Email/URL Addresses
Result: What To Say:
(954)-555-7700 nine five four five five five seven seven zero zero
1-(800)-555-1212 one eight hundred five five five one two one two
.com dot com
.net dot net
.org dot org
Punctuation Marks
Result: What To Say:
. period/dot
. point (say when using numbers)
; semicolon
, comma
- hyphen
? question mark
-- double dash (note – saying “dash” also returns “- -“)
! exclamation point/exclamation mark
… ellipsis
: colon
’ apostrophe
/ slash
\ back slash
“ quote/open quote
” quote/end quote/close quote
‘ single quote/open single quote
’ single quote/end single quote/close single quote
( left paren/open paren
) right paren/close paren
[ left bracket/open bracket
] right bracket/close bracket
< left angle/open angle/less than
> right angle/close angle/greater than
{ open brace/left brace
} close brace/right brace
@ at sign
# pound sign
- hyphen (use for minus sign)
+ plus sign
$ dollar sign
= equal sign
% percent sign
^ caret (note if this returns the word “carrot” emphasize the “a” in your pronunciation(kAy-ret)
& ampersand
_ underscore
* asterisk
| vertical bar
SpeakToText 2.5 - Speech Commands – Basic Mode
(If you enable and create User Commands, these will also appear in the What Can I Say? dialog)
|
Advanced Mode |
Starts Advanced Mode |
|
Backspace |
Moves the Cursor Back One Space |
|
Cap All Text |
Capitalizes All Letters in Selected (Highlighted) Text |
|
Cap Text |
Capitalizes The First Letter of Each Word in Selected (Highlighted) Text |
|
Caps Lock |
Turns Caps Lock On/Off |
|
Clear Text |
Clears SpeakToText or Deletes Selected (Highlighted) Text |
|
Clear Word |
Deletes the Last Word Spoken |
|
Click About |
Opens the About Dialog |
|
Click Exit |
Closes SpeakToText |
|
Click Focus |
Brings SpeakToText to the Foreground |
|
Click Minimize |
Minimizes SpeakToText |
|
Click Save |
Saves the Contents of SpeakToText |
|
Click Settings |
Opens the Settings Dialog |
|
Close me |
Closes the What Can I Say? Dialog |
|
Configure Microphone |
Opens The Speech Properties Dialog |
|
Copy to Clipboard |
Copies the Contents of SpeakToText to the Clipboard |
|
Copy to Word |
Copies the Contents of SpeakToText to Microsoft Word |
|
Delete Selection |
Deletes the Selected (Highlighted) Text |
|
Force Num |
Forces the Next Number Between 1 and 20 to Numeric |
|
Go To Beginning |
Moves the Cursor to the Beginning of Text |
|
Go To Bottom |
Moves the Cursor to the End of Text |
|
Go To Sleep |
Stops Listening (Mutes SpeakToText) |
|
Go To Top |
Moves the Cursor to the Beginning of Text |
|
Go to End |
Moves the Cursor to the End of Text |
|
Microphone Off |
Turns the Microphone Off |
|
No no |
Deletes the Last String of Spoken Text |
|
Open Dictation Commands |
Displays a List of Dictation Commands in the Default Browser |
|
Open Manual |
Displays the Manual in the Default Browser |
|
Open Quick Start |
Displays the Quick Start Guide in the Default Browser |
|
Paste from Clipboard |
Pastes the Contents of the Clipboard into the Target Application |
|
Read Clipboard |
Reads the Contents of the Clipboard |
|
Read Right |
Reads the Text From the Right of the Cursor to the End |
|
Read Selection |
Reads the Selected (Highlighted) Text |
|
Read Text |
Reads All the Text in SpeakToText |
|
Scratch All |
Clears SpeakToText or Deletes Selected (Highlighted) Text |
|
Scratch Last |
Deletes the Last String of Spoken Text |
|
Scratch Paragraph |
Deletes the Last Paragraph |
|
Scratch Phrase |
Deletes the Last String of Spoken Text |
|
Scratch Sentence |
Deletes the Last Sentence |
|
Scratch Word |
Deletes the Last Word Spoken |
|
Scroll Down |
Scrolls up SpeakToText in Basic Mode, and What Can I Say? when open |
|
Scroll Up |
Scrolls down SpeakToText in Basic Mode, and What Can I Say? when open |
|
Select All |
Selects (Highlights) All Text in SpeakToText |
|
Select Last |
Selects (Highlights) the Last String of Spoken Text |
|
Select Paragraph |
Selects (Highlights) the Last Paragraph |
|
Select Phrase |
Selects (Highlights) the Last String of Spoken Text |
|
Select Sentence |
Selects (Highlights) the Last Sentence |
|
Select Word |
Selects (Highlights) the Last Word |
|
Space Bar |
Enters One Space |
|
Speech Properties |
Opens the Speech Properties Dialog |
|
Start CoolInfo |
If CoolInfo is installed, starts CoolInfo, or if running gives it focus |
|
Stop Listening |
Stops Listening (Mutes SpeakToText) |
|
Tab Key |
Inserts a "tab" character |
|
Train Speech Profile |
Opens the Speech Properties Dialog |
|
Train Word |
Opens the Train Word Dialog |
|
Undo Scratch |
Undoes the last scratch if no new text has been entered |
|
What Can I Say |
Opens the What Can I Say? Dialog |
SpeakToText 2.5 - Speech Commands – Advanced Mode
|
Caps Lock |
Turns Caps Lock On/Off |
|
Click About |
Opens the About Dialog |
|
Click Exit |
Closes SpeakToText |
|
Click Focus |
Brings SpeakToText to the Foreground |
|
Click Minimize |
Minimizes SpeakToText |
|
Click Settings |
Opens the Settings Dialog |
|
Close me |
Closes the What Can I Say? Dialog |
|
Configure Microphone |
Opens The Speech Properties Dialog |
|
Copy Target |
Copies the Contents of the Target Application to the Clipboard |
|
End Advanced |
Returns SpeakToText to Basic Mode |
|
Force Num |
Forces the Next Number Between 1 and 20 to Numeric |
|
Go To Sleep |
Stops Listening (Mutes SpeakToText) |
|
Microphone Off |
Turns the Microphone Off |
|
Open Dictation Commands |
Display a List of Dictation Commands in the Default Browser |
|
Open Manual |
Displays the Manual in the Default Browser |
|
Open Quick Start |
Displays the Quick Start Guide in the Default Browser |
|
Paste from Clipboard |
Pastes the Contents of the Clipboard into the Target Application |
|
Read Clipboard |
Reads the Contents of the Clipboard |
|
Read Target |
Reads the Contents of the Target Application |
|
Scroll Down |
Scrolls Down in the What Can I Say? dialog |
|
Scroll Up |
Scrolls Up in the What Can I Say? dialog |
|
Send Message |
Sends the Message in Supported Chat and Email Programs |
|
Speech Properties |
Opens the Speech Properties Dialog |
|
Start CoolInfo |
If CoolInfo is installed, starts CoolInfo, or if running gives it focus |
|
Stop Listening |
Stops Listening (Mutes SpeakToText) |
|
Tab Key |
Inserts a "tab" character |
|
Train Speech Profile |
Opens the Speech Properties Dialog |
|
Train Word |
Opens the Train Word Dialog |
|
What Can I Say |
Opens the What Can I Say Dialog |
SpeakToText 2.5 Commands – Microphone On and Listening Off
|
Click Focus |
Brings SpeakToText to the Foreground |
|
Close me |
Closes the What Can I Say? Dialog |
|
Start Listening |
Turns Listening On (Un-mutes SpeakToText) |
|
Wake Up |
Turns Listening On (Un-mutes SpeakToText) |
|
What Can I Say |
Opens the What Can I Say? Dialog |
What Can I Say?
What Can I Say? Button ![]() Close Me
Button
Close Me
Button ![]()
Speech Command: “What Can I Say”
Note: The commands shown above lists appear in the What Can I Say? dialog depending on the SpeakToText mode. If you enable and create User Commands, these will also appear in the What Can I Say? dialog in both Basic and Advanced modes. Move the cursor over a command in the What Can I Say? dialog to see a tool tip for that command.